CS-Cart Email Attachments

Email Attachments Addon for CS-Cart simplifies the process of attaching order documents, such as customer account registration, orders, invoices, shipments, and credit Memo details, in your emails. This feature streamlines communication between administrators and customers by automatically attaching relevant files to emails sent throughout the purchasing process.
Whether it's sending registration confirmations or order notifications, this extension ensures that both customers and administrators receive emails with necessary documents conveniently. With Email Attachments, managing and sharing crucial information becomes effortless, enhancing the efficiency and professionalism of your online store operations.
Features:
- Easy Document Attachments: Quickly attach important order documents like invoices and shipment details to emails.
- Customer Account Registration confirmations: Send confirmation emails with attached documents when customers register their accounts.
- Shipment Details: Keep customers updated on their shipment status by attaching relevant documents.
- Order Notifications: Ensure customers and administrators get notified about orders with necessary documents.
- Credit memo inclusion: Attach credit memo details to emails for efficient handling of canceled order status.
- Seamless communication: Simplify interactions between administrators and customers by automatically including relevant files in emails.
- Effortless management: Simplify the process of managing and sharing crucial information related to orders.
- Enhanced efficiency: Increase the efficiency of online store operations by automating document attachments in emails.
- Enhanced Customer Experience: Make interactions smoother and more informative
- Multi-vendor support: Well integrated with CS-Cart multi-vendor.
Installation
How To Install Add-on
https://store.ecarter.co/blogs/how-to-install-addon/
Configuration:
Let's Check How the Addon Settings works:
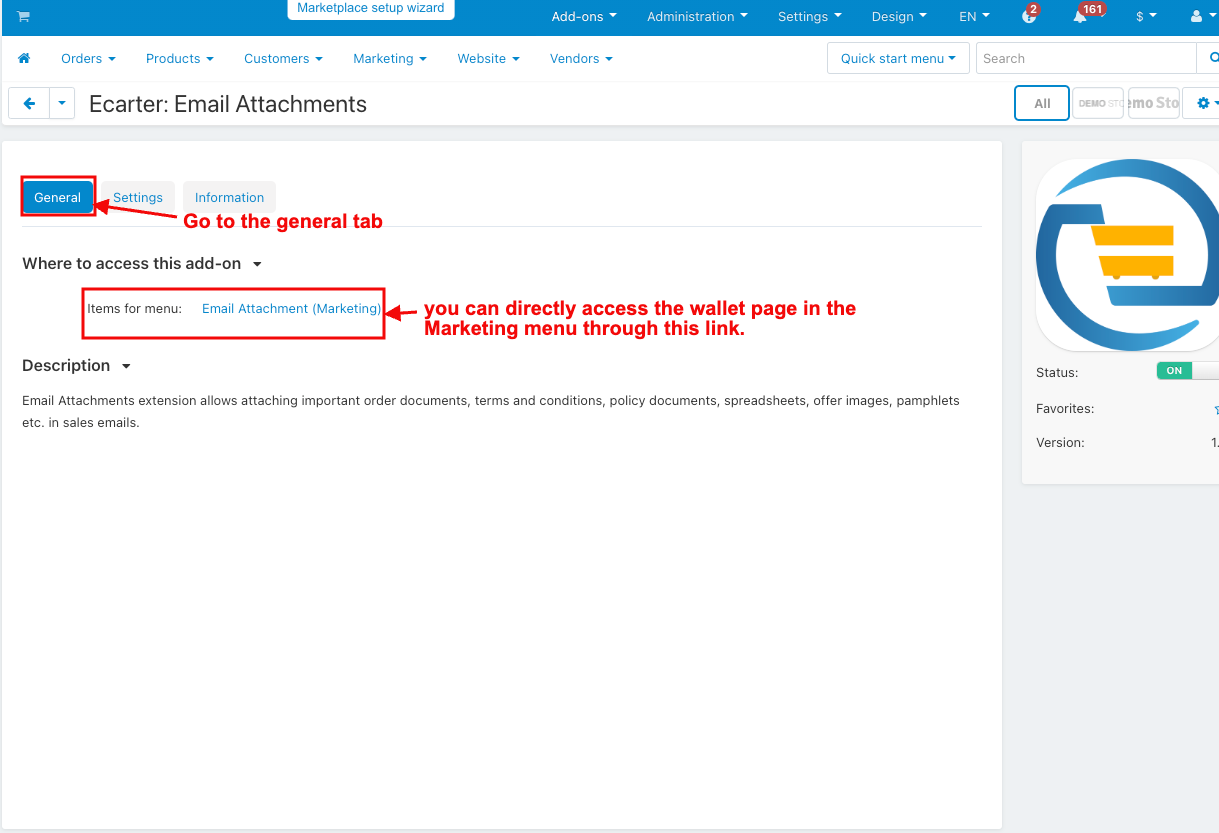
- In the general tab Items for menu: you can directly access the wallet page in the Marketing menu through this link.
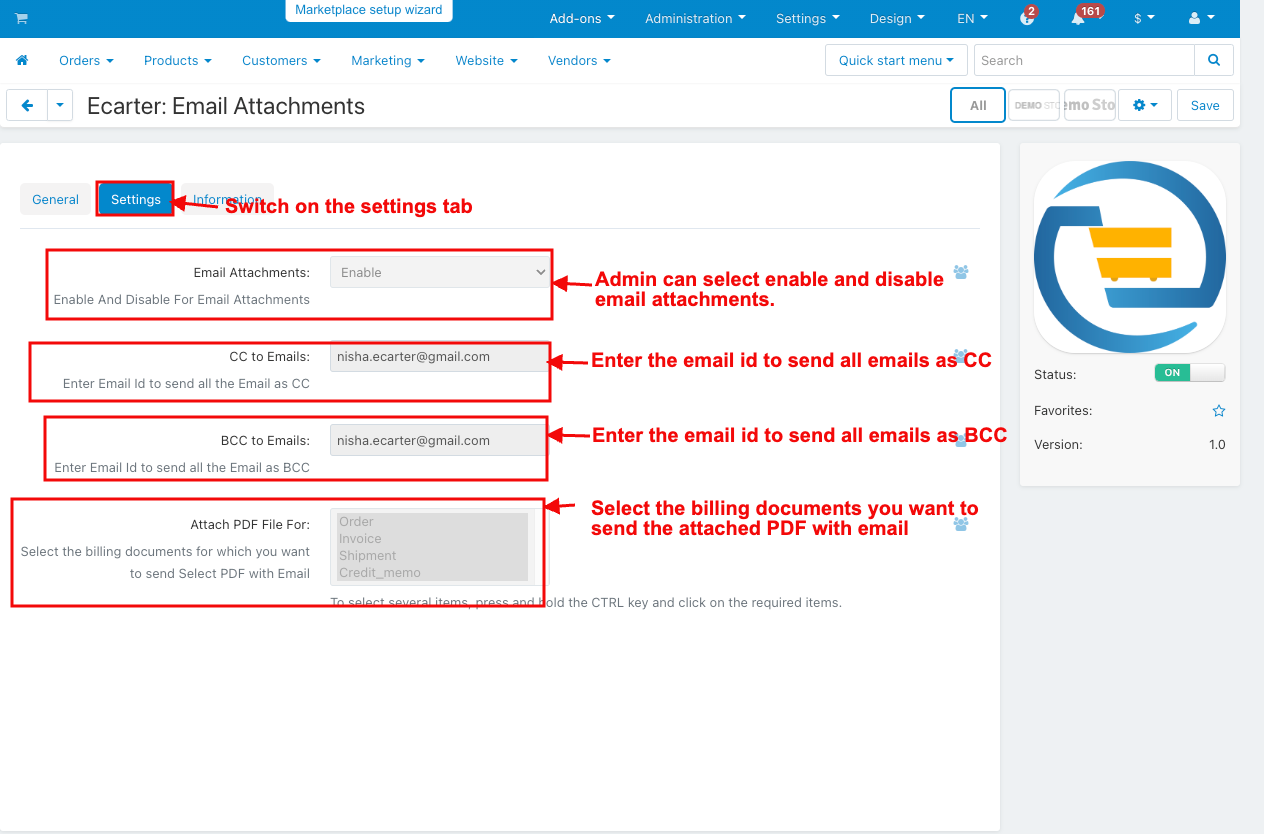
- Switch on the settings tab.
- Email Attachments: Admin can select enable and disable email attachments.
- CC to Emails: Enter the email ID to send all emails as CC.
- BCC to emails: Enter the email ID to send all emails as BCC.
- Attach PDF File for: Select the billing documents you want to send the attached PDF with email.
How the addon works
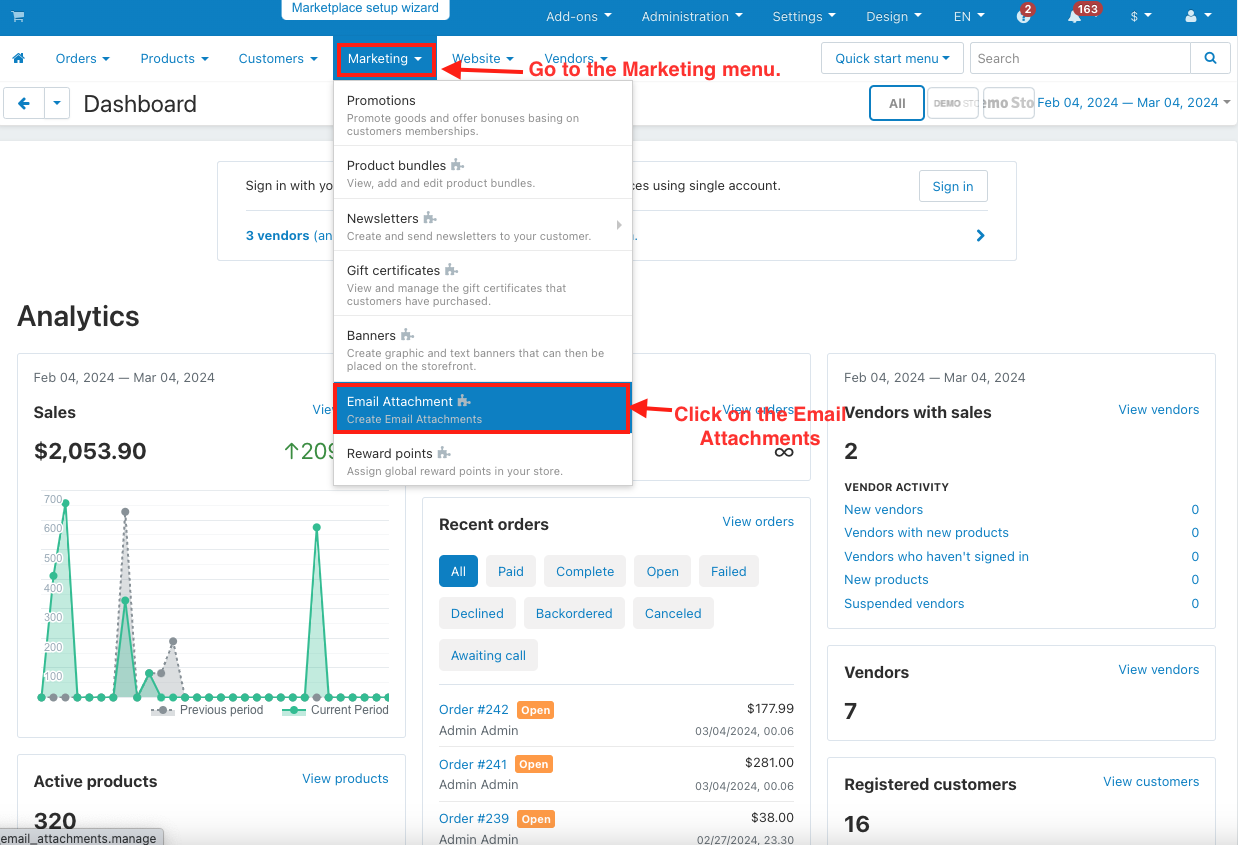
- Go to the Marketing menu.
- Click on the Email Attachments.
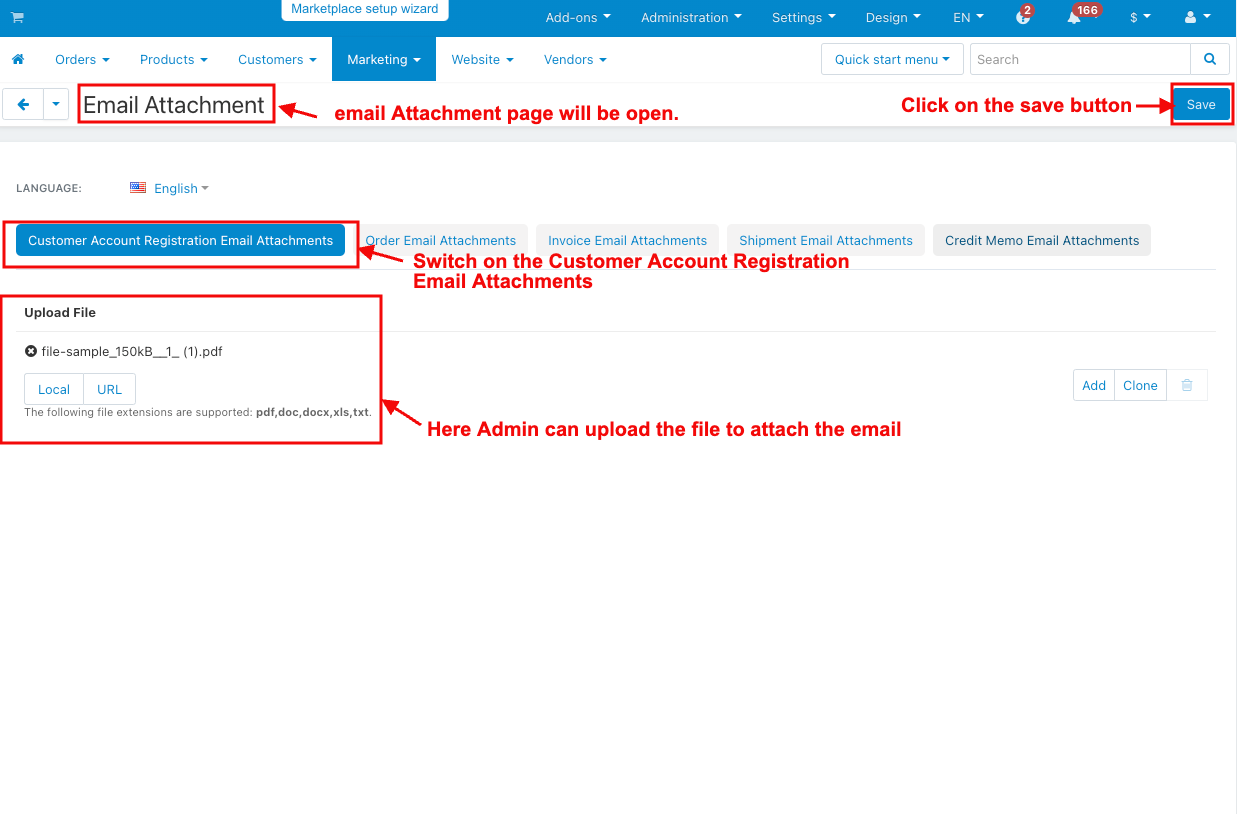
- The email Attachment page will be open.
- Switch on the Customer Account Registration Email Attachments.
- Here, the Admin can upload the file to attach the email.
- Click on the save button.
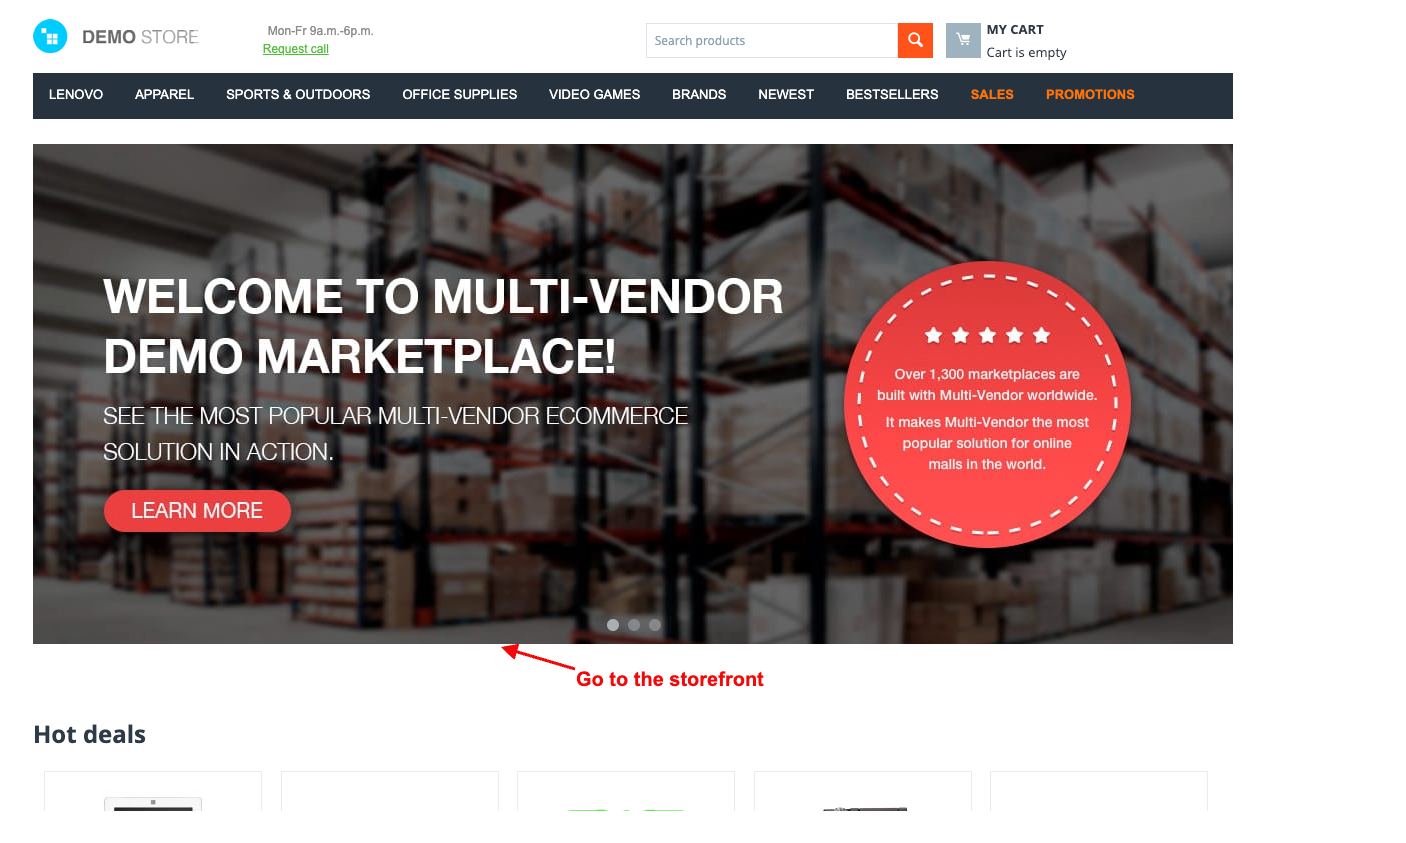
- Go to the storefront.
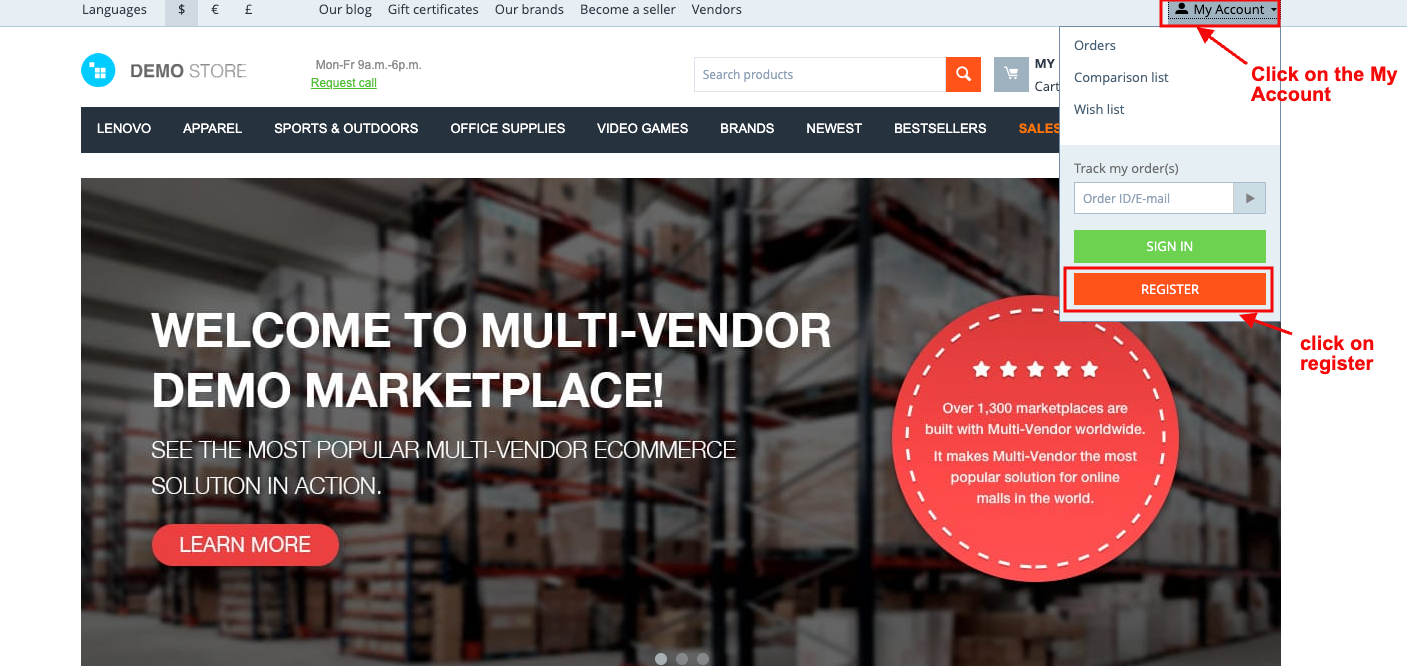
- Click on the My Account.
- And then click on register to create a new customer profile.
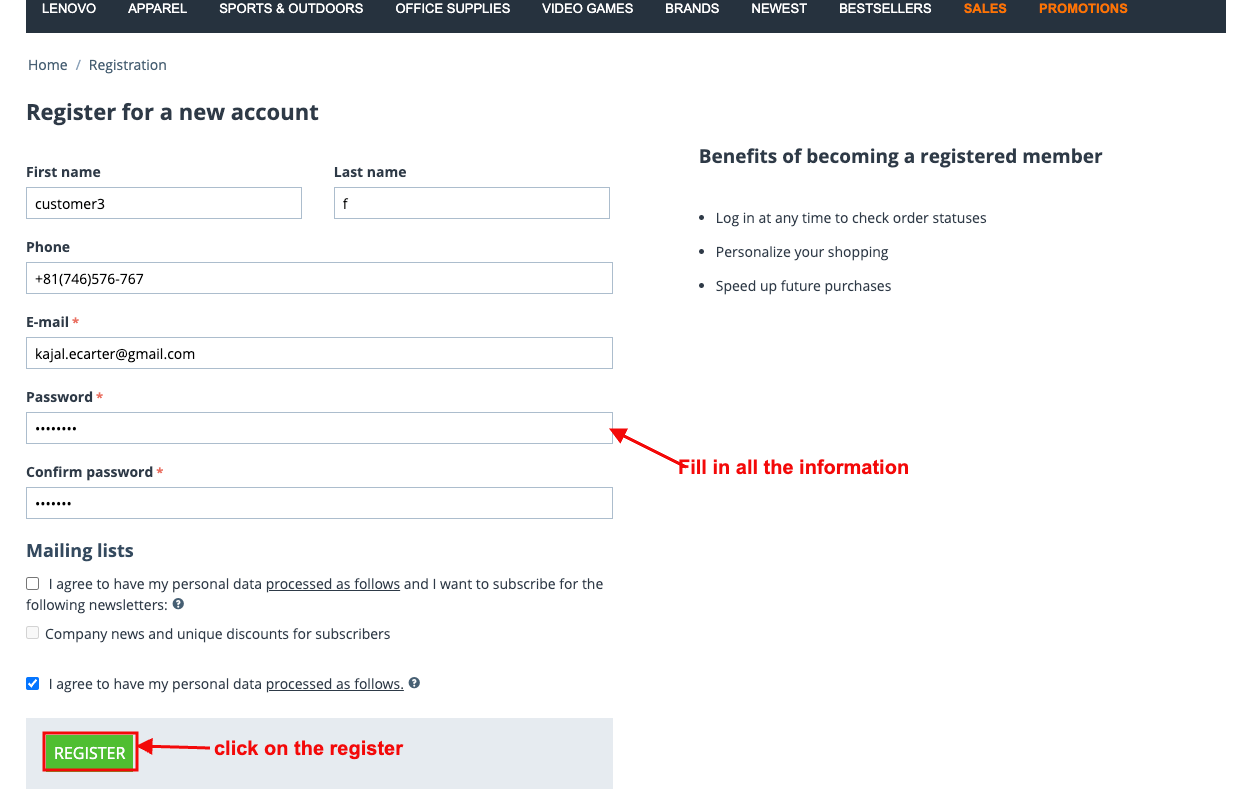
- Fill in all the information.
- And then click on the register.
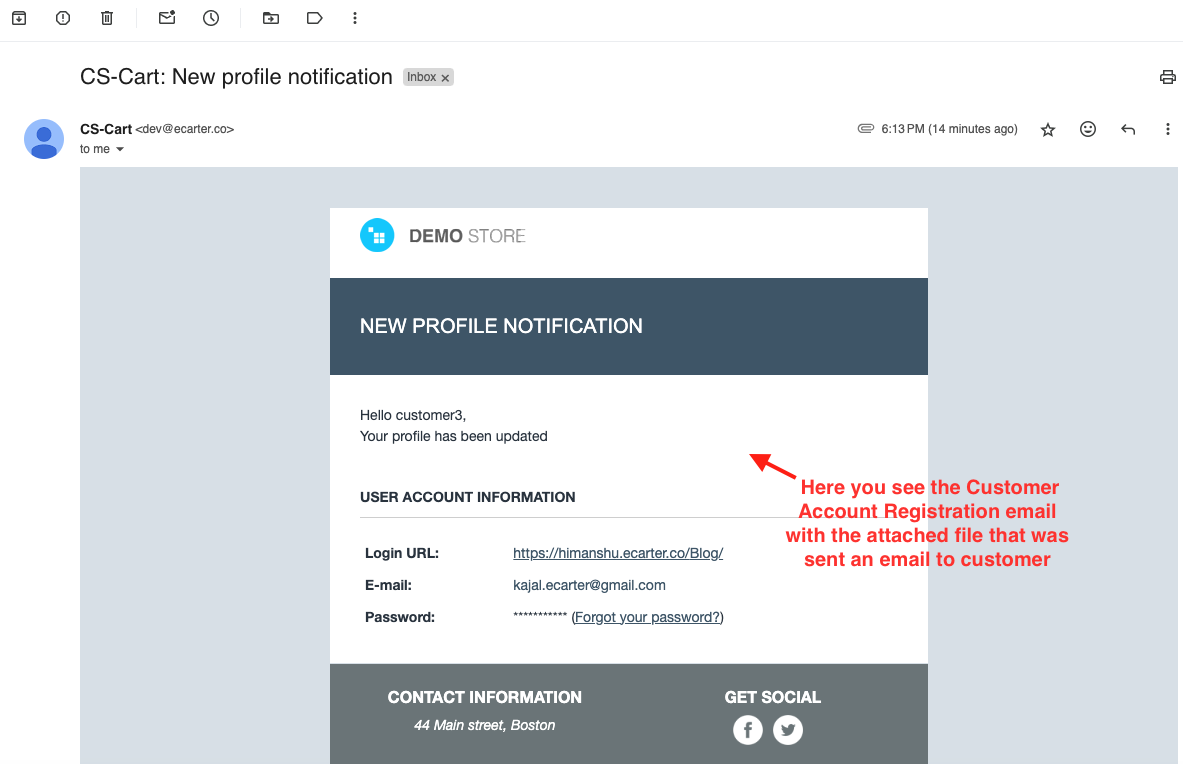
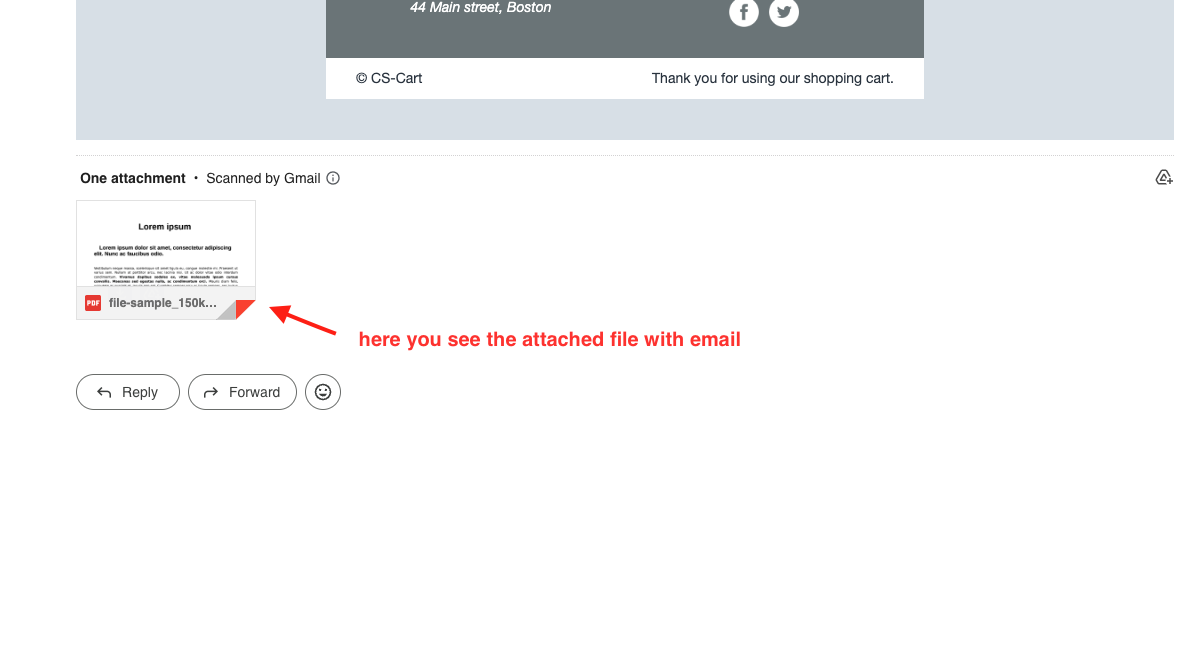
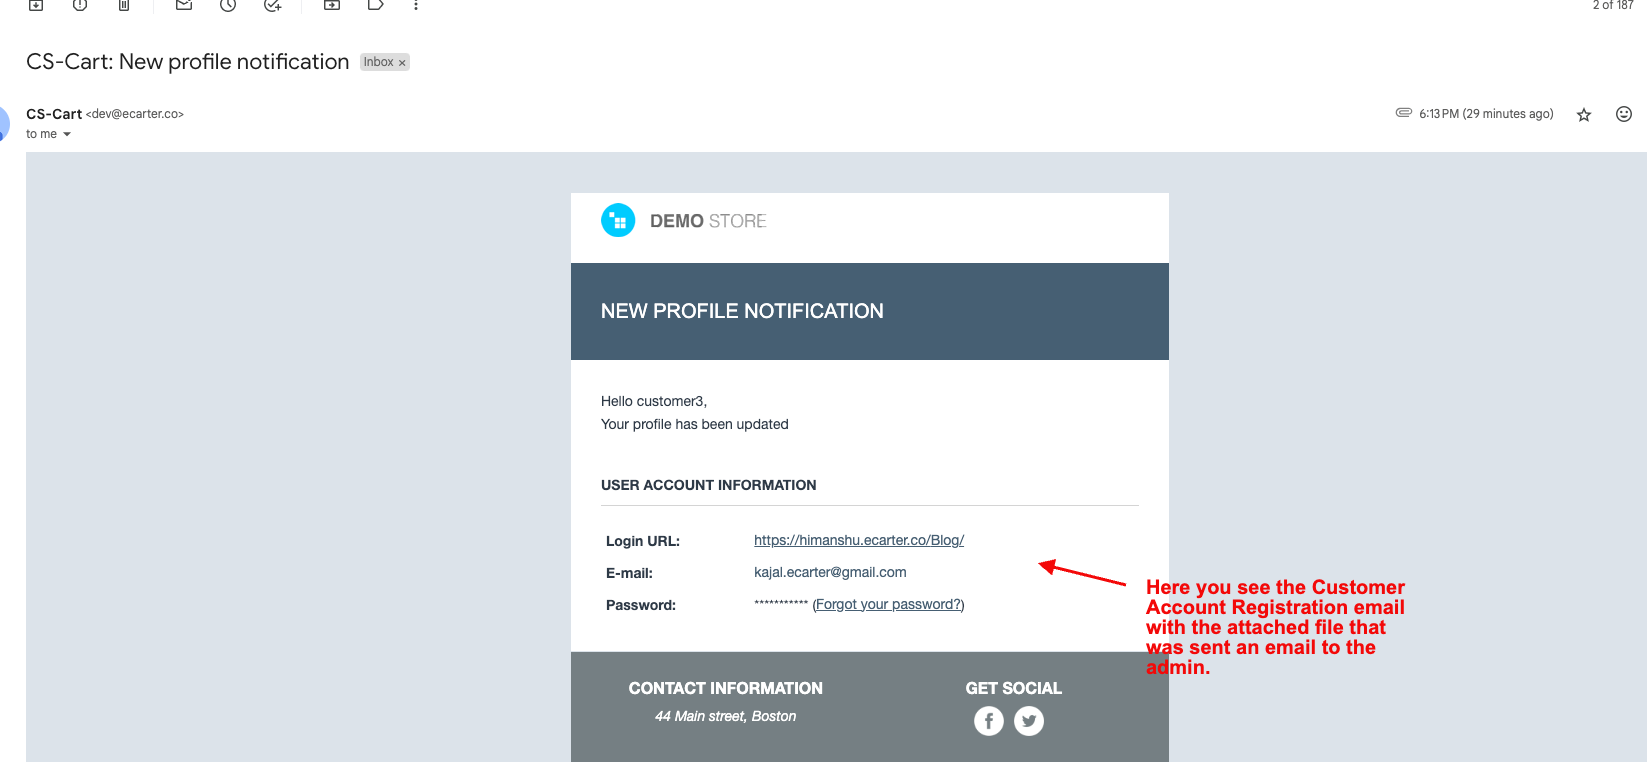
- Here you see the Customer Account Registration email with the attached file that was sent an email to both the customer and admin.
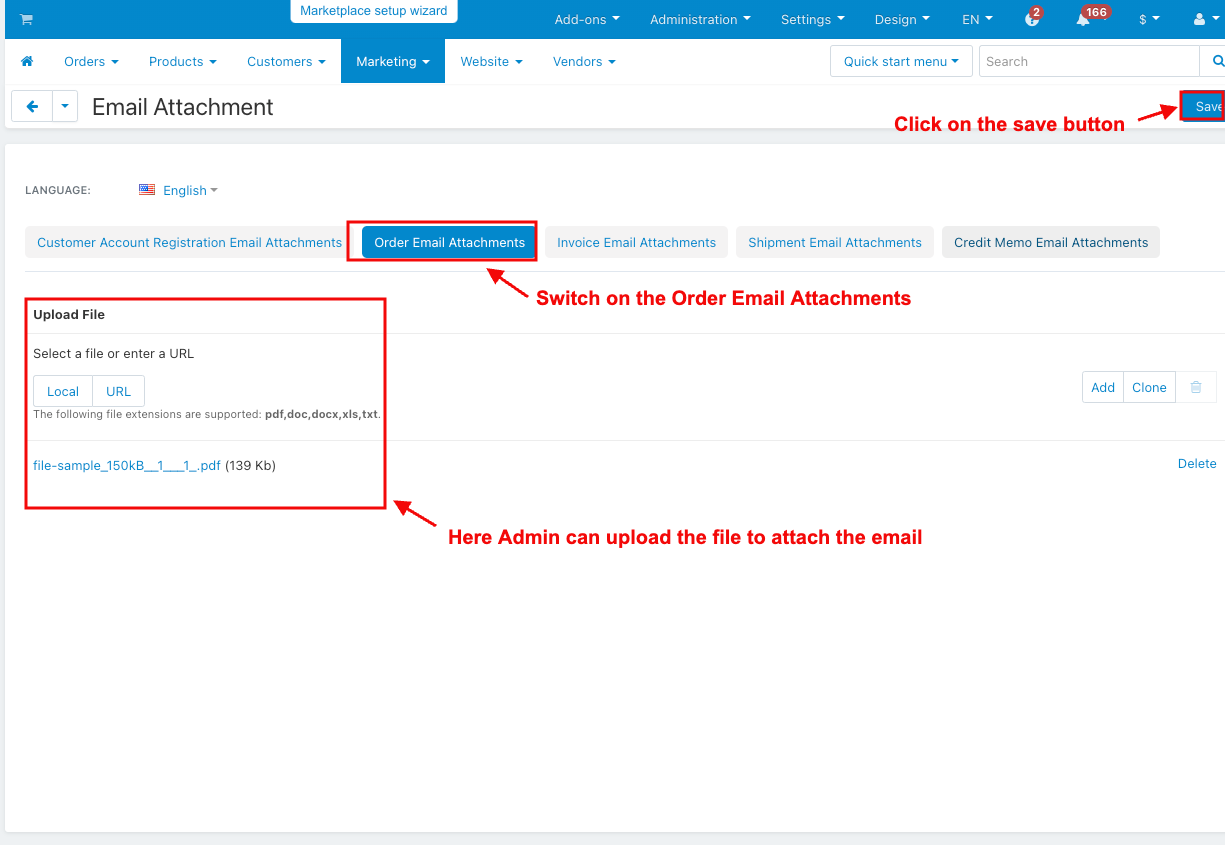
- Switch on the Order Email Attachments.
- Here, the Admin can upload the file to attach the email.
- Click on the save button.
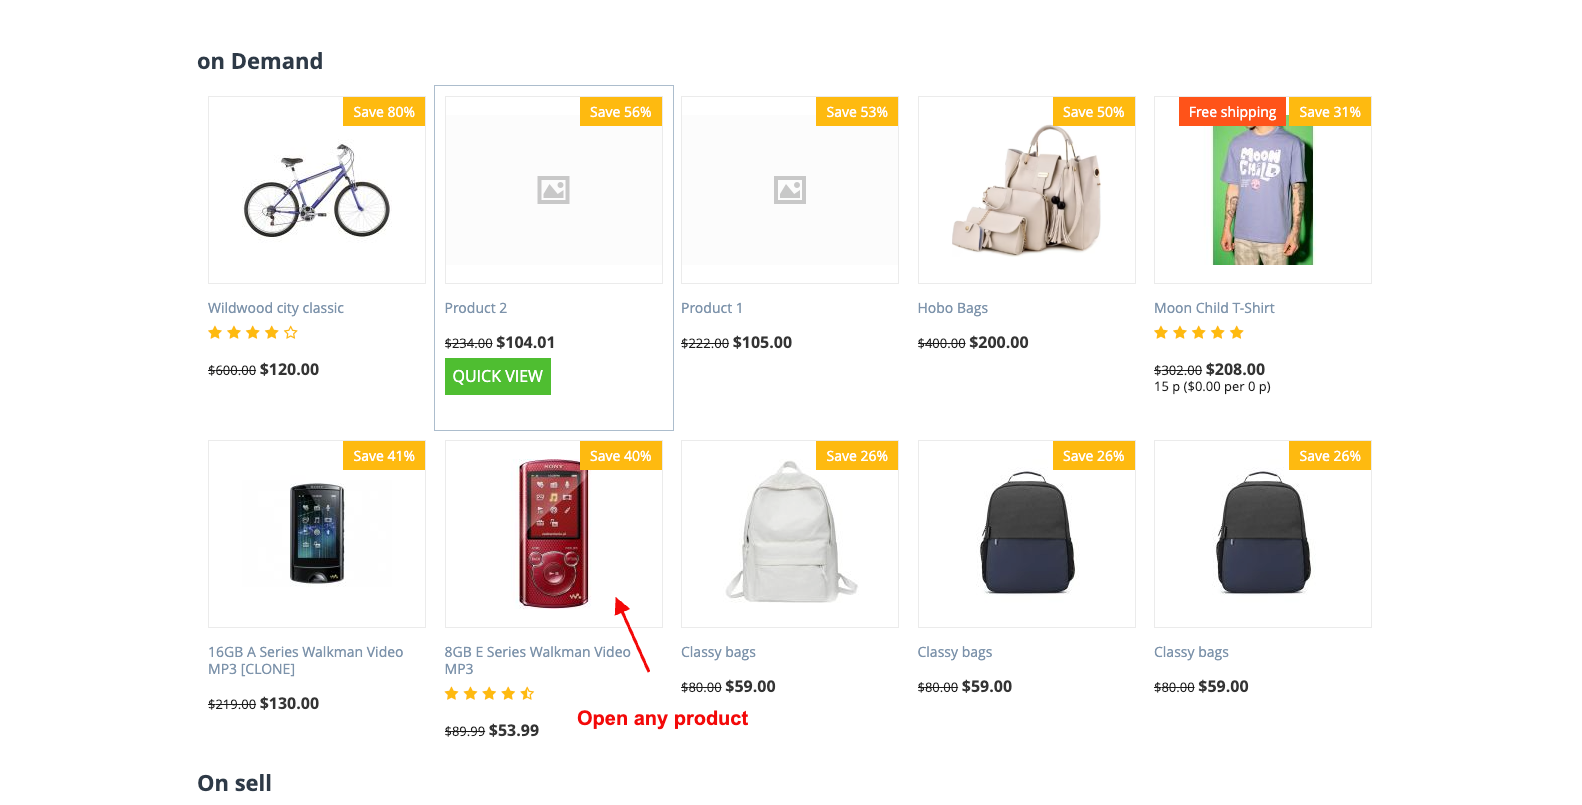
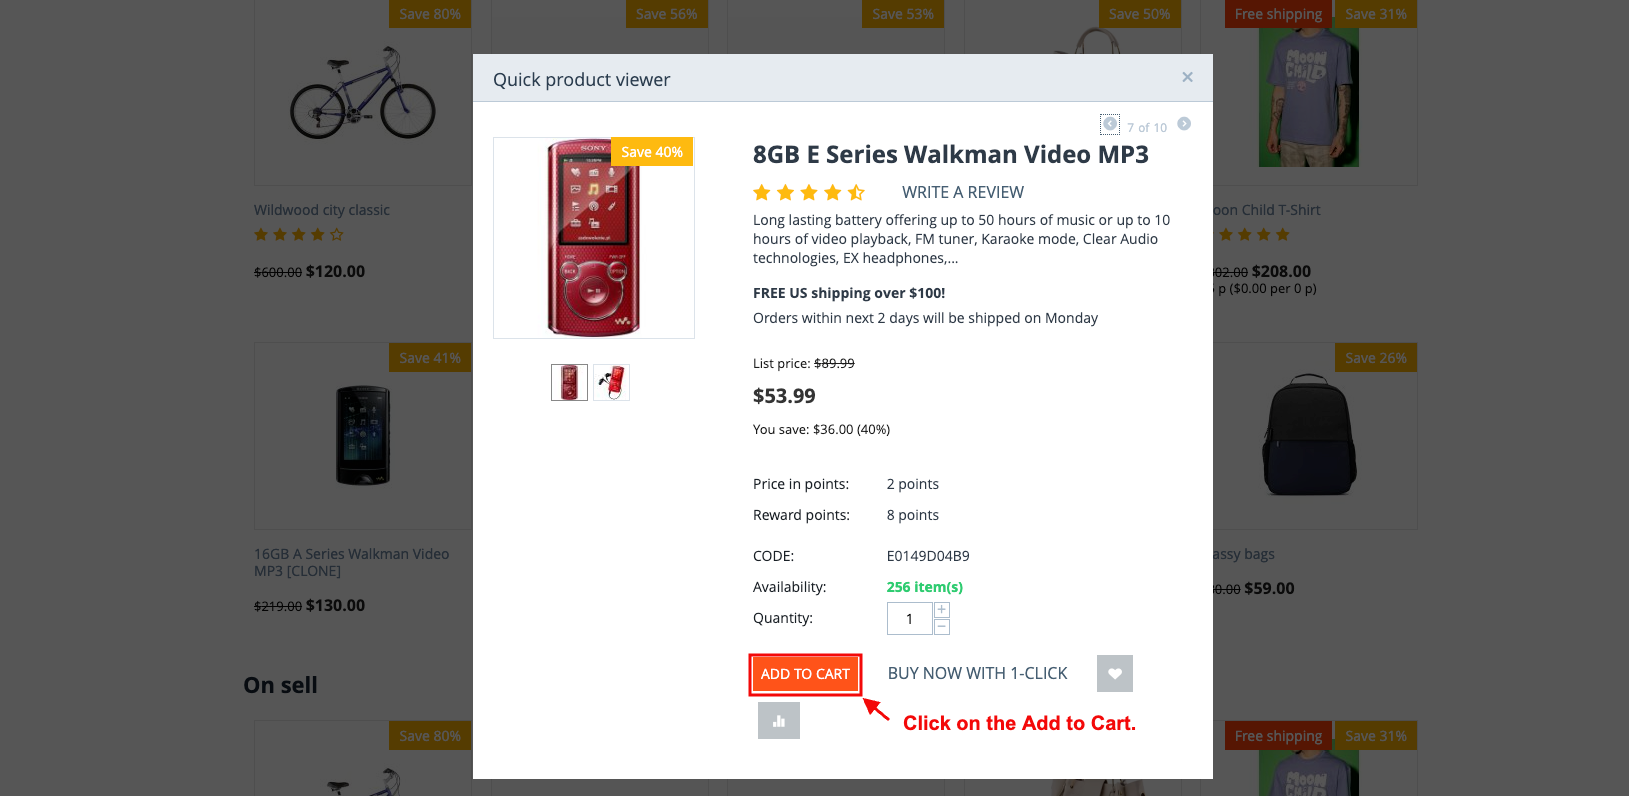
- Open any product.
- Click on the Add to Cart.
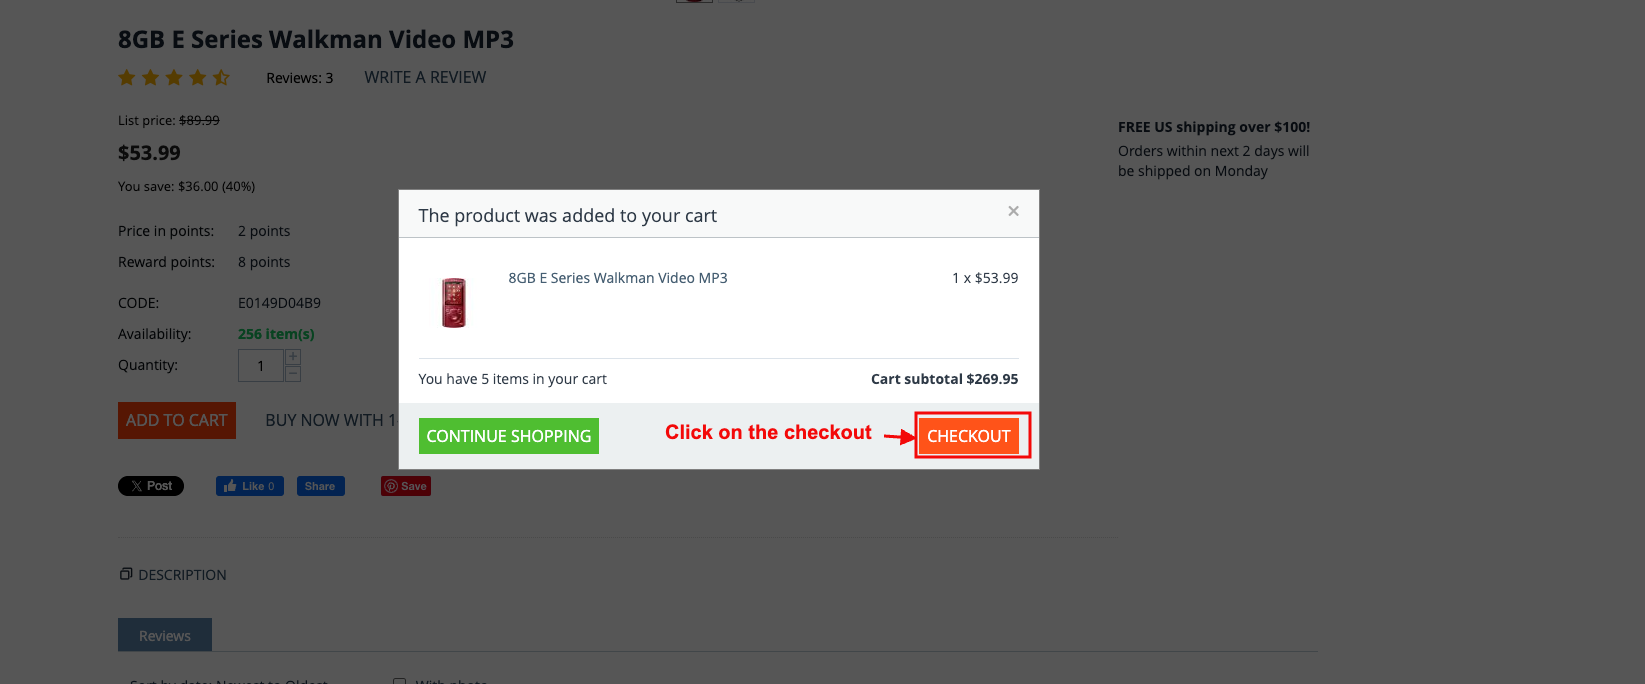
- And then click on the checkout.
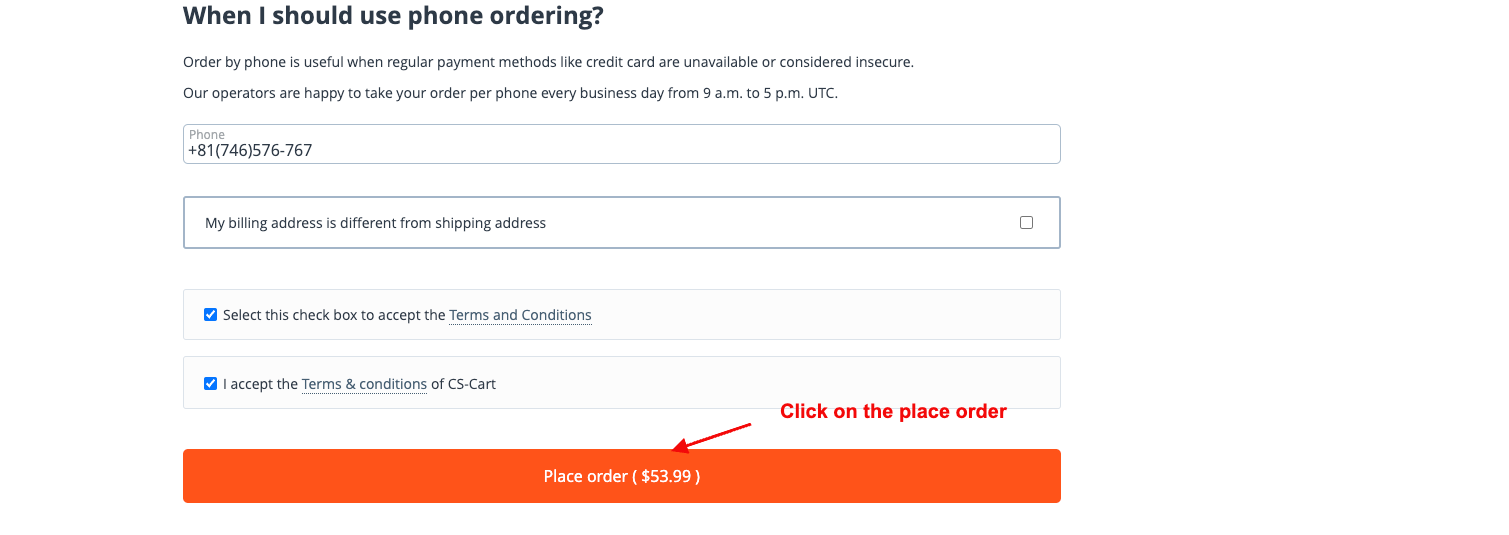
- And then click on the place order.
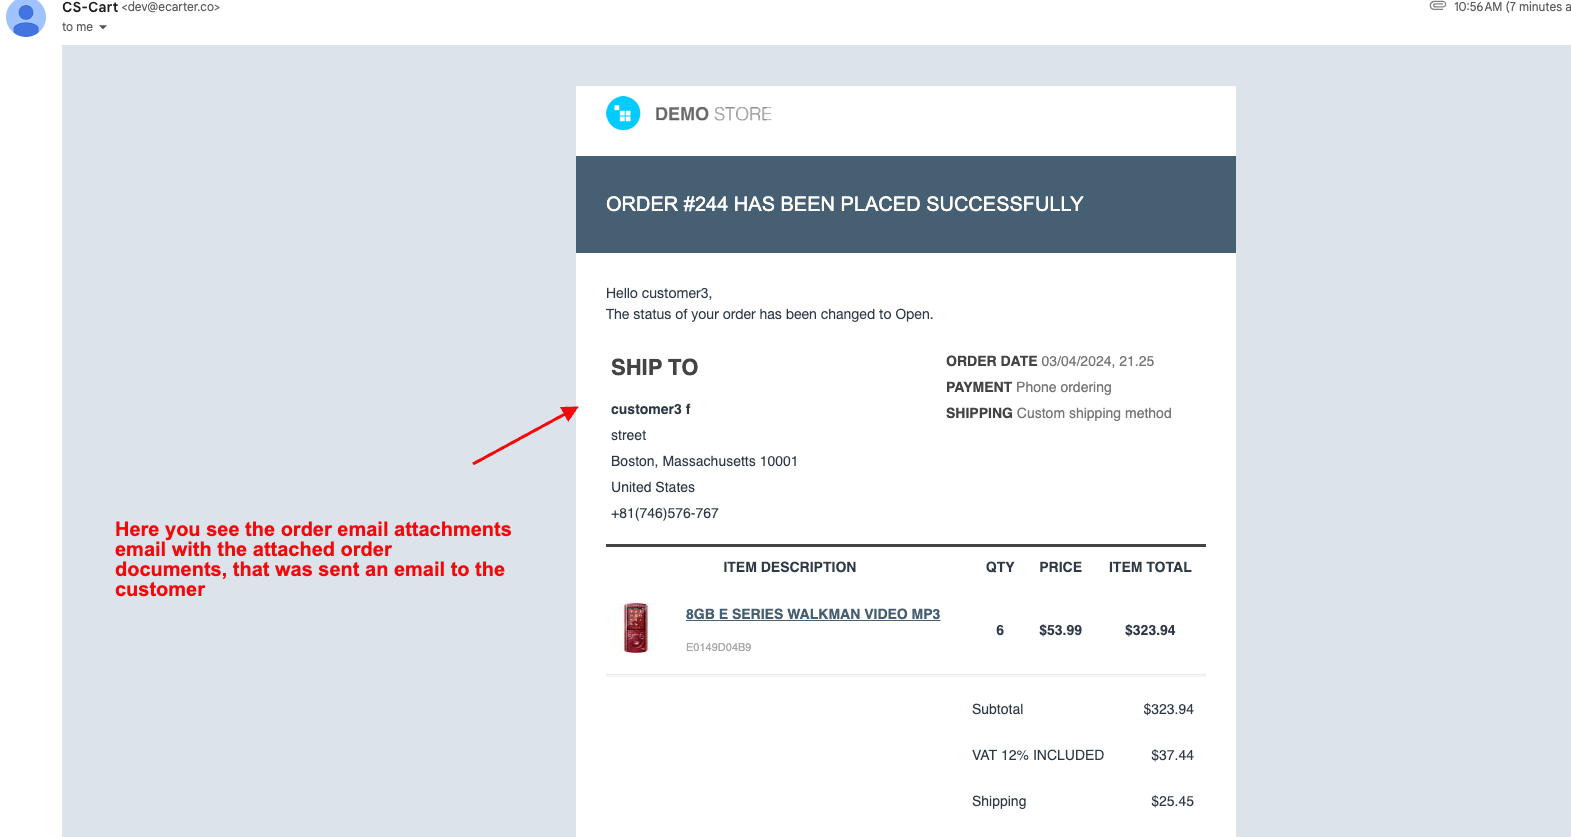
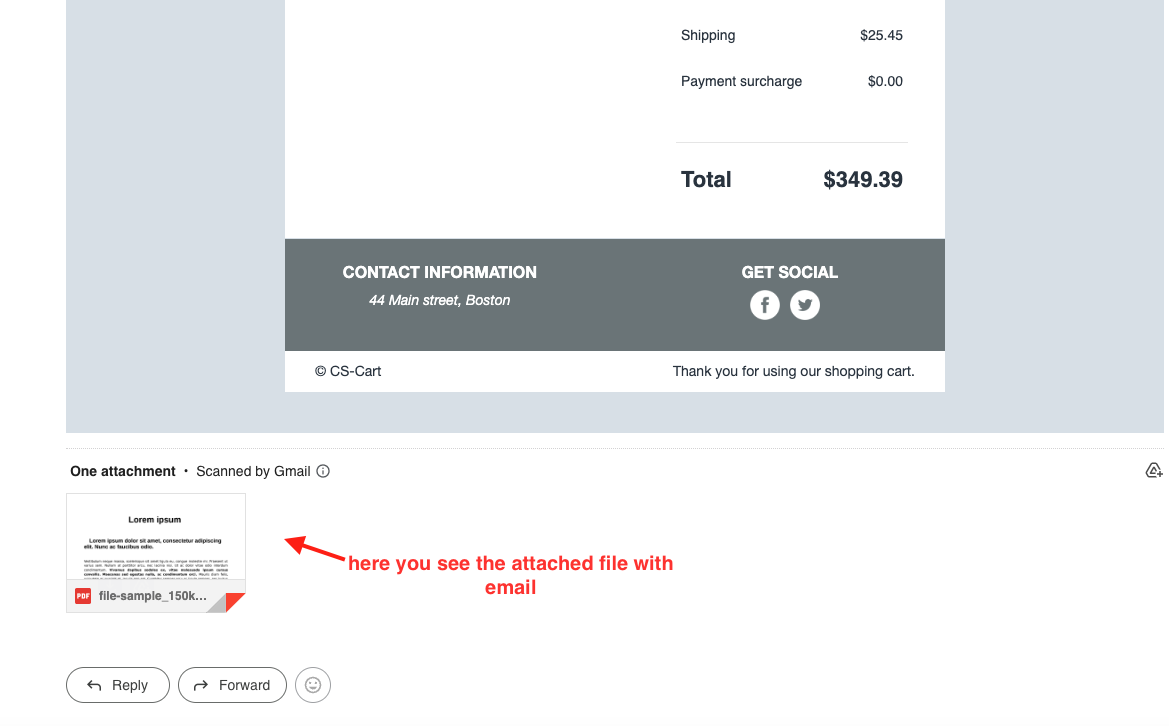
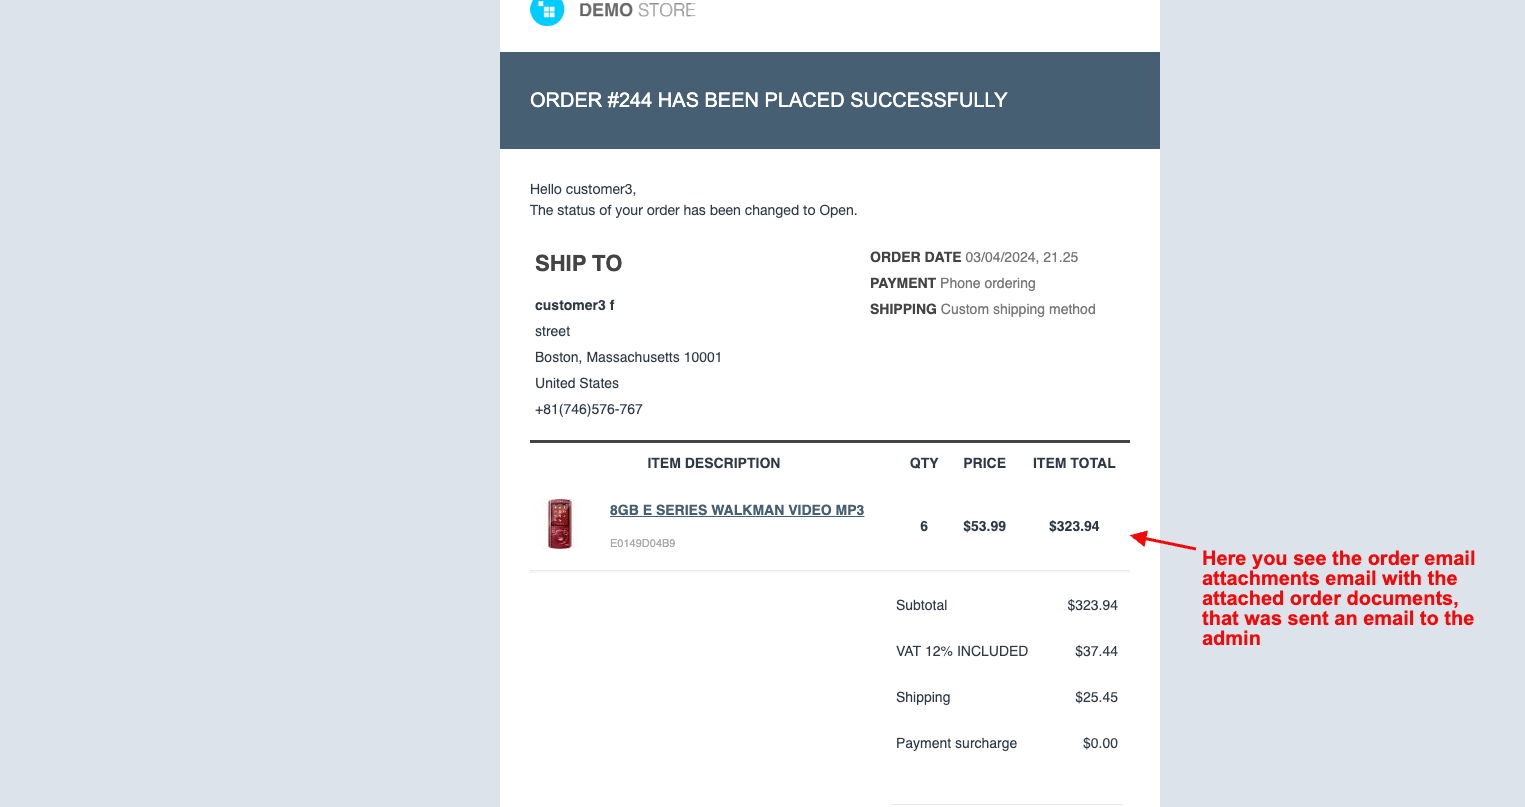
- Here you see the order email attachments email with the attached order documents, that was sent an email to both the customer and admin.
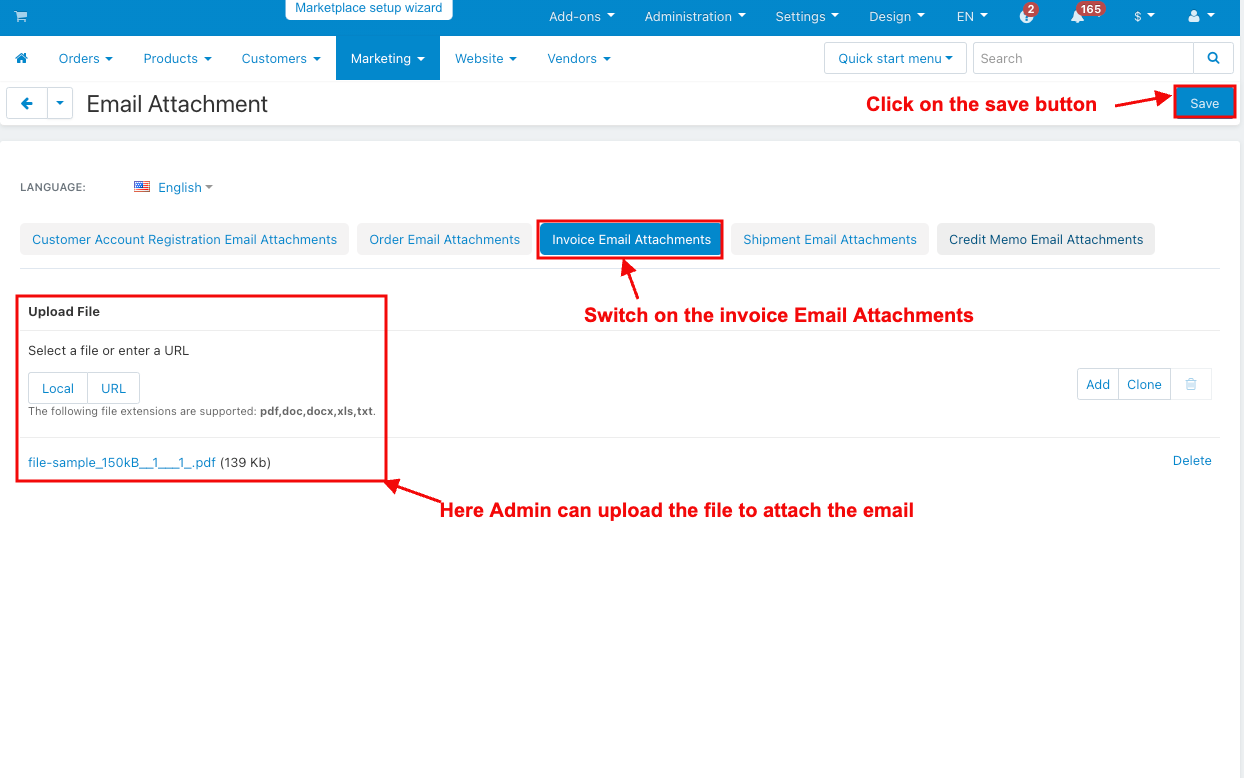
- Switch on the invoice Email Attachments.
- Here, the Admin can upload the file to attach the email.
- Click on the save button.
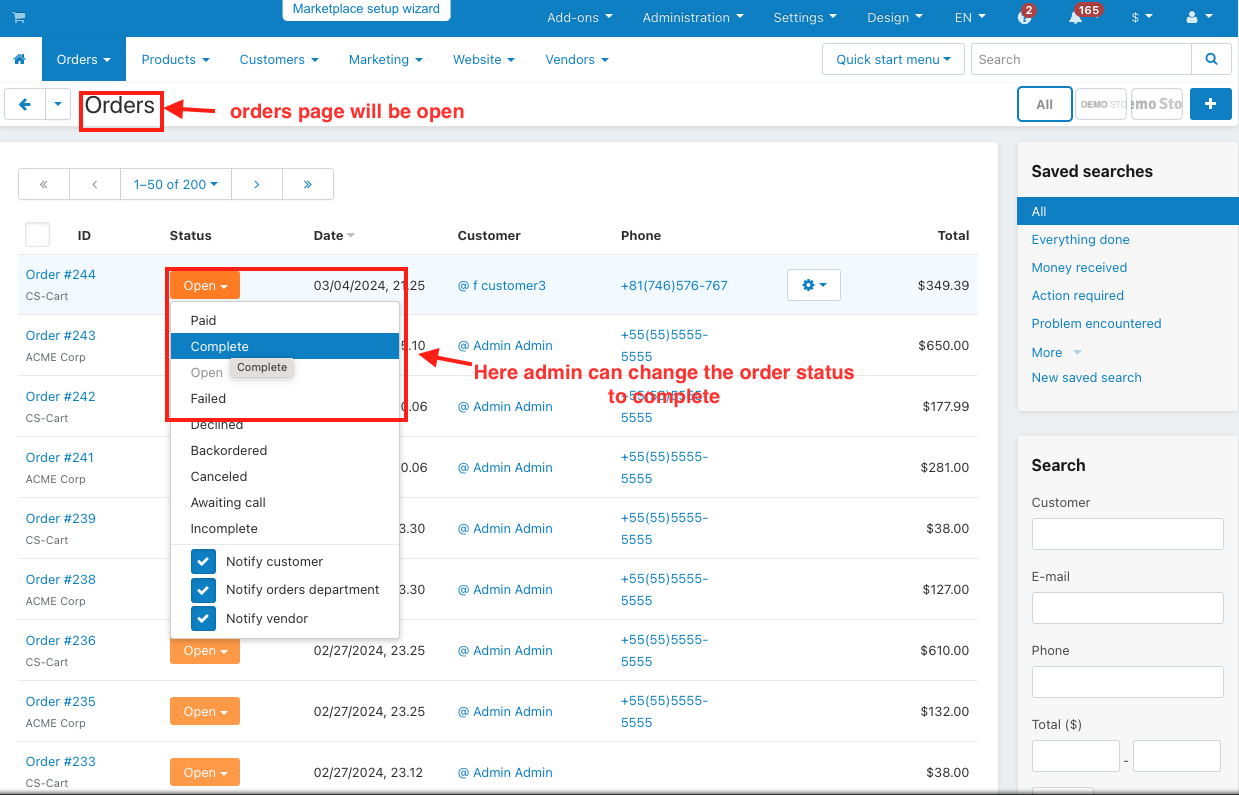
- Click on the view order under the orders menu.
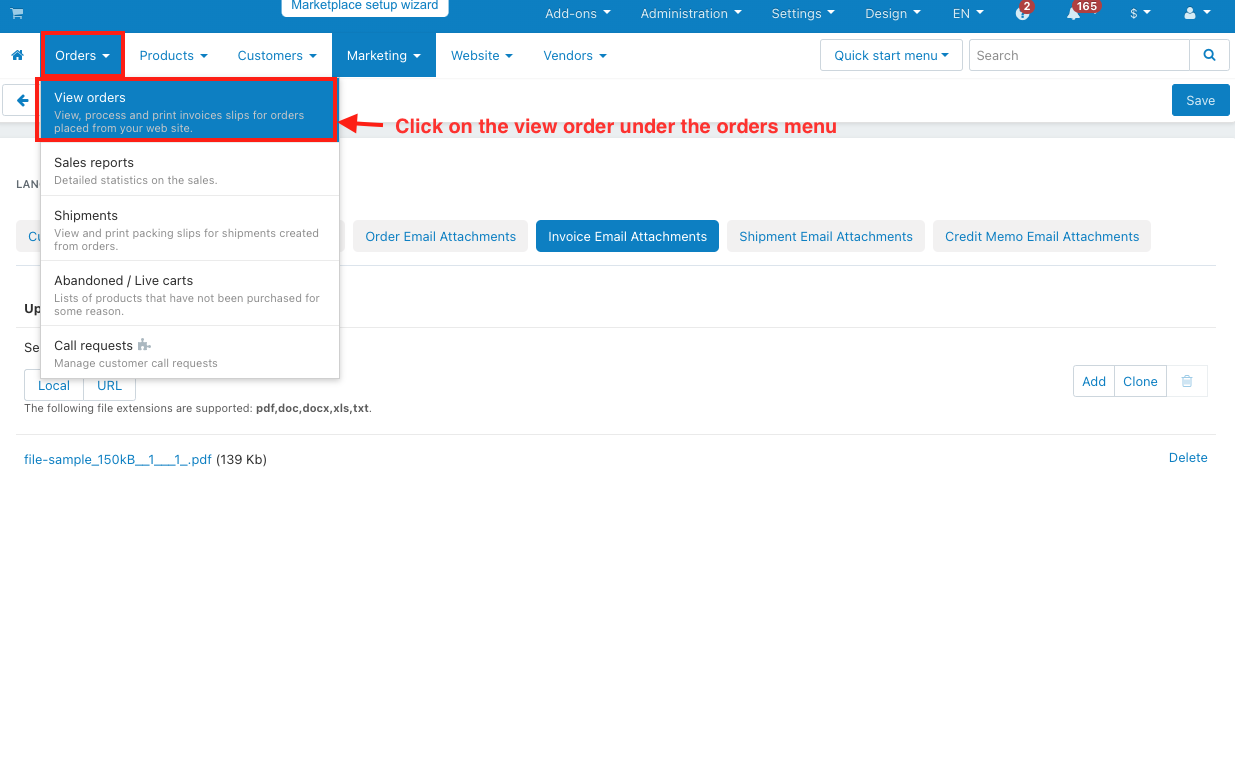
- The orders page will be open.
- Here admin can change the order status to complete.
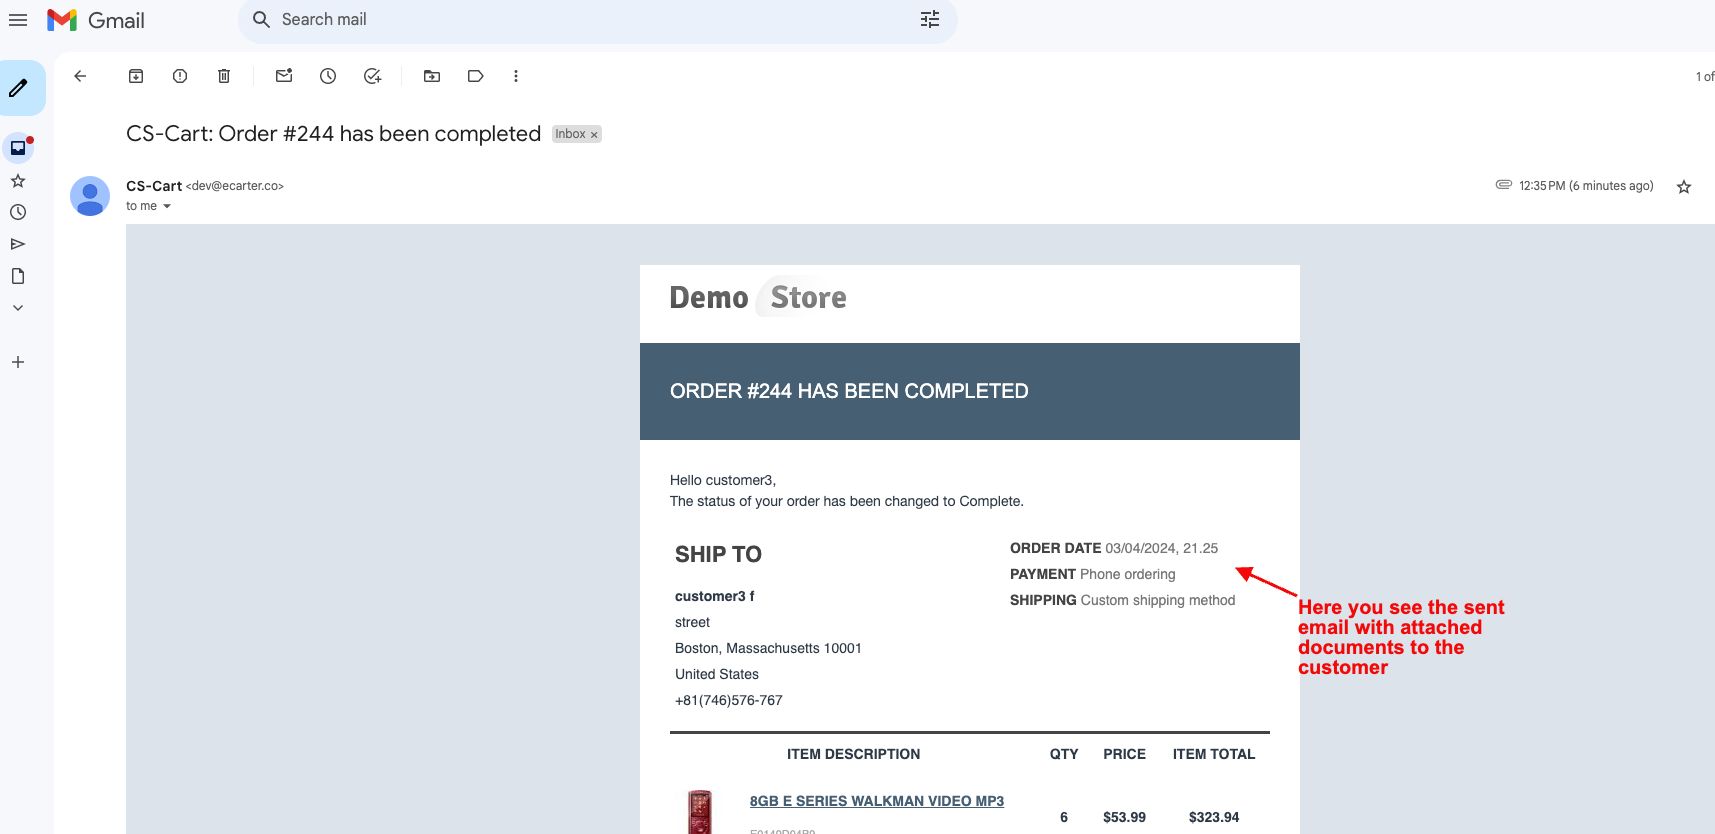
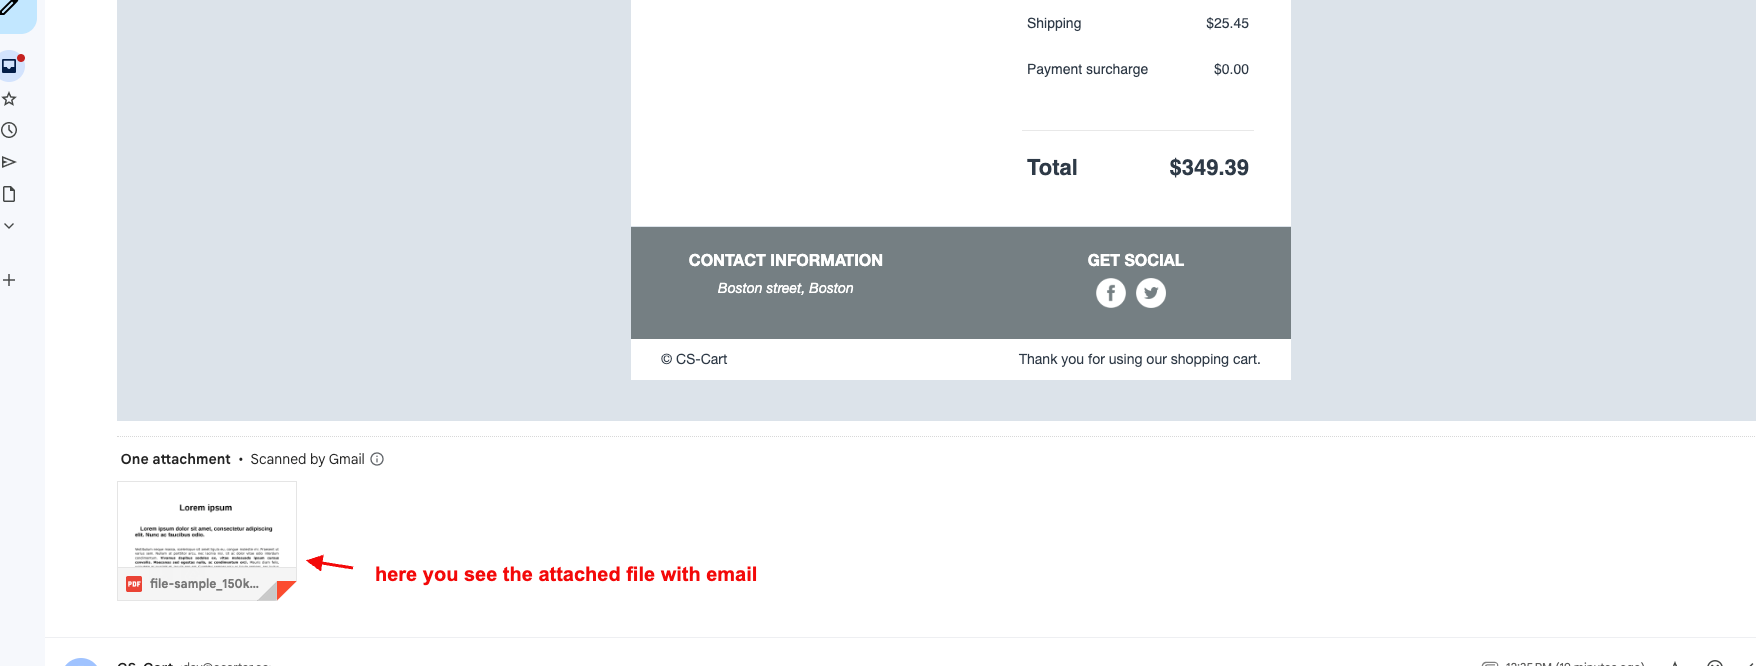
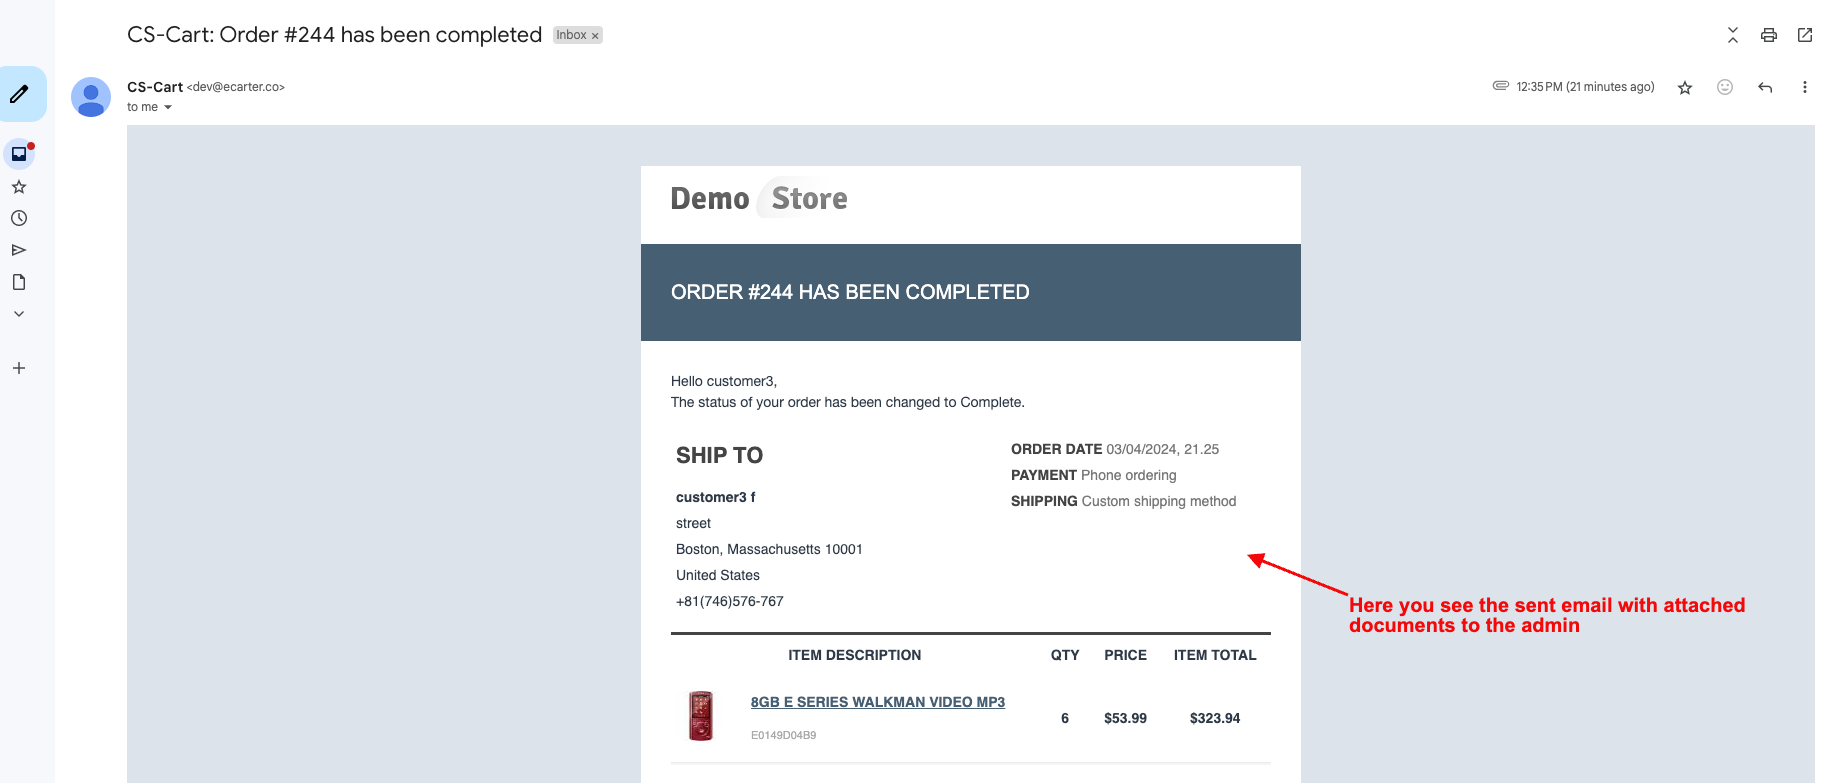
- Here you see the sent email with the attached documents to both the customer and admin.
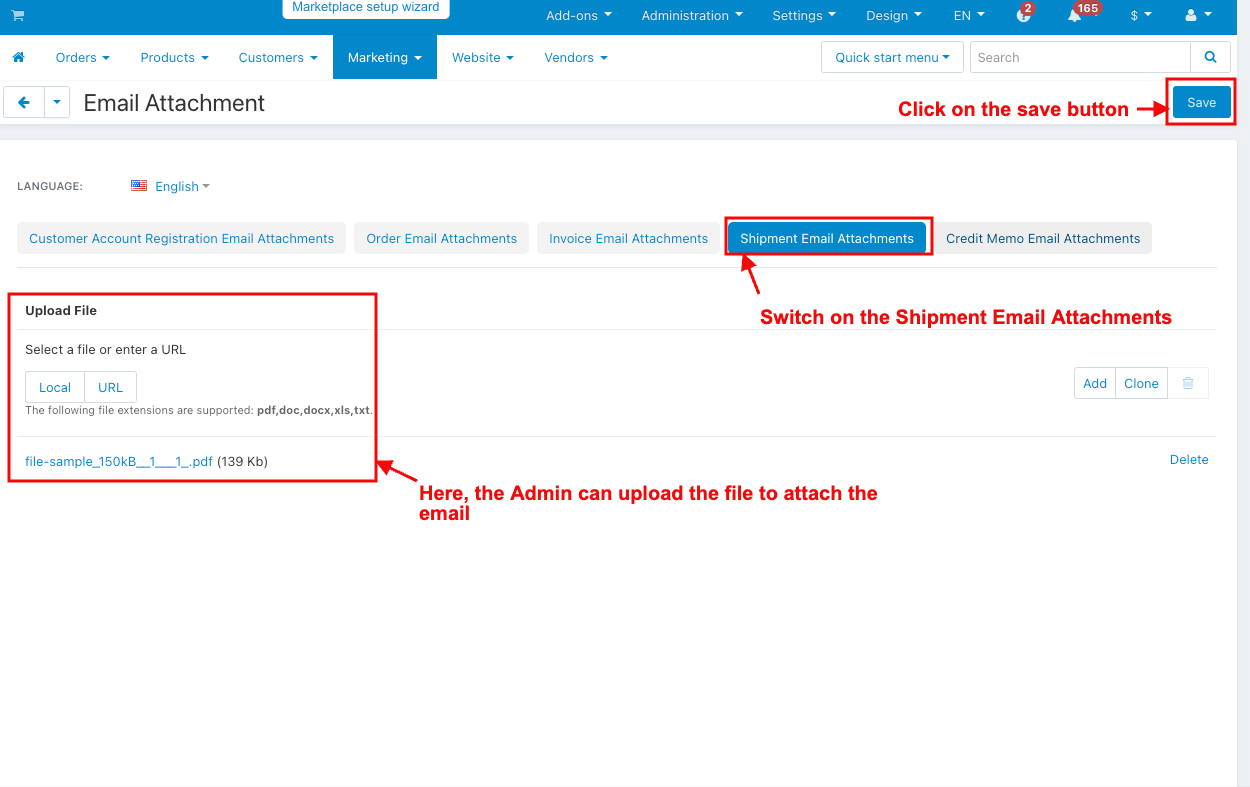
- Switch on the Shipment Email Attachments.
- Here, the Admin can upload the file to attach the email.
- Click on the save button.
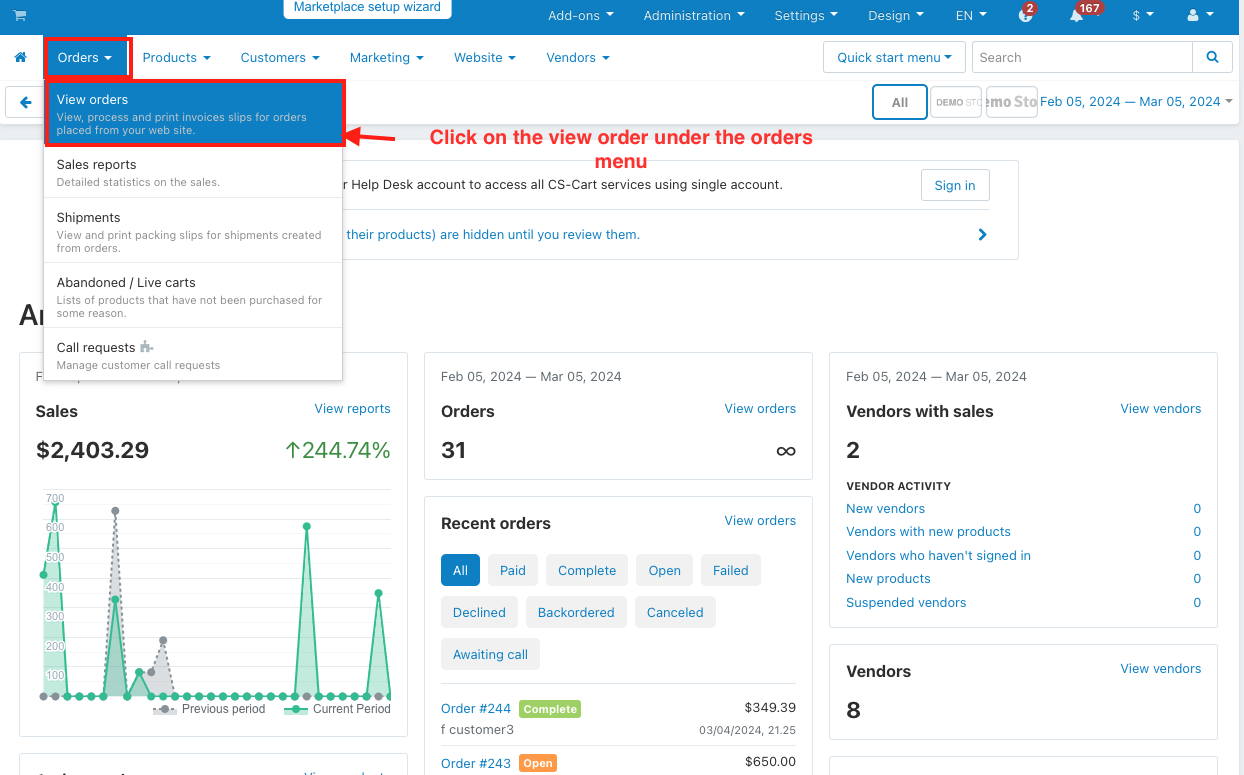
- Click on the view order under the orders menu.
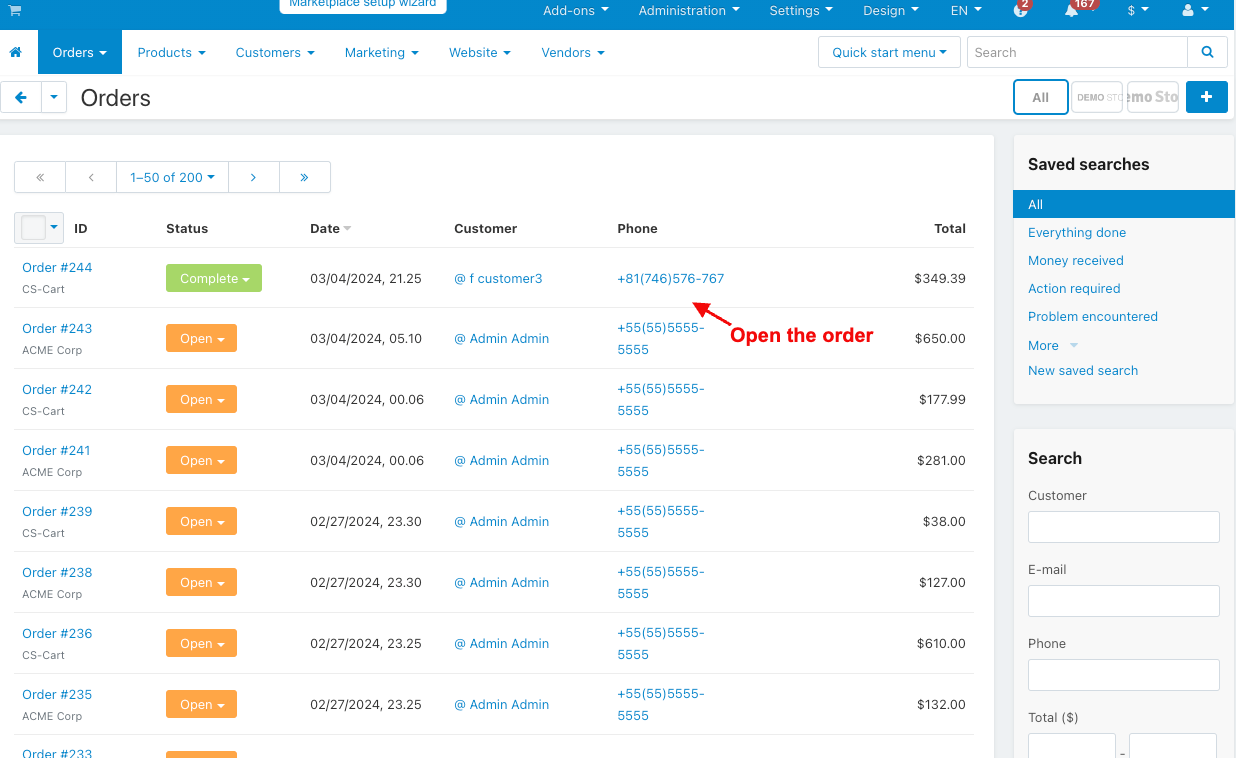
- Open the order.
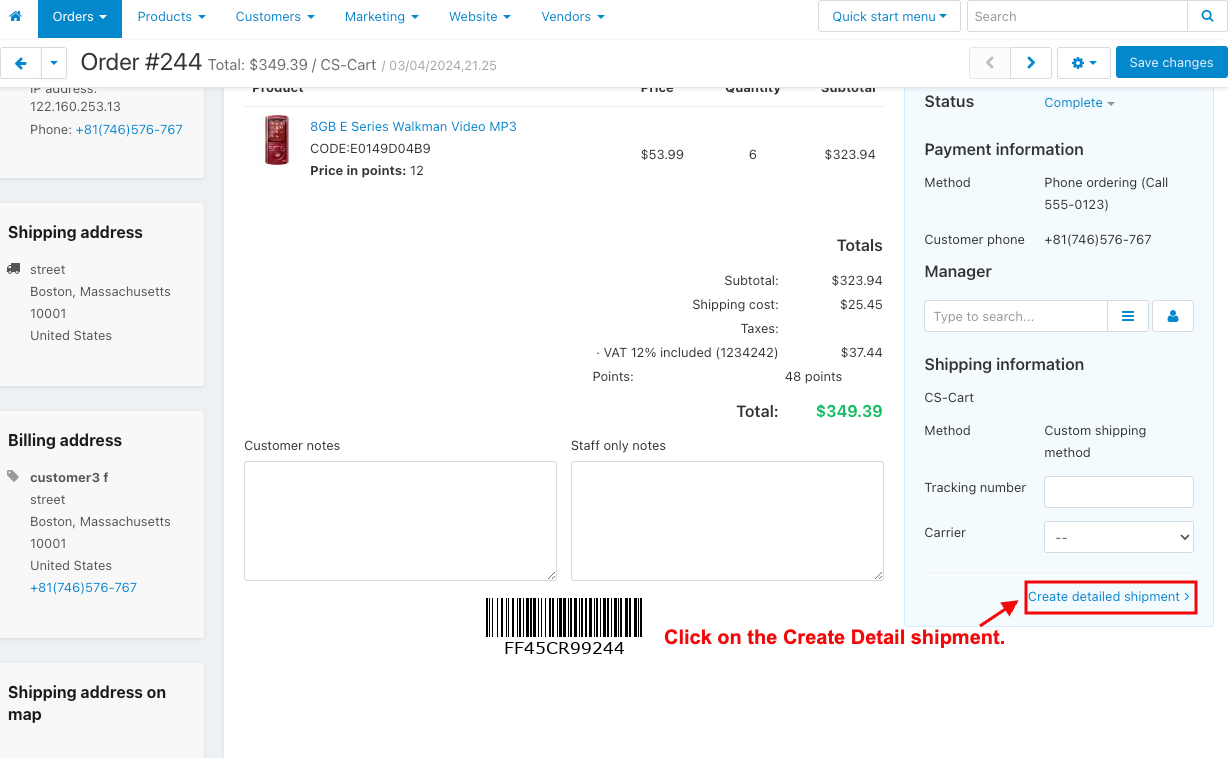
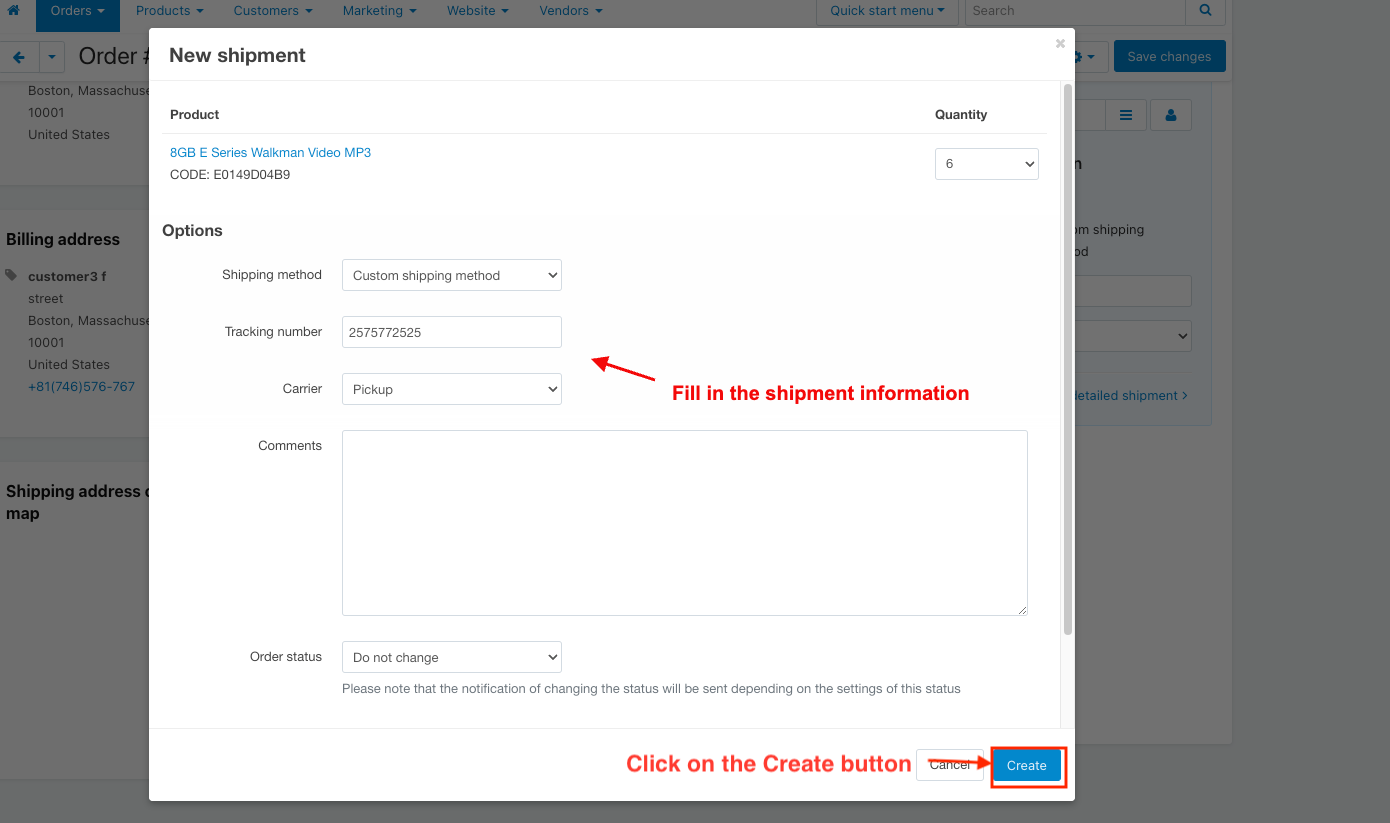
- Click on the Create Detail shipment.
- Fill in the shipment information.
- Click on the Create button.
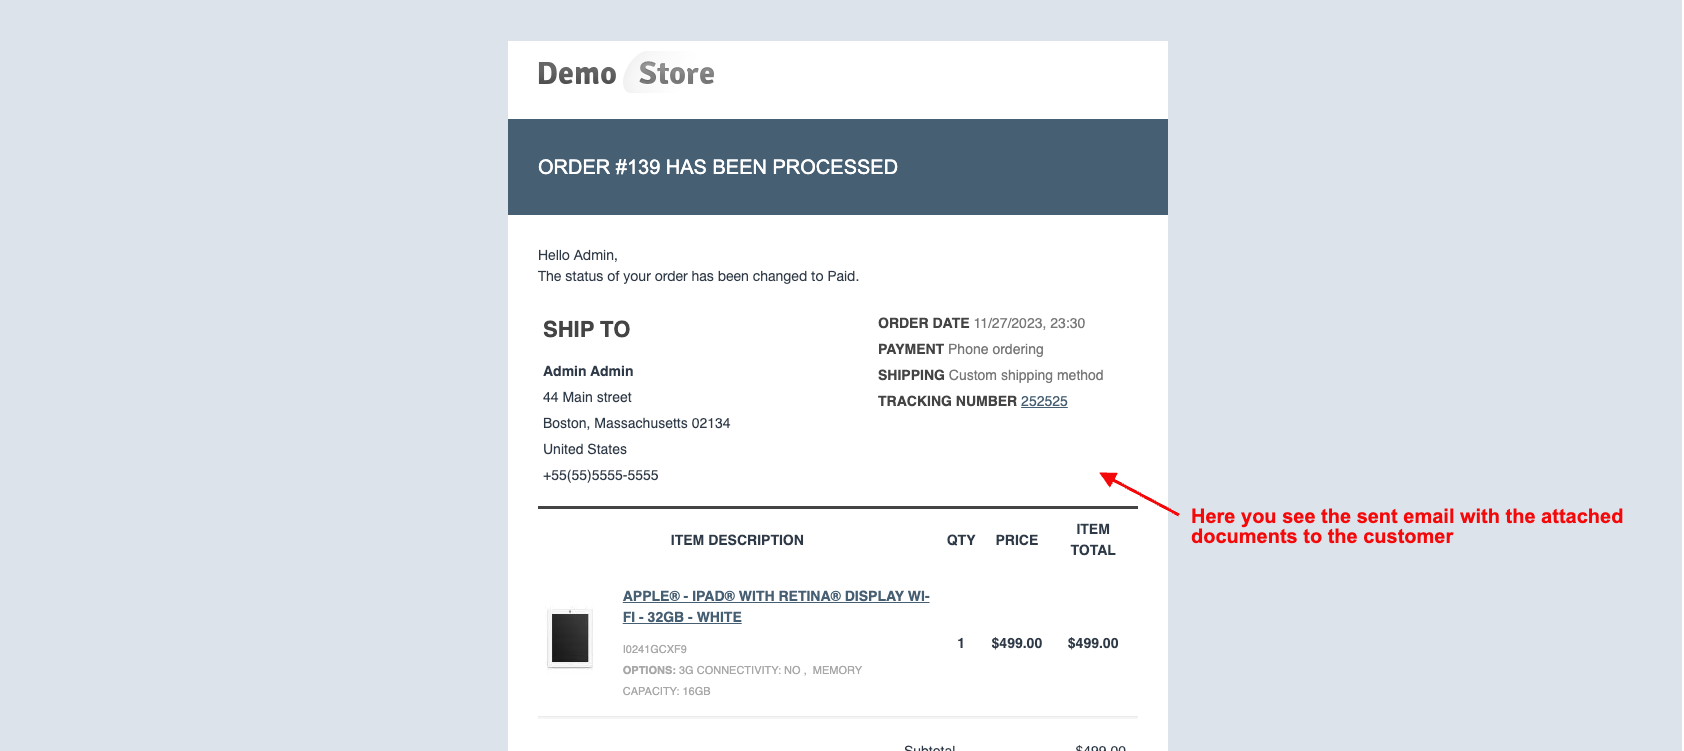
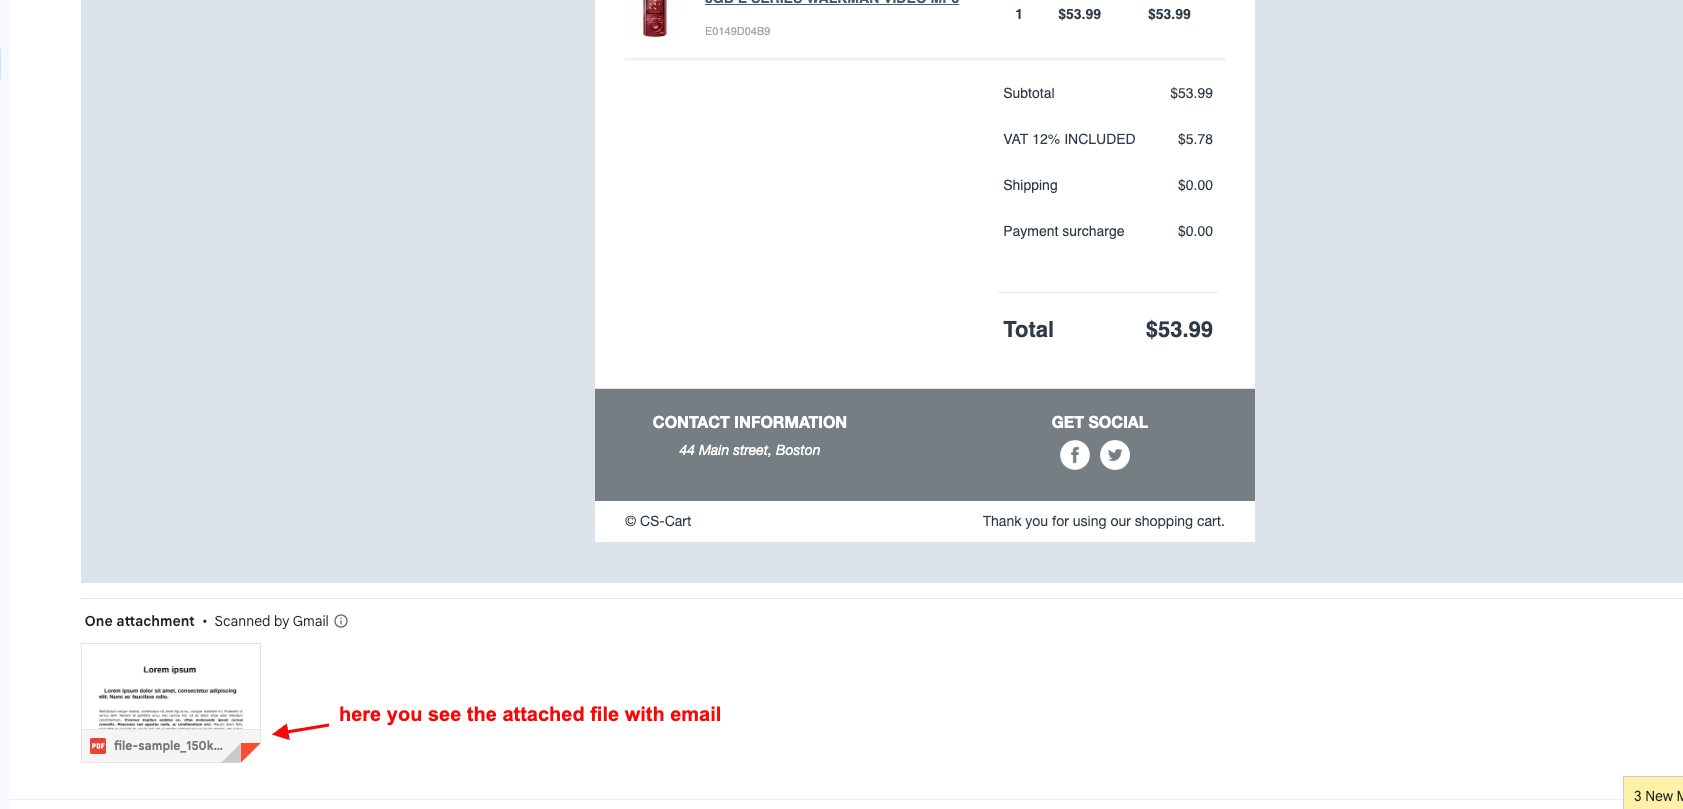
- Here you see the sent email with the attached documents to both the customer and admin.
- Switch on the Credit Memo Email Attachments.
- Here, the Admin can upload the file to attach the email.
- Click on the Save button.
- Click on the view order under the orders menu.
- Here you see the sent email with the attached documents to both the customer and admin
Addon-Version:
Version-1.0
Supported Versions:
CS-Cart, CS-Cart Multivendor 4.8.x, 4.9.x,4.10x,4.11x,4.12,4.13x, 4.14x, 4.15x, 4.16x, 4.17x, 4.18x
Support:
This app is developed and published by Ecarter Technologies Pvt. Ltd., a CS-Cart developer. You are guaranteed quality add-ons.


