
CS-Cart Vendor Badges Add-on: Seller Trust
The Vendor Badges Add-on CS-Cart allows admins assign performance badges to sellers, display them on vendor profiles, and manage multiple badges easily. Fully integrated with CS-Cart Multi-Vendor.
The Vendor Badges add-on for CS-Cart Multi-Vendor lets the store admin assign visual badges to sellers based on their performance. Each badge appears on the vendor's profile page, so buyers can quickly spot top-performing sellers, while the admin keeps full control over which badges exist and who receives them. You can create multiple badges, set a name, image, priority, and description for each, and assign the same badge to several vendors or several badges to one vendor. It is aimed at Multi-Vendor marketplace operators who want a simple way to signal seller trust and reward reliable sellers.

The Vendor Badges Add-on for CS-Cart allows the admin to add badges for different sellers based on their performance. These badges appear on the seller’s profile page, helping buyers identify top-performing vendors while giving the admin full control to manage badges.
The add-on is easy to configure and lets the admin assign, remove, or delete badges. Multiple badges can be added and allocated to one or more vendors, and it integrates smoothly with CS-Cart Multi-Vendor.
Feature:
- Easy Configuration: Simple to configure and manage at the admin end.
- Badge Allocation: Option to assign the same badge to multiple vendors.
- Manual Management: Admin can remove, assign, or delete badges manually.
- Multiple Badges: Ability to add numerous badges from the admin panel.
- CS-Cart Integration: Well integrated with CS-Cart Multi-Vendor.
- Multiple Badges per Vendor: Option to allocate multiple badges to a single vendor.
Installation:-
How to install Addon
https://store.ecarter.co/blogs/how-to-install-addon/
Let's check how the addon works
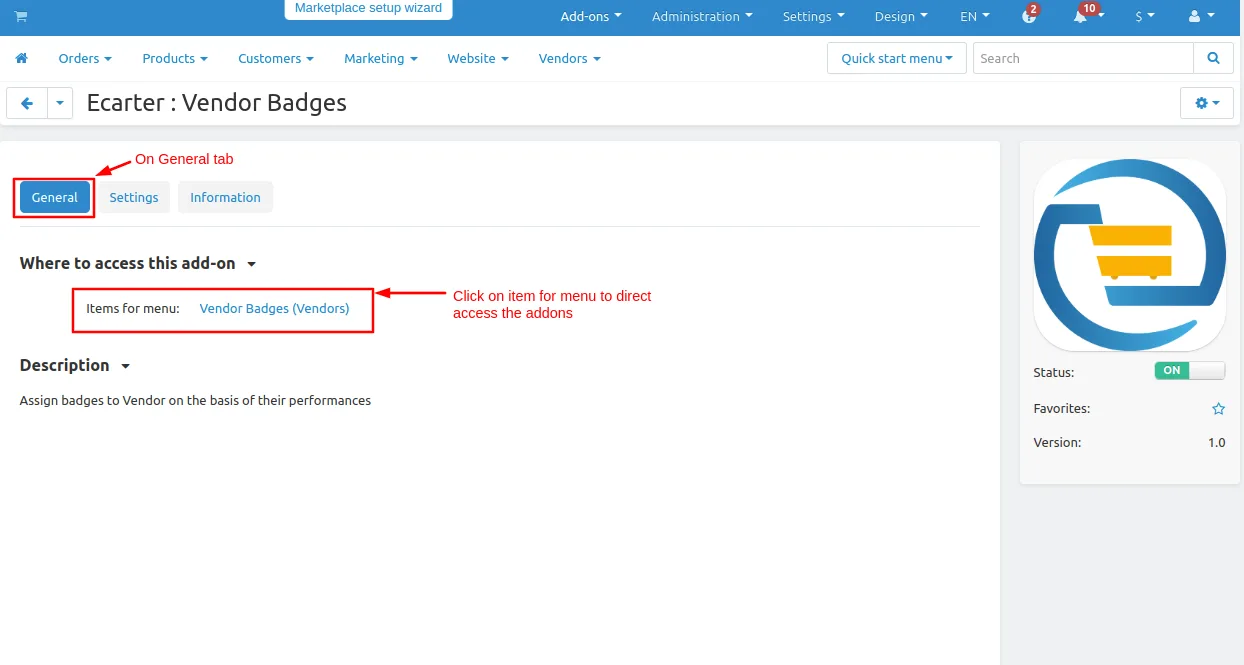
- To access the addon setting directly click on the item for the menu link vendor badge.
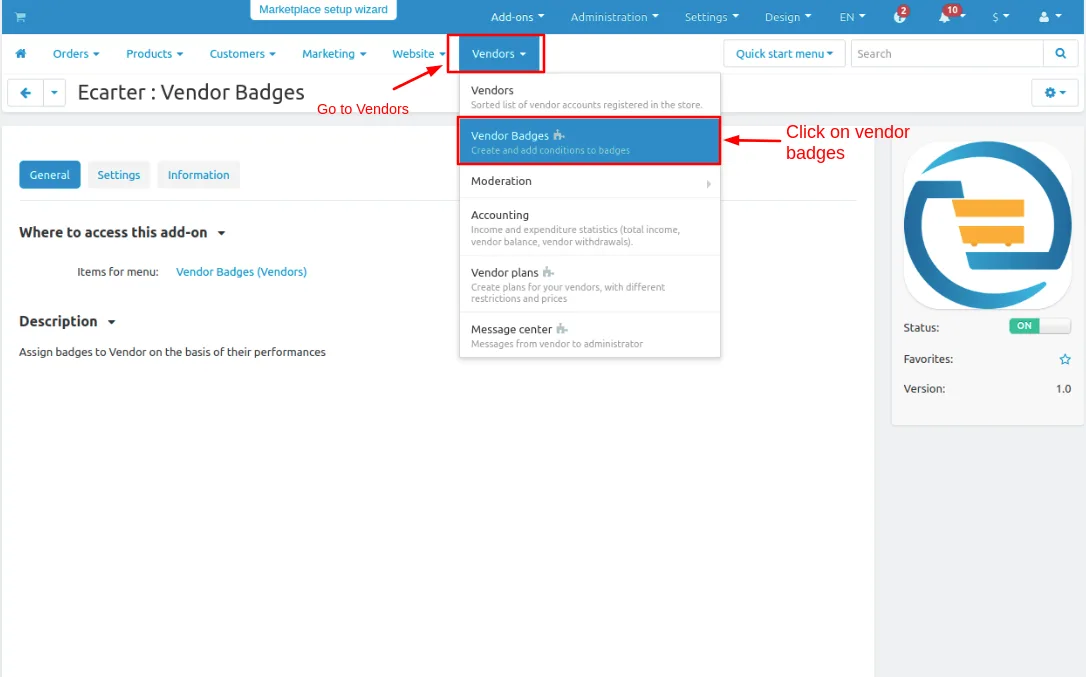
- Now Go to vendor drop down click on >> vendor badges.
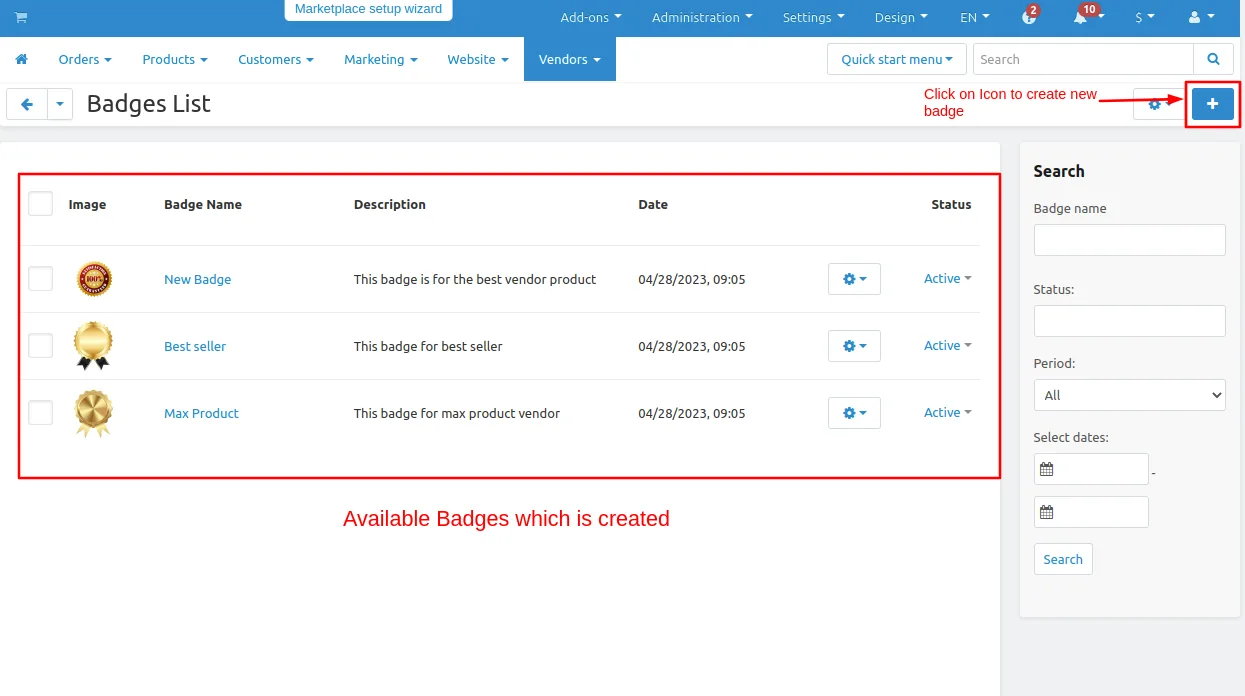
There are some badges now see how to create a badge.
- Click on >> (+) icon.
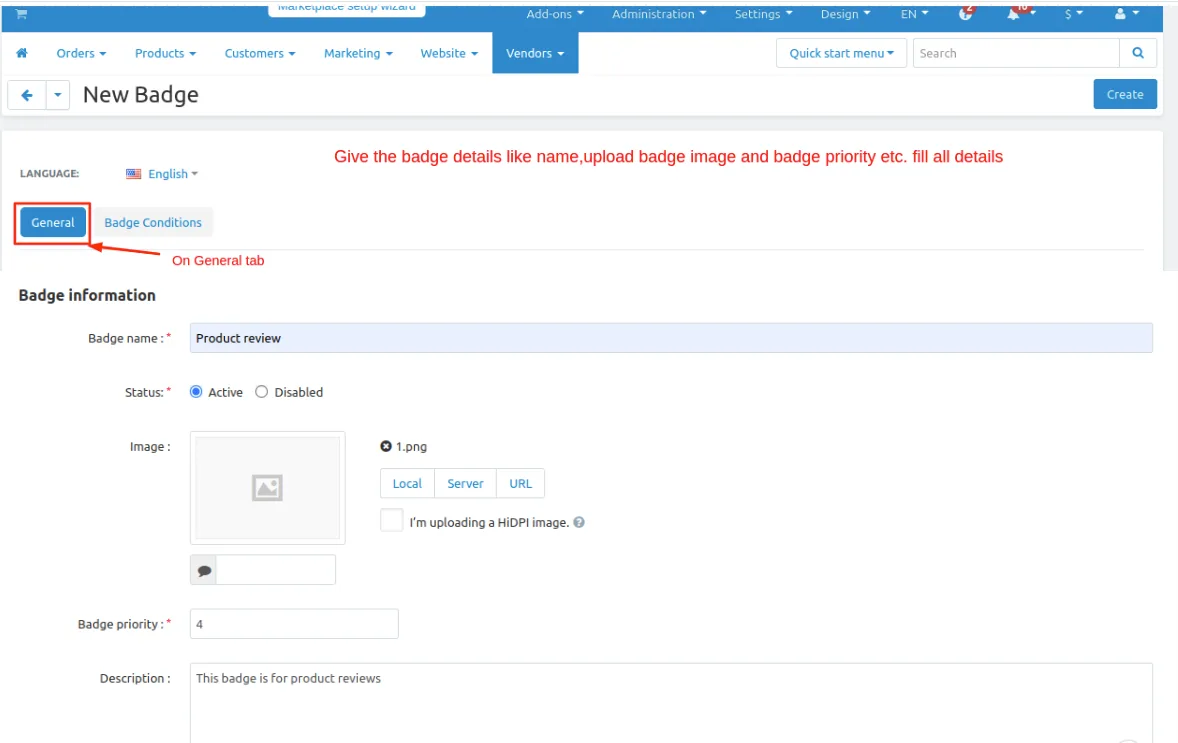
- On the General tab fill the badge information.
- Like Badge name, upload badge image, set priority and write description.
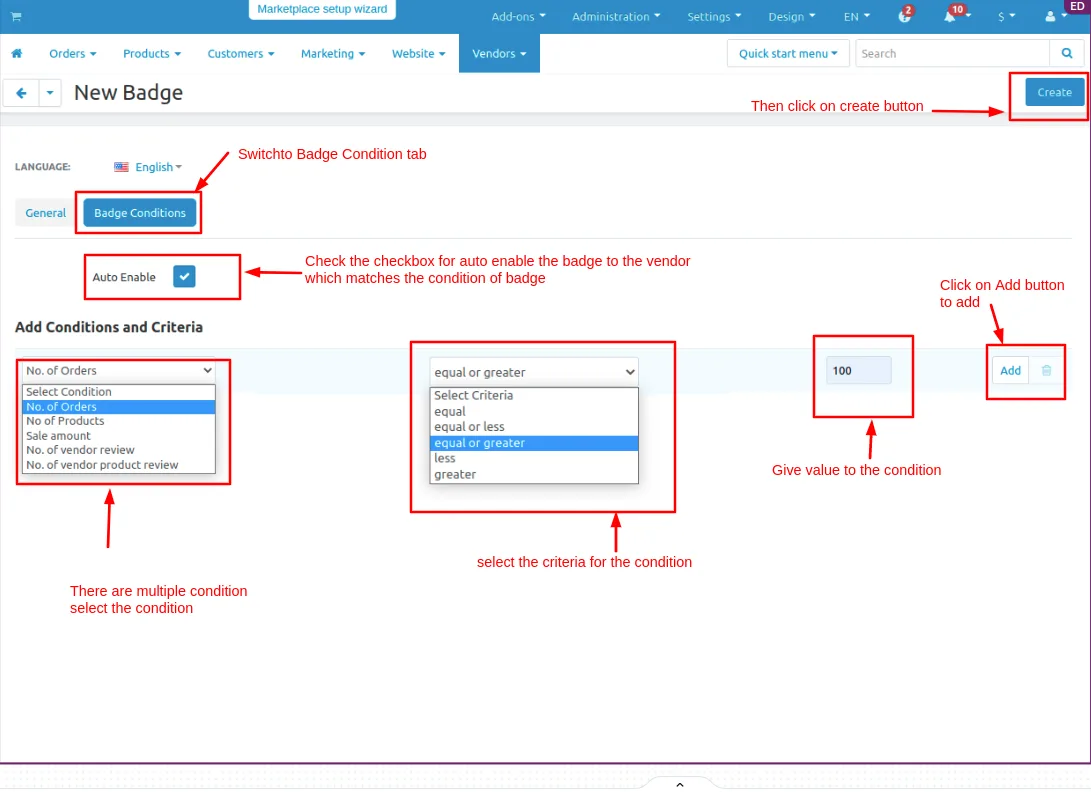
- Then switch to Badge Condition tab.
- Tick the checkbox of auto enable so the badge is assign to vendor automatically.
- Now add conditions for the badge.
- Admin can set multiple conditions there are few conditions and criteria according to conditions.
- After that set the value for a condition then click on >> Add button.
- Now Click on >>Create button.
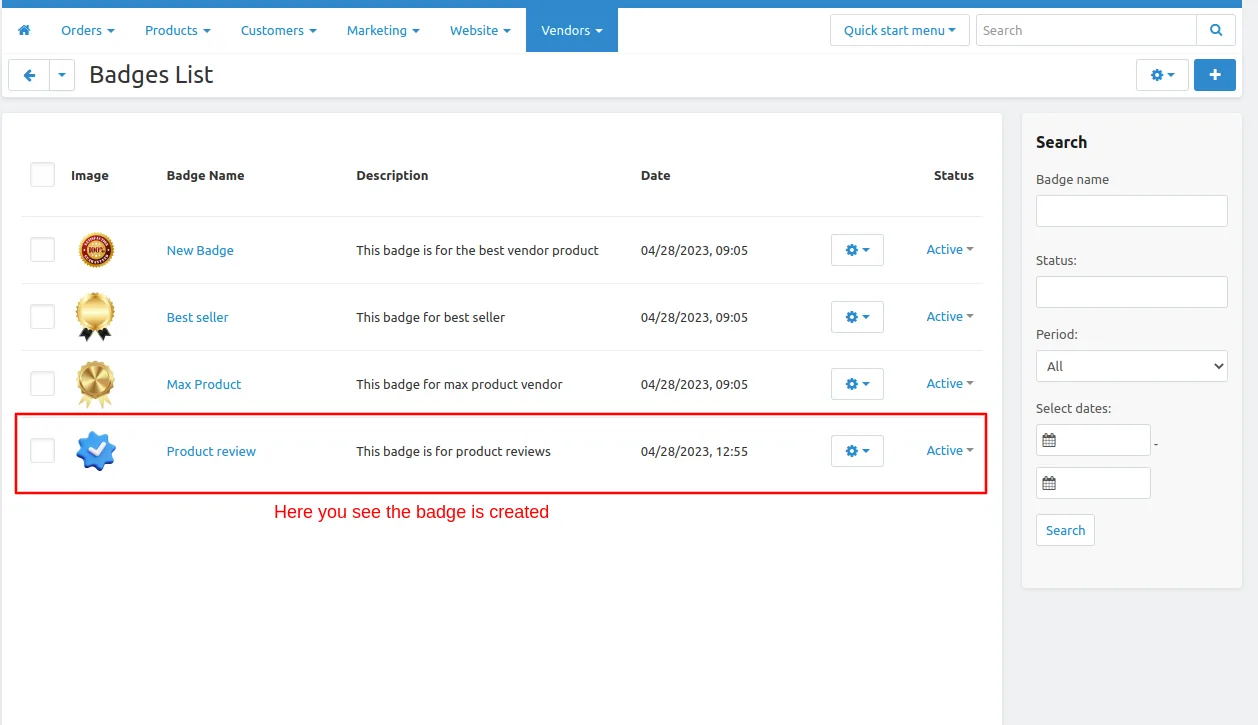
- The badge is created.
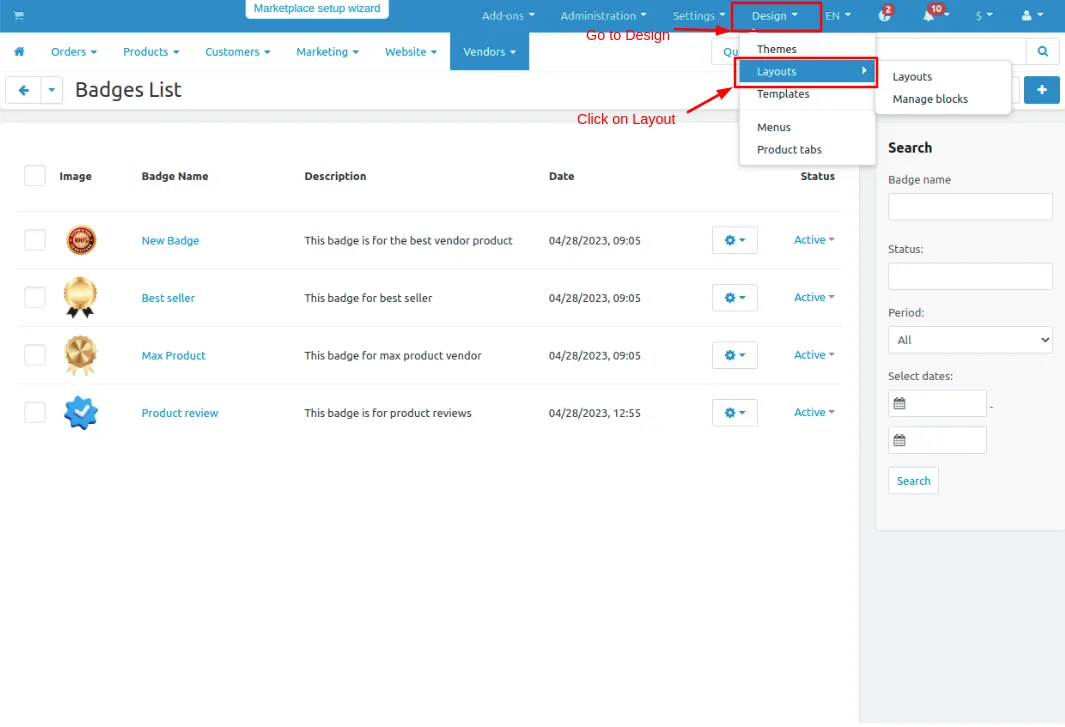
Now Set the block of the vendor badge so it will appear on the storefront.
- Go to design drop down click on >> Layouts.
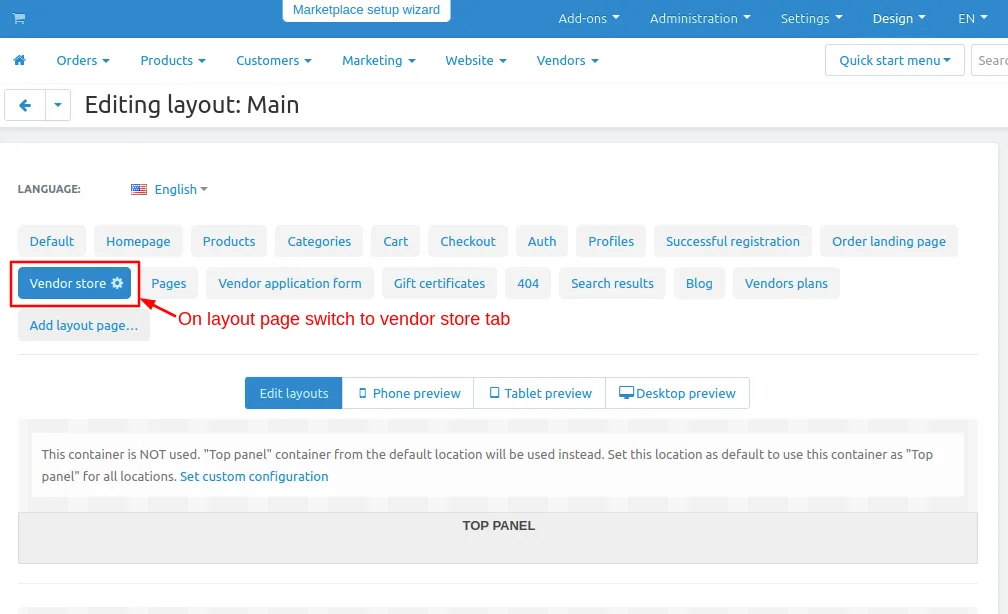
- Switch to vendor store tab on edit layout page.
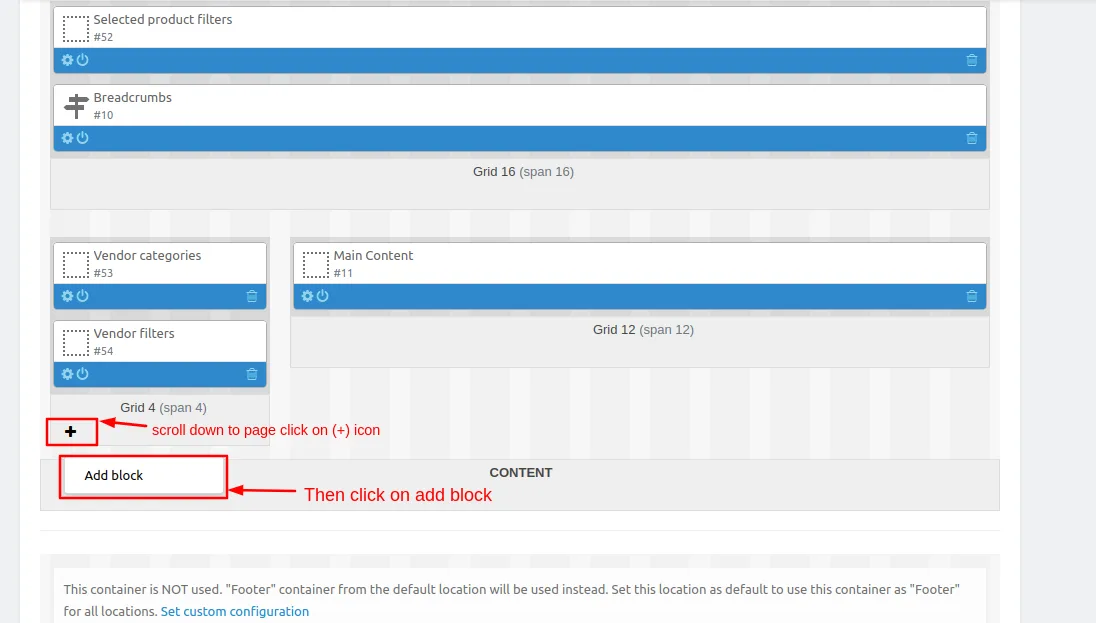
- Scroll down to the page click on >> (+) icon then click on >> Add block.
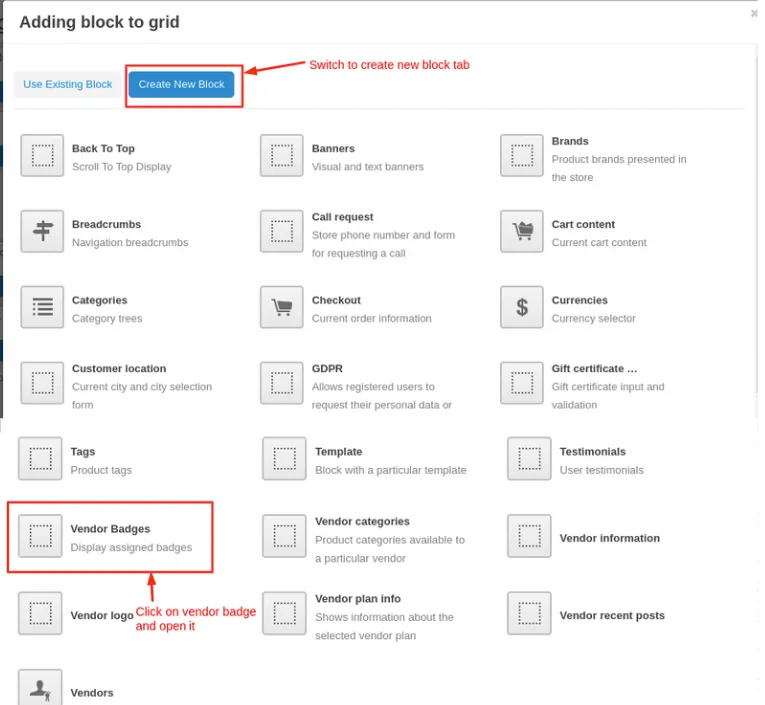
- Now switch to create new block tab.
- Then click on >> Vendor badge and open it.
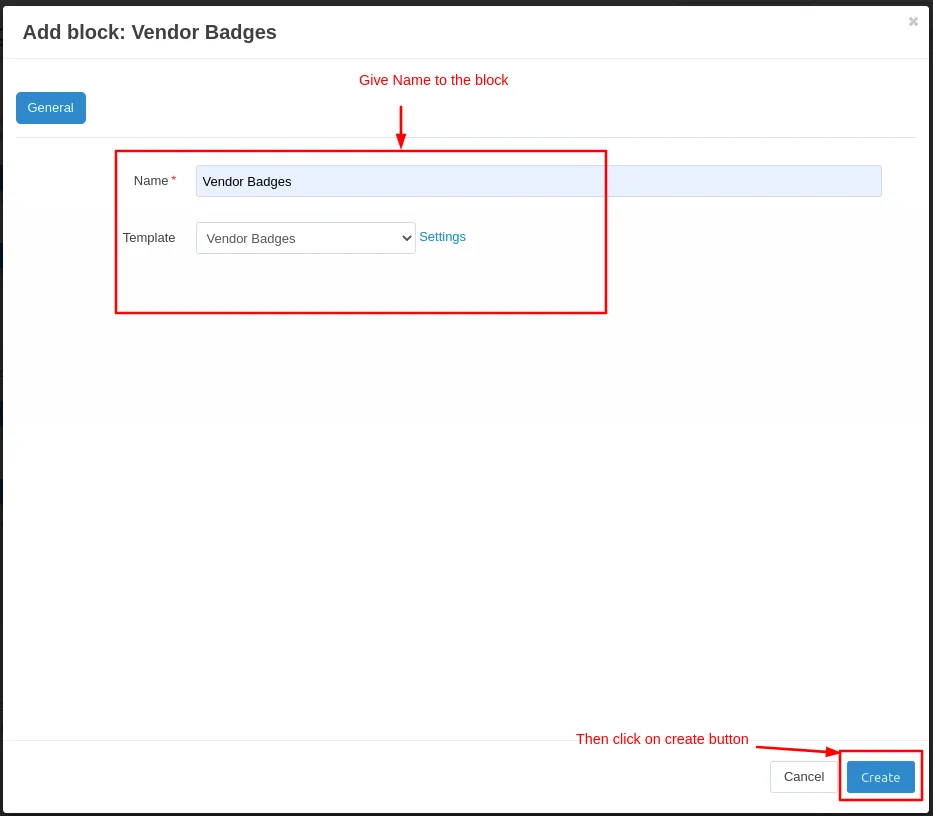
- Give the Name of the block and then click on >> create button.
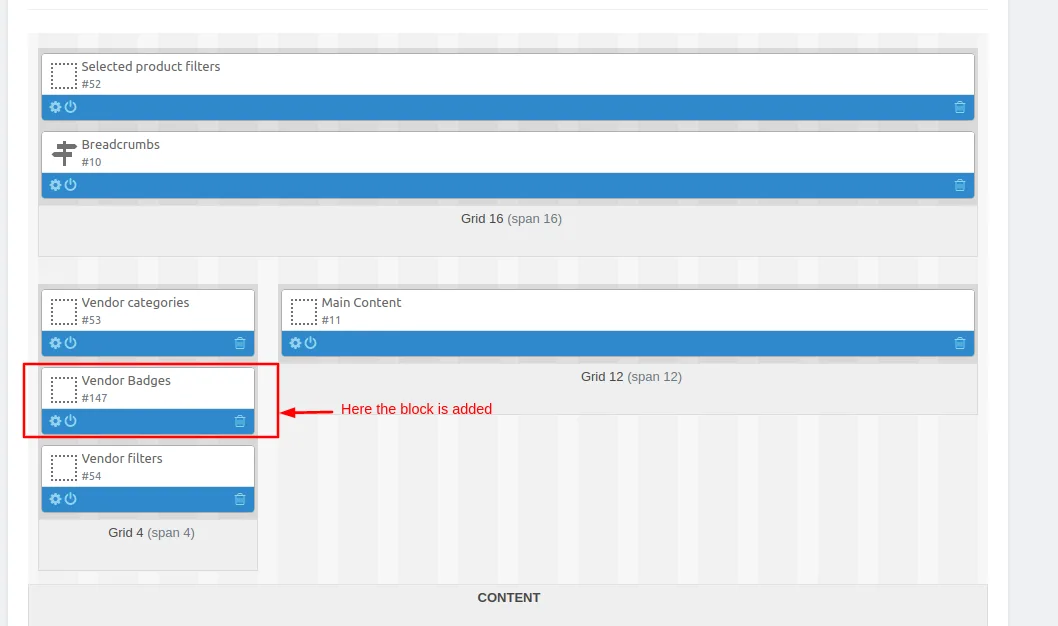
- Here you see the block is added.
Now we have to assign the badge to the vendor store.
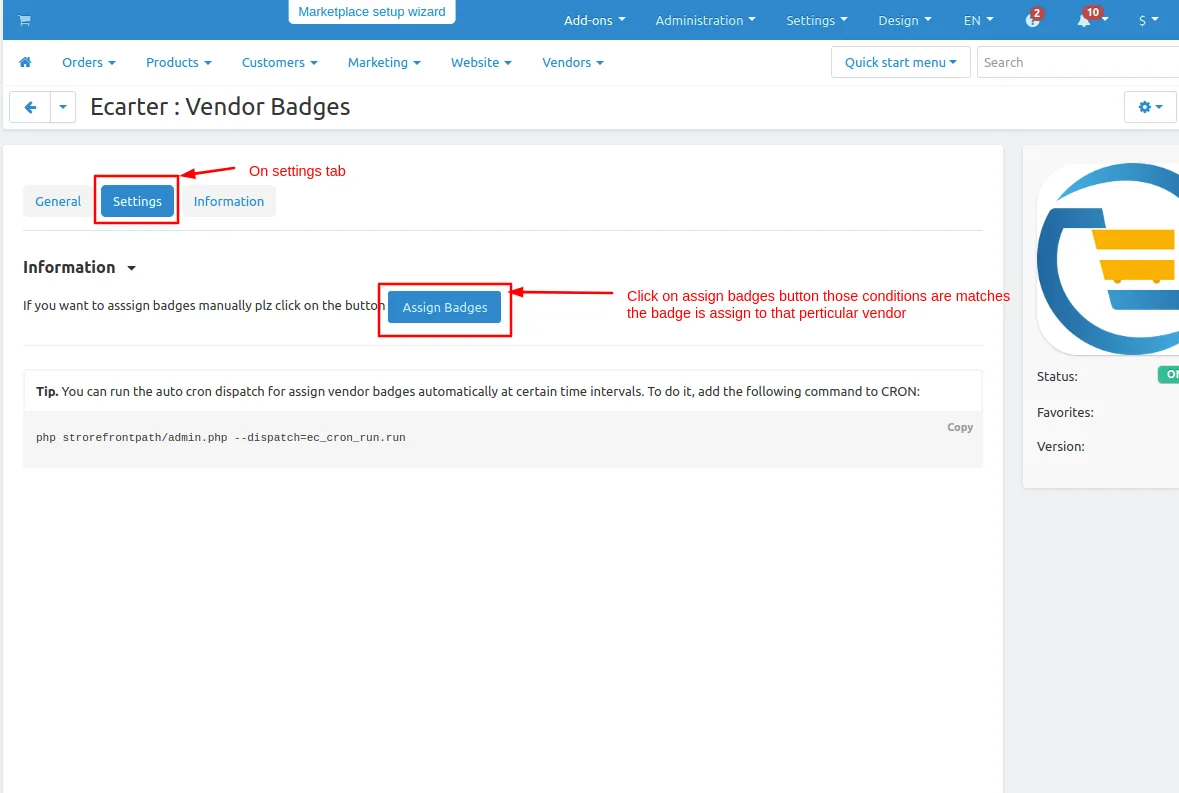
- Go to addons and open the addon.
- On settings tab
- Click on >> Assign Badges button so the badge is assigned to the vendor which matches the condition of the badge.
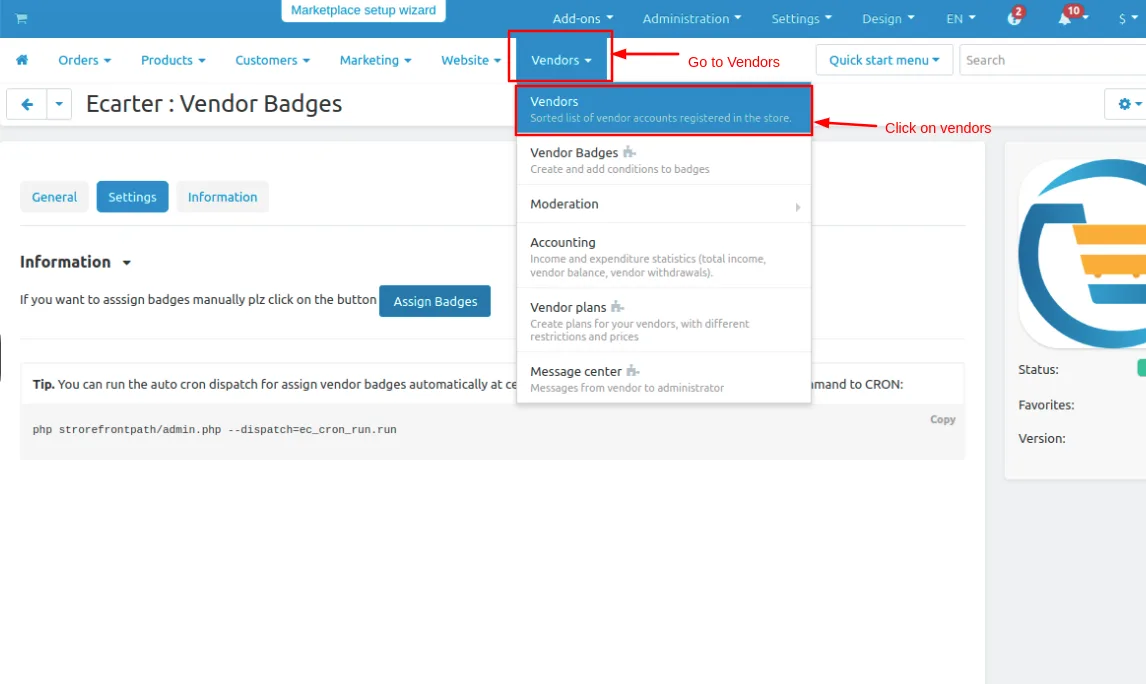
- To see which badge is assigned to the vendor go to the vendors drop-down and click on >> Vendors.
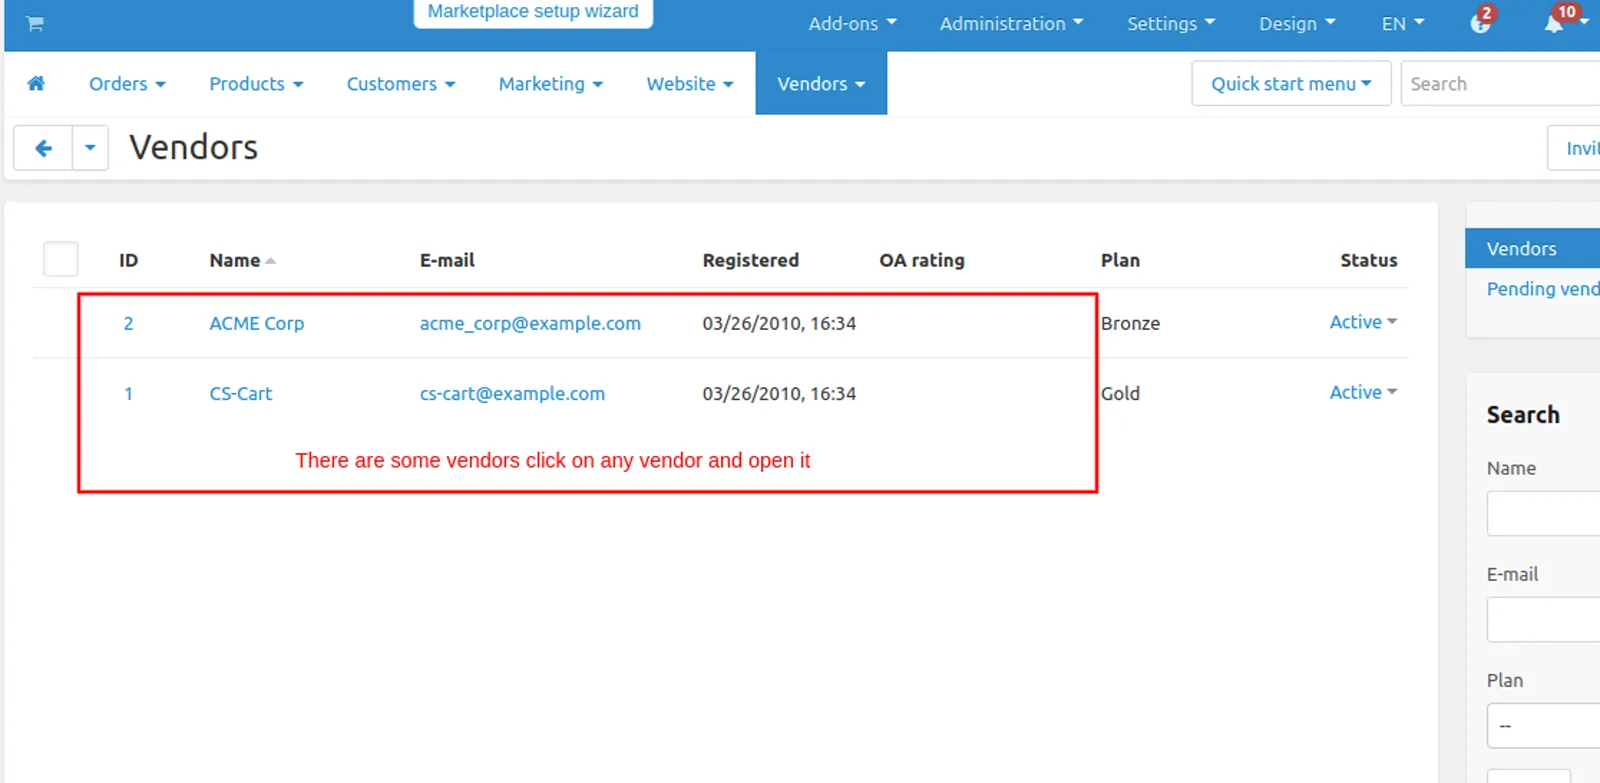
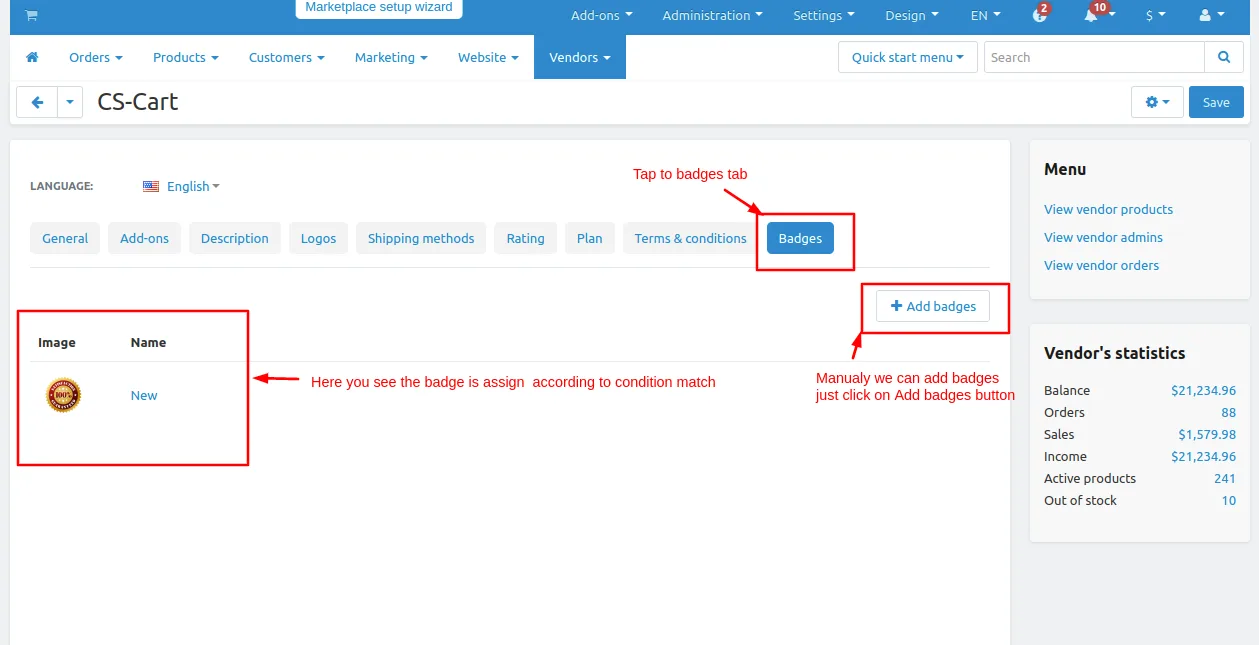
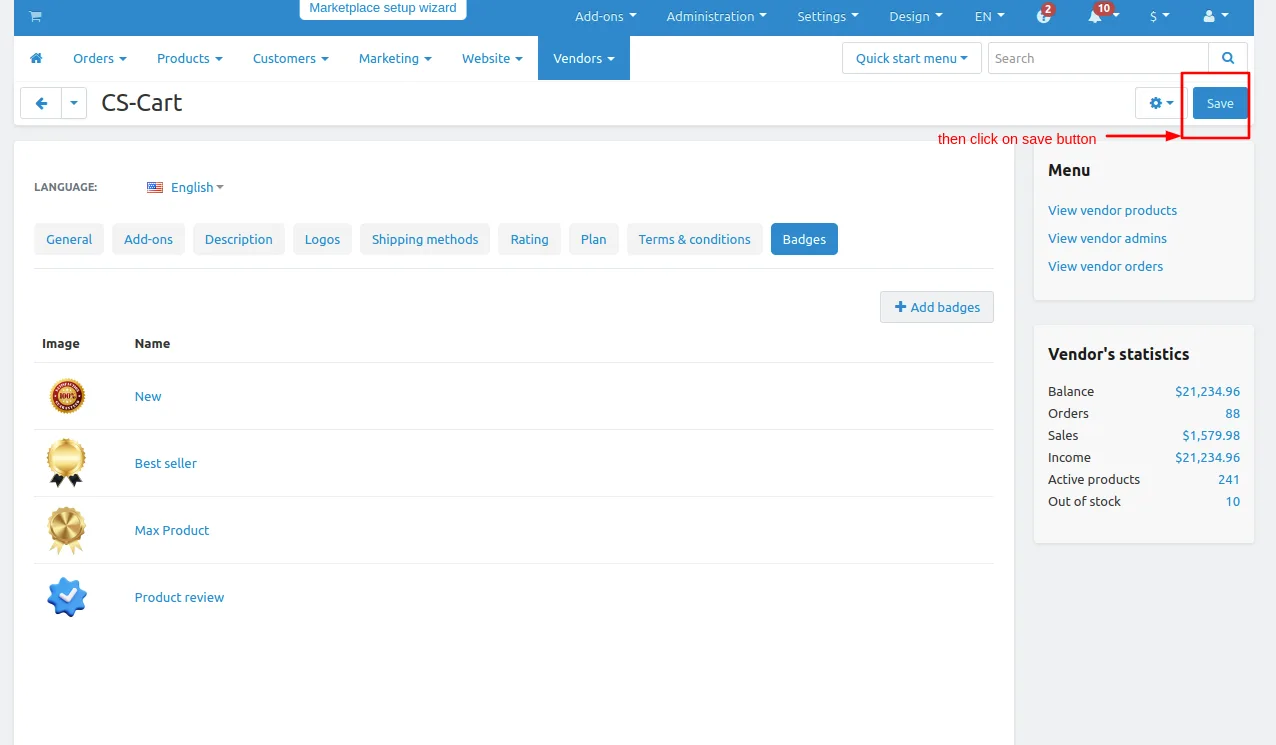
Here are some vendors open any vendor and tap on Badges tab. here you see the badge is assign to the vendor.
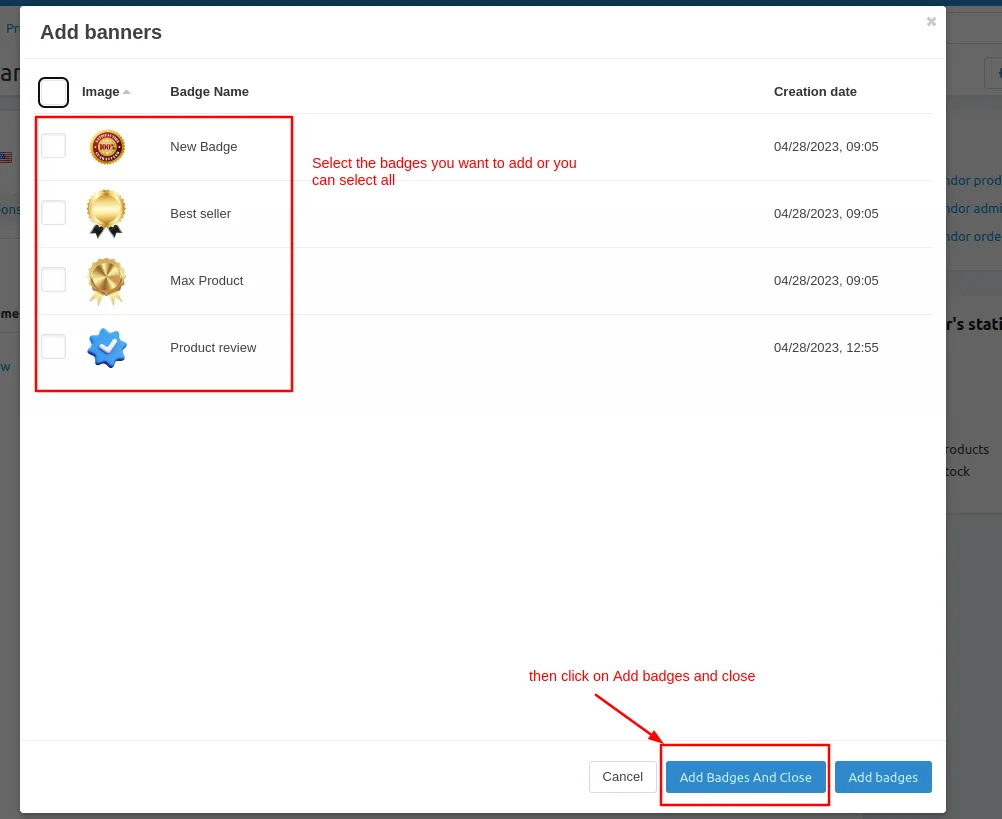
- From here you can manually add the badges for the vendor by just clicking on >> Add Badges button.
- Here you see the badges select the badge you want to add and then click on >> Add badge and close button.
- Here you see the badges are added.
Now let's see the badges are on storefronts.
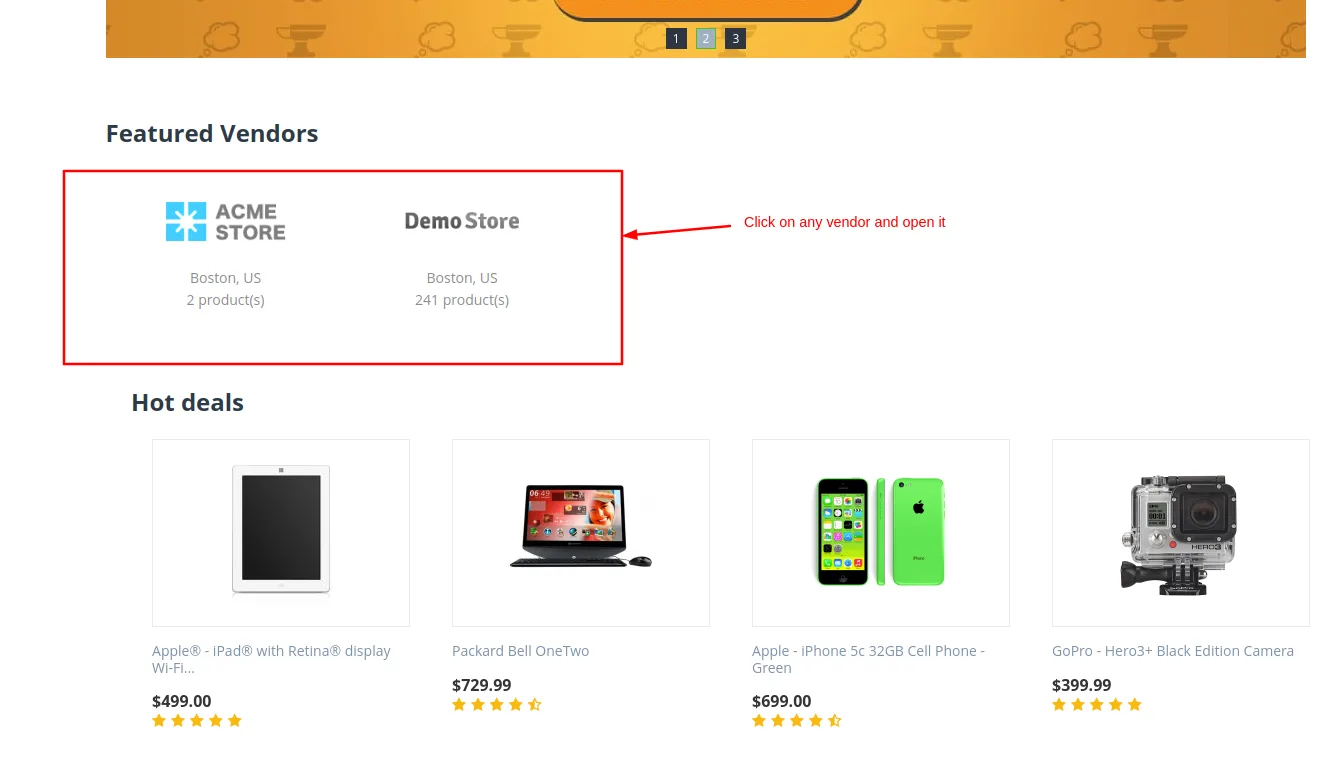
open the storefront choose the vendor and open it.
- Here you see the badges are assigned to that vendor because the conditions are matches this vendor or the admin manually adds the badges to this vendor.
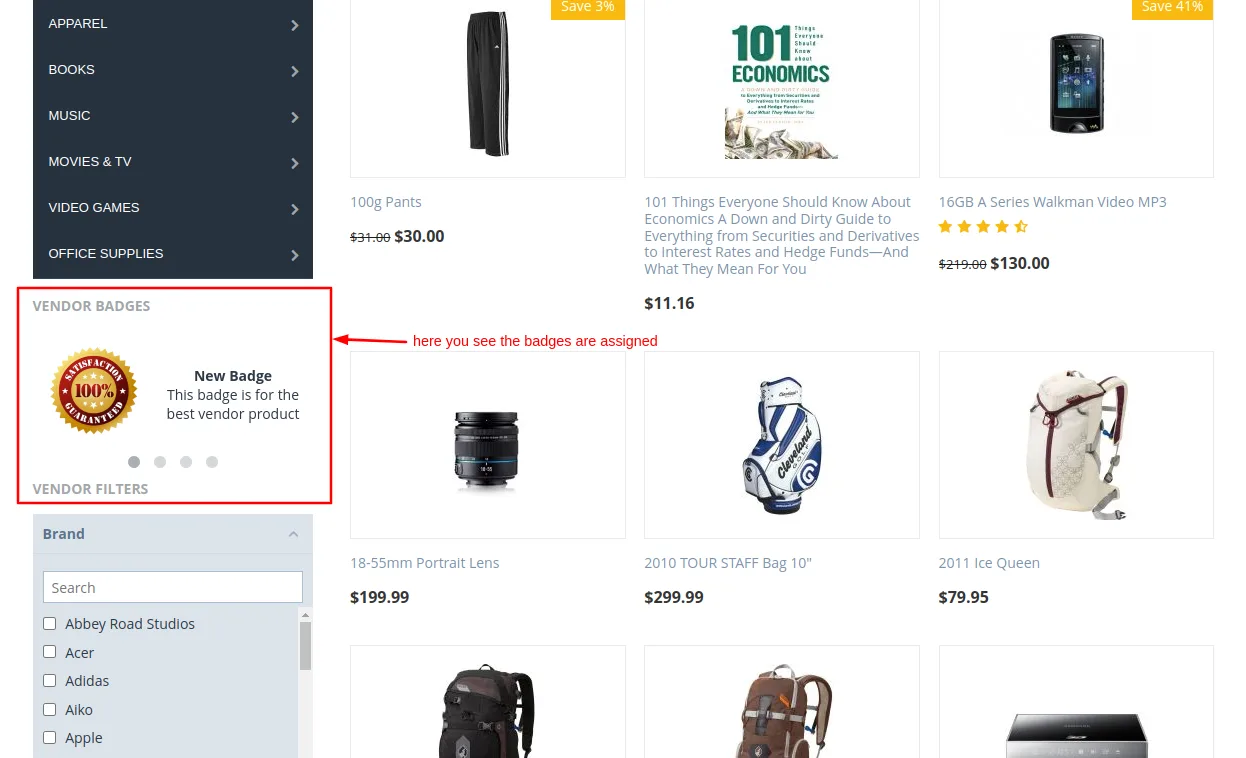
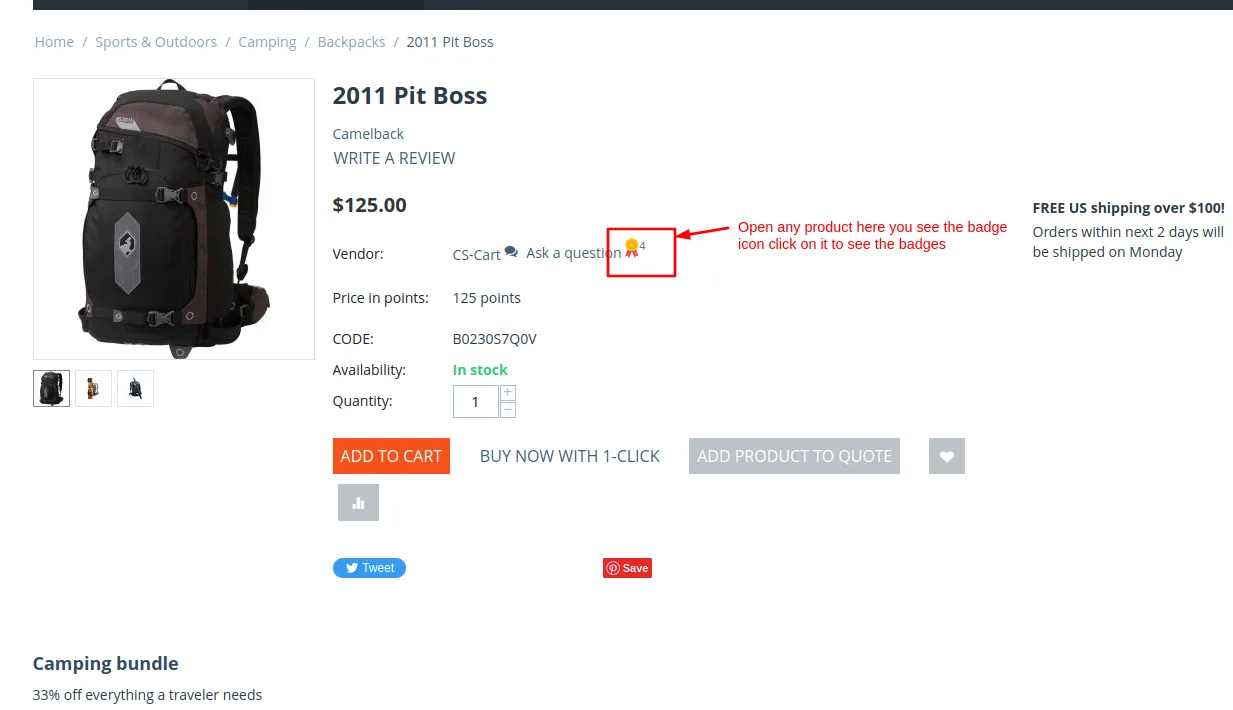
- Now open any product.
- Click on >> badge icon and here you see that the vendor has 4 badges assigned.
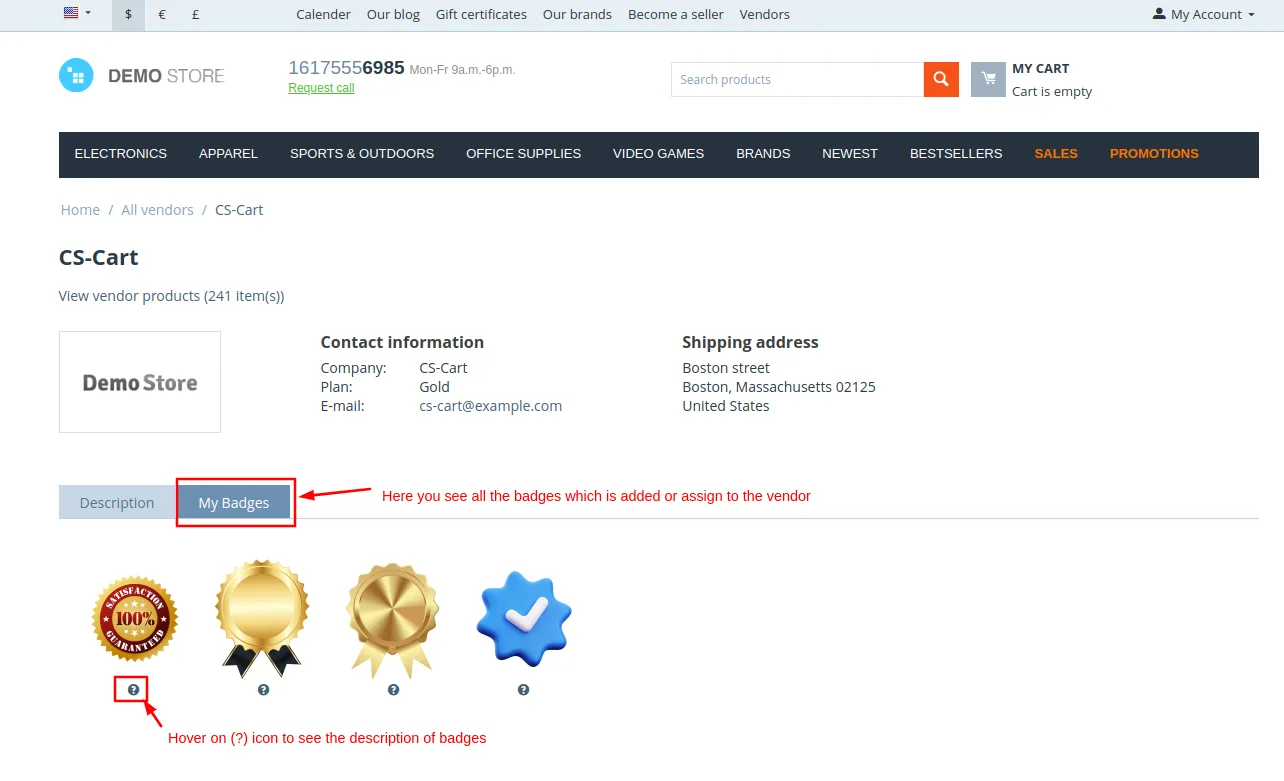
- Here you see the badges which are assigned to the vendor.
- If the user wants to see the badge description hover on (?) to see the description.
Addon-Version:
Version-1.0
Supported Versions:
CS-Cart, CS-Cart Multivendor 4.8.x, 4.9.x,4.10x,4.11x,4.12,4.13x, 4.14x, 4.15x, 4.16x, 4.17x, 4.18x
Support:
This app is developed and published by Ecarter Technologies Pvt. Ltd., a CS-Cart developer. You are guaranteed quality add-ons.
Frequently asked questions
Where do vendor badges appear to buyers?
Badges are shown on the seller's profile page, so shoppers can identify top-performing or trusted vendors while browsing the marketplace.
Does the admin control which vendors get badges?
Yes. The admin manages everything from the admin panel and can manually assign, remove, or delete badges. You can also give the same badge to multiple vendors or assign several badges to a single vendor.
How do I create a new badge?
In the admin panel, open the Vendor Badges section from the Vendors menu and click the (+) icon. On the General tab enter the badge name, upload a badge image, set a priority, and add a description, then switch to the Badge Condition tab to finish setup.
Is this add-on compatible with CS-Cart Multi-Vendor?
Yes, it is built for and integrates with CS-Cart Multi-Vendor. If you need confirmation for a specific CS-Cart version, share the version you run and we can confirm compatibility.
Kajal is a Technical Content Writer at Ecarter Technologies. She writes technical documentation and in-depth guides on eCommerce platforms, mobile commerce and AI in online retail.