
CS-Cart WhatsApp Chat Support Addon
%20(32).png?1666093800488)
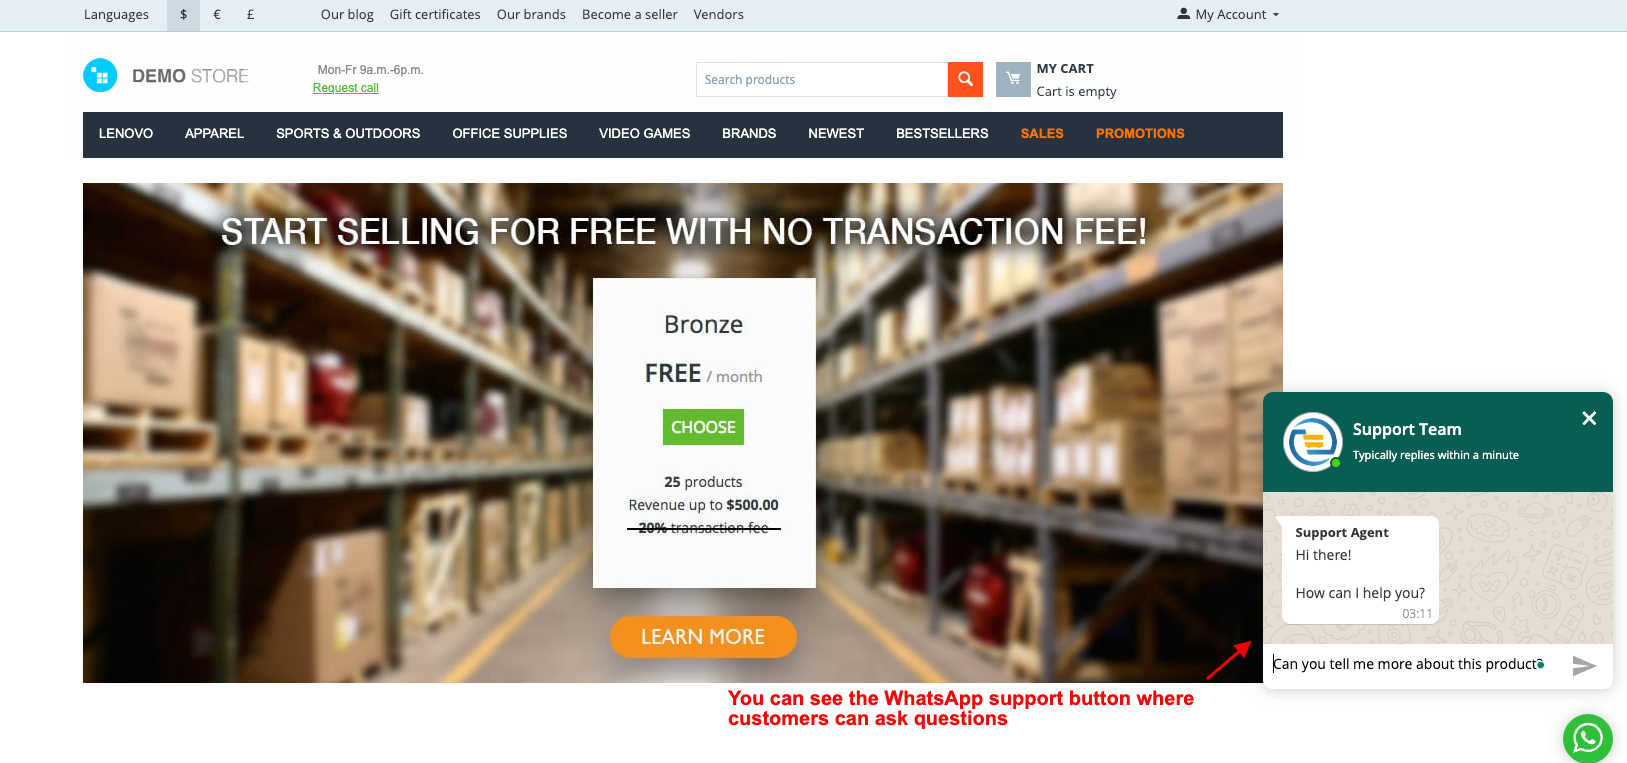
This magnificent add-on provides the facility to the customers can chat with the support agent of your website via WhatsApp.The customers will select the support agents available and can contact them. Basically, this add-on allows customers and support agents to communicate faster and easier, and the customer can send queries through the WhatsApp support button to ask questions and then redirect to the WhatsApp web page.
CS-Cart WhatsApp Chat Support Features -
- Well integrated with CS-Cart, CS-Cart Multivendor, CS-Cart Multivendor-Plus, CS-Cart Multivendor Ultimate.
- Option available for the admin to configure layout settings for the chat support window.
- Show your customers when you are unavailable.
- The admin can customize the title and description of the chat support window.
- The option available for the admin to choose the image icon of the support team member, which will be shown on the chat support window.
- A welcome message can be entered that can be seen at the chat support window.
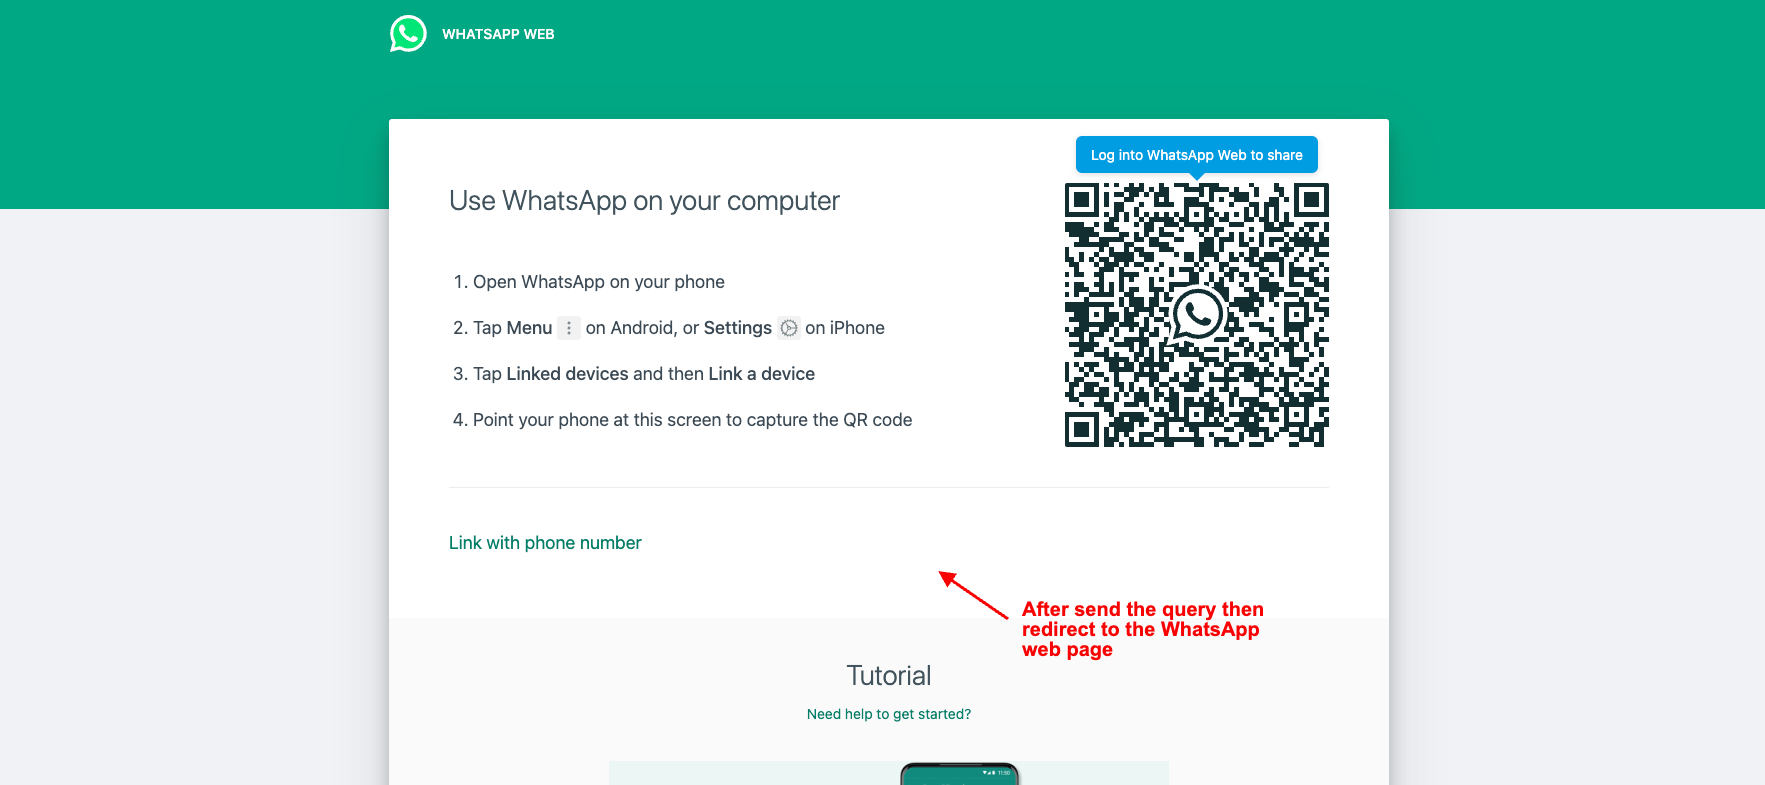
- Customers send questions via the WhatsApp support button and redirected to the WhatsApp webpage
How to install Addon
https://store.ecarter.co/blogs/how-to-install-addon/
How Addon Works
Addon Settings:
Addon properties
Contact Info.
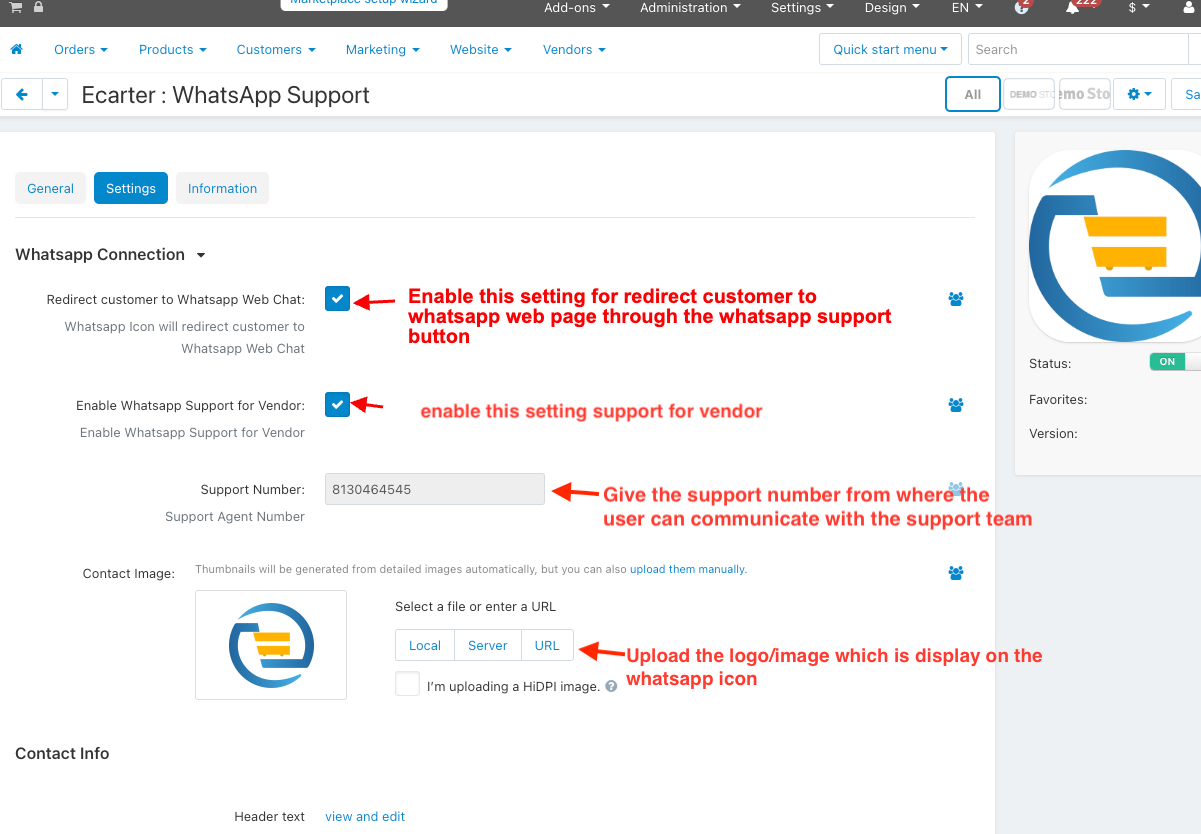
- Redirect customer to Whatsapp Web Chat: Enable this setting for redirect customer to whatsapp web page through the whatsapp support button.
- Whatsapp support for vendor: Enable this setting WhatsApp support for the vendor
- Support Number:-Give the support number from where the user can communicate with the support team and ask about any services and products via WhatsApp.
Contact info
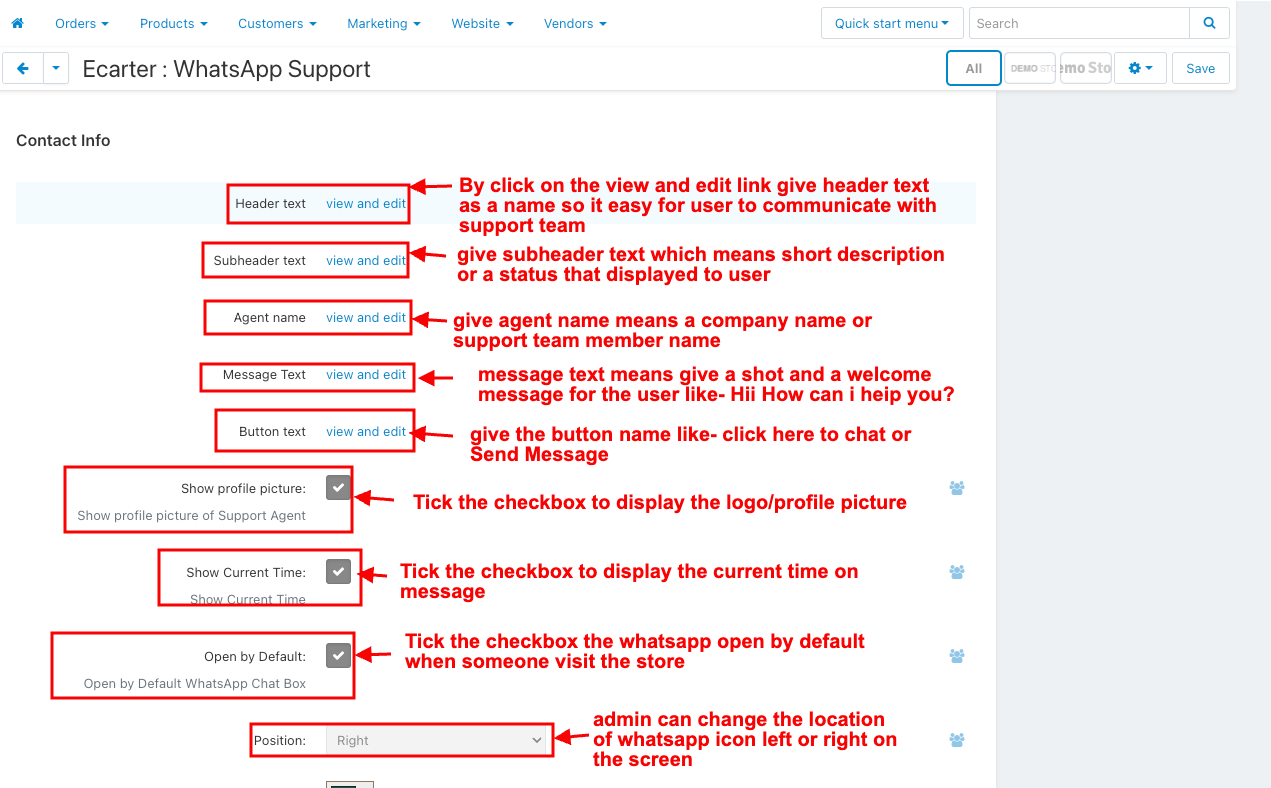
- Header text:- Give the Header text that displays to the user while communicating with the support team.
- Subheader text:- On subheader text means it's a status or short description eg. typically replies team.
- Agent name:-
- Message:-On the message text field you can give the welcome message to the user when he uses telegram support.
- Button Text:-give button text that displayed or easy to understand what this button functionality is like Click here to chat.
- Contact Image:- upload the logo/image that will be visible on the telegram support icon so that user can see it.
- Show profile picture:-if you tick the checkbox then the user can see the image if uncheck not able to see
- Show the current time:-if you tick the checkbox then the user can see the current time if uncheck not able to see
- Open by default:-if you tick the checkbox then the telegram is open by default when some visit the store.
- Position:- admin can change the position of the telegram icon on the screen left or right.
- Background color:- admin can change the header color multiple times
- Text Color:-admin can change the text header color multiple times.
- Subheader text color:-admin can change subheader text color multiple times
- Agent Name color:-admin can change the agent name color on the message box multiple times.
- Message text color:-admin can change the send button text color on the footer multiple times.
- Button text color:-admin can change the send button text color on the footer multiple times.
- Footer background color:-admin can change the send button color on the footer multiple times.
- Show close button:-If you tick the checkbox then the close button will be visible if untick the checkbox it will be disappear
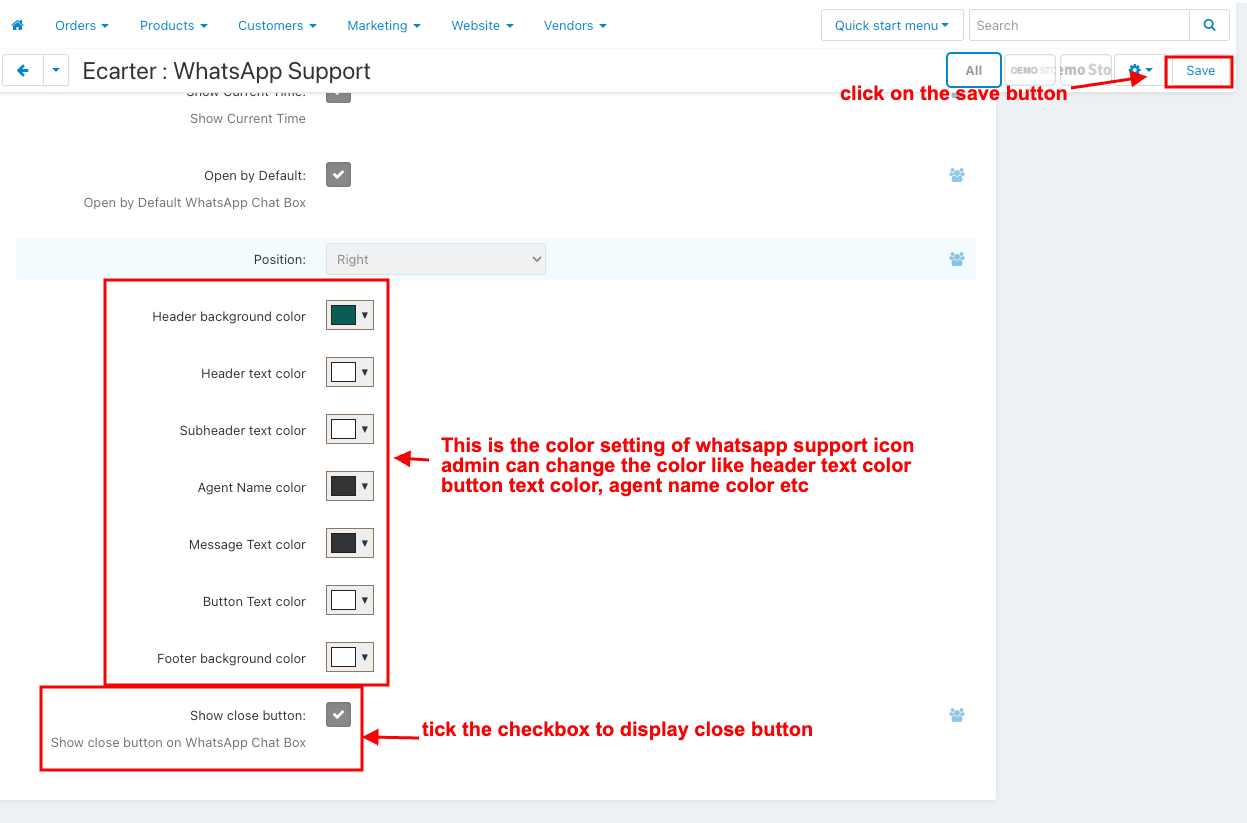
- After giving the settings click on >> save button
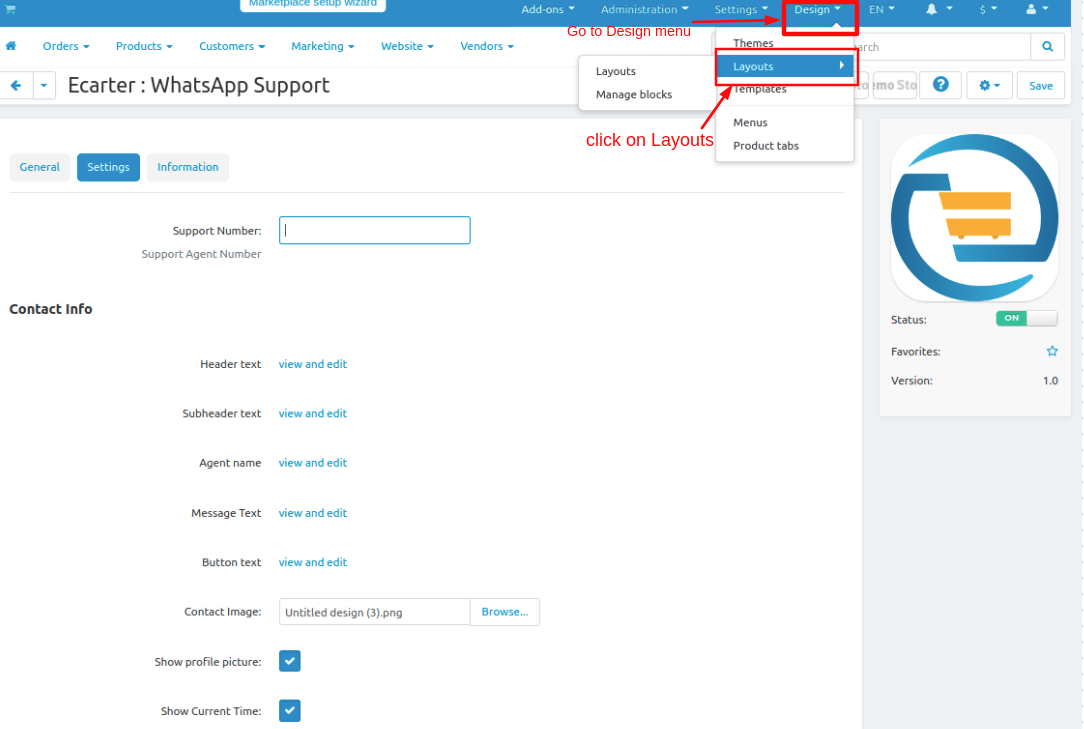
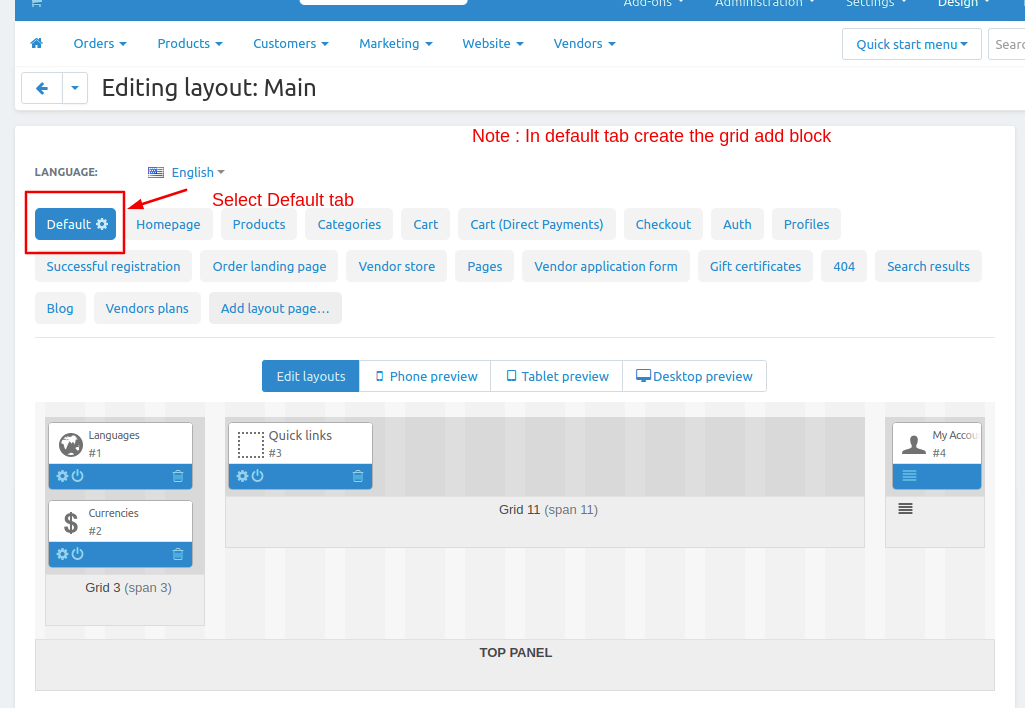
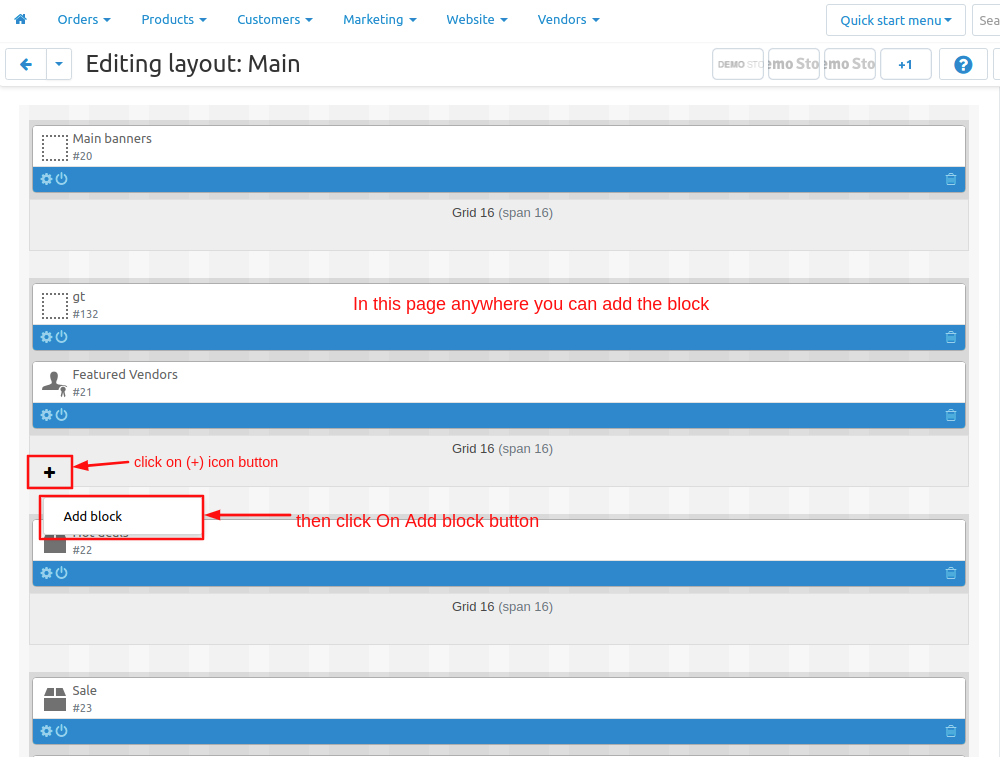
Now set up the Layout for the WhatsApp icon
Go to >> Design Penal click on >> Layouts.
- Switch to default tab
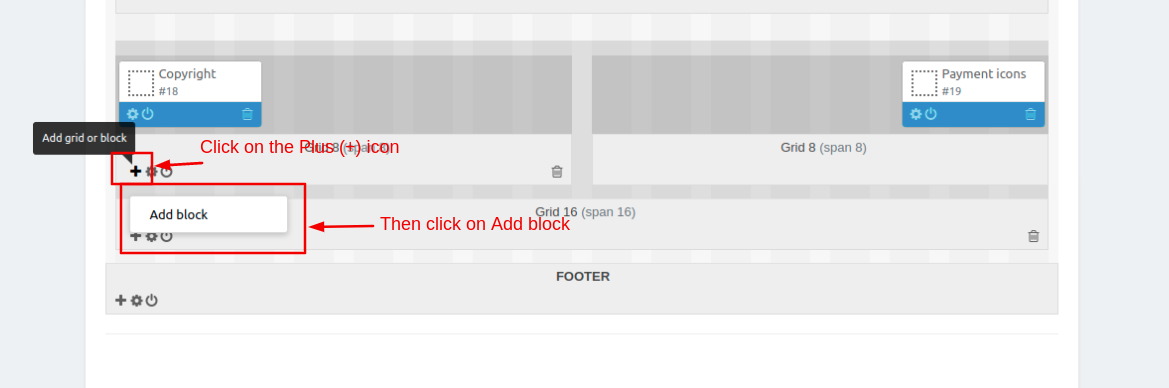
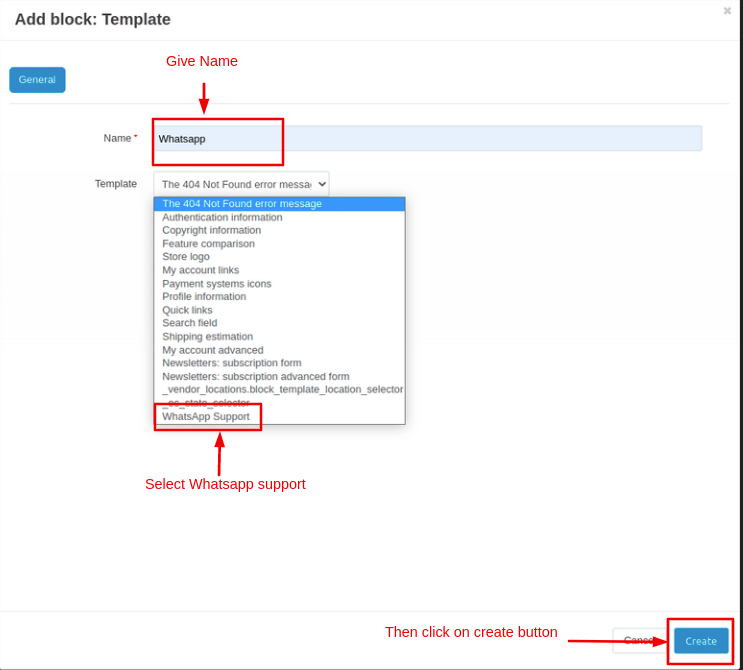
- Now add the block
- click on>> plus(+) button
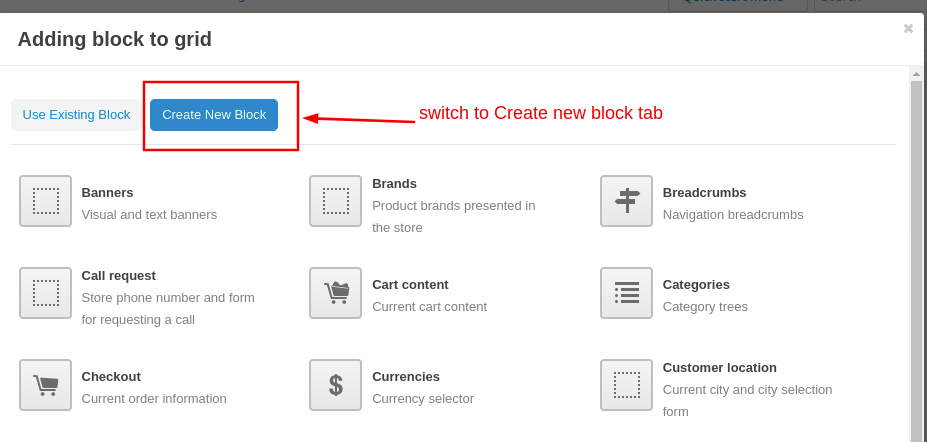
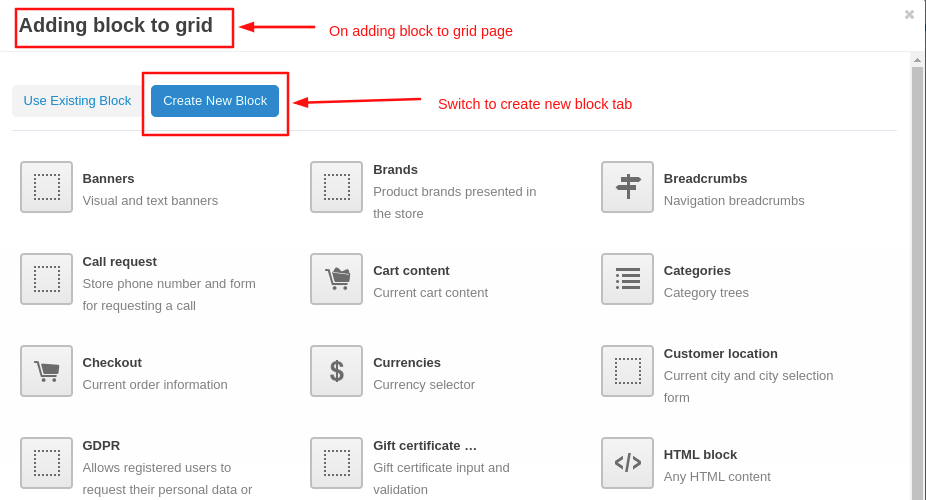
- Add block>> Switch to create new block
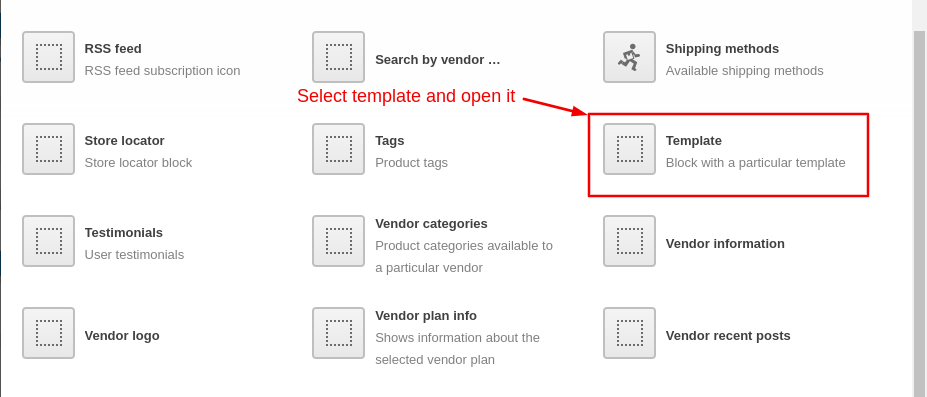
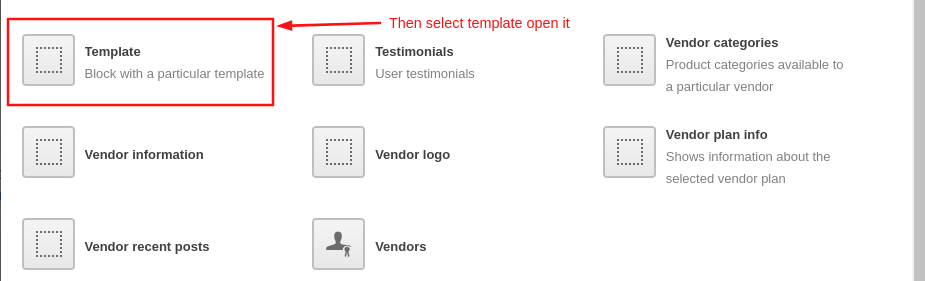
- Choose >> Template
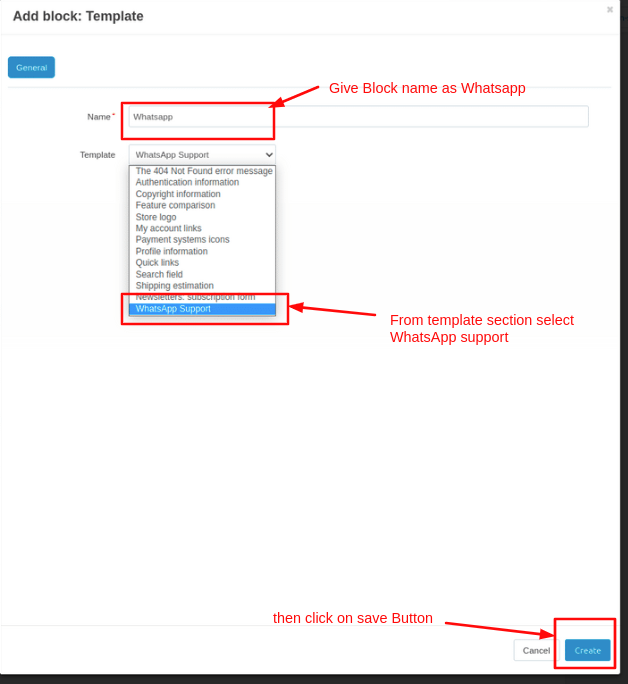
- Give Name >> WhatsApp
- Select >> WhatsApp Support
- Click on >> Create button
At Storefront
Here you see WhatsApp chat button
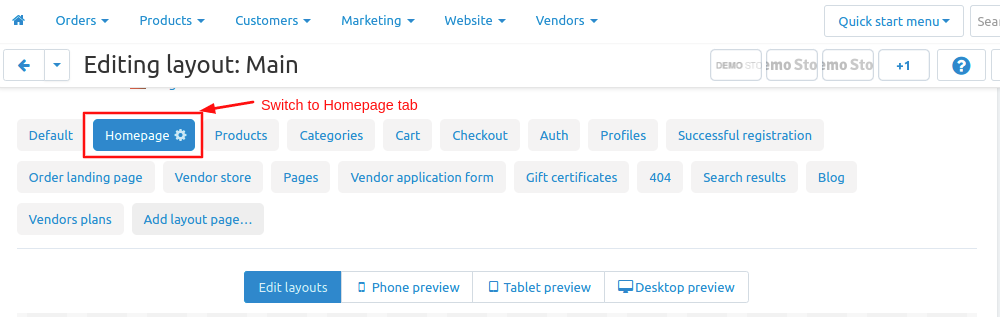
Now Setup the layout for different multiple storefront
- Select one by one storefront and repeat the same process to set up layout for all storefronts.

- Switch to Homepage tab
- Now add the block
- click on>> plus(+) button
- Add block>> Switch to create new block
- Choose >> Template
- Give Name >> WhatsApp
- Select >> WhatsApp Support
- Click on >> Create button
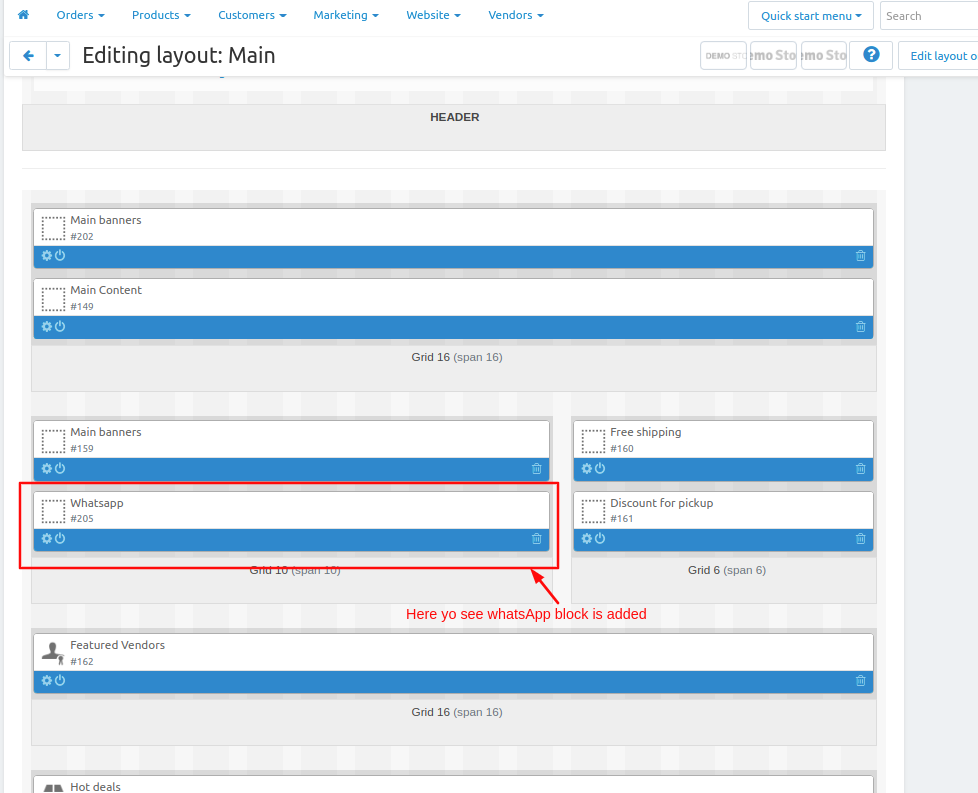
Here you see WhatsApp block is added
Tutorial Video:
Addon-Version
Version-1.0
Supported Versions:
CS-Cart, CS-Cart Multivendor 4.8.x, 4.9.x,4.10x,4.11x,4.12,4.13x, 4.14x, 4.15x, 4.16x, 4.17x, 4.18x
Support:
This add-on is developed and published by Ecarter Technologies Pvt.Ltd., a CS-Cart developer. You are guaranteed a quality add-on supported by future versions. If you need help, please contact us via email at support@ecarter.co.


© 2020 - 2025 Ecarter Technologies Pvt Ltd.