
Send Mail With Delay
The Send Mail With Delay Add-on for CS-Cart enables delayed email delivery to both admins and customers. Customize delay settings, manage events, and control email scheduling securely with cron support.
The Send Mail With Delay add-on for CS-Cart lets you send emails to customers and admins after a set delay instead of immediately. You can enable the delay for emails in both the admin and customer panels and choose which events trigger delayed messages, such as order updates or profile changes. It gives store owners more control over email scheduling, including how many emails go out per cron run, how long logs are kept, and a custom cron password to protect the process. It suits CS-Cart store owners who want to schedule and manage outgoing email more carefully rather than sending every notification the moment an event happens.

The Send Mail With Delay Addon for CS-Cart helps improve email communication by sending messages to both customers and admins after a set delay. You can enable the delay for emails in both the admin and customer panels and select events like order updates or profile changes to trigger delayed emails. It also lets you control how many emails are sent per cron command, decide how long to keep logs for better management, and protect the process with a personalized cron password for added security.
This addon offers better control over email scheduling and ensures smoother communication. Automating delayed email delivery, it improves workflow efficiency, keeps messages organized, and maintains a professional and secure communication experience for both admins and customers.
Features:
- Delay Messages: Send emails with a delay.
- Customer and Admin Support: Messages are sent to both customer and admin with a delay.
- Enable Delay: Enable delay for both admin and customer panel emails effortlessly.
- Event Options: Choose from various events like order updates and profile changes.
- Specify Email Quantity: Decide how many emails to send per cron command.
- Clear Log: Set days to keep your log clear for better organization.
- Efficient Communication: Manage email communications efficiently.
- Improved Control: Gain better control over email scheduling.
- Customizable Settings: Tailor settings according to your preferences.
- Streamlined Operations: Enhance operations with simplified email management.
- Multi-vendor support: Well integrated with CS-Cart multi-vendor.
Installation
How To Install Send Mail With Delay Add-on
https://store.ecarter.co/blogs/how-to-install-addon/
Configuration:
Let's Check How the Addon Settings Works:
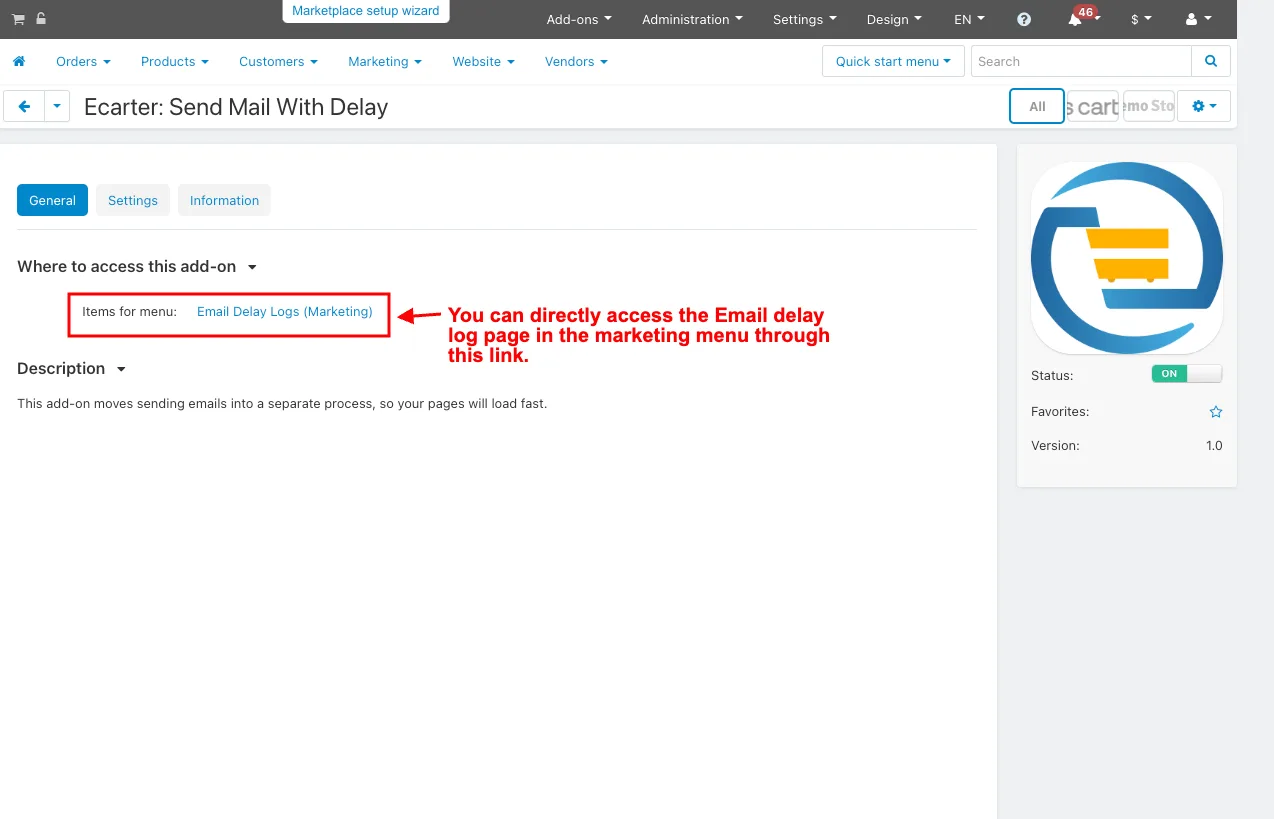
- Go to the general tab.
- Items for menu: You can directly access the Email delay log page in the marketing menu through this link.
- Switch on the settings tab.
- Enable Delay: This Setting enables email messages to be sent with a delay.
- Enable Admin Panel Delay: This setting enables delaying sent emails related to events in the admin panel.
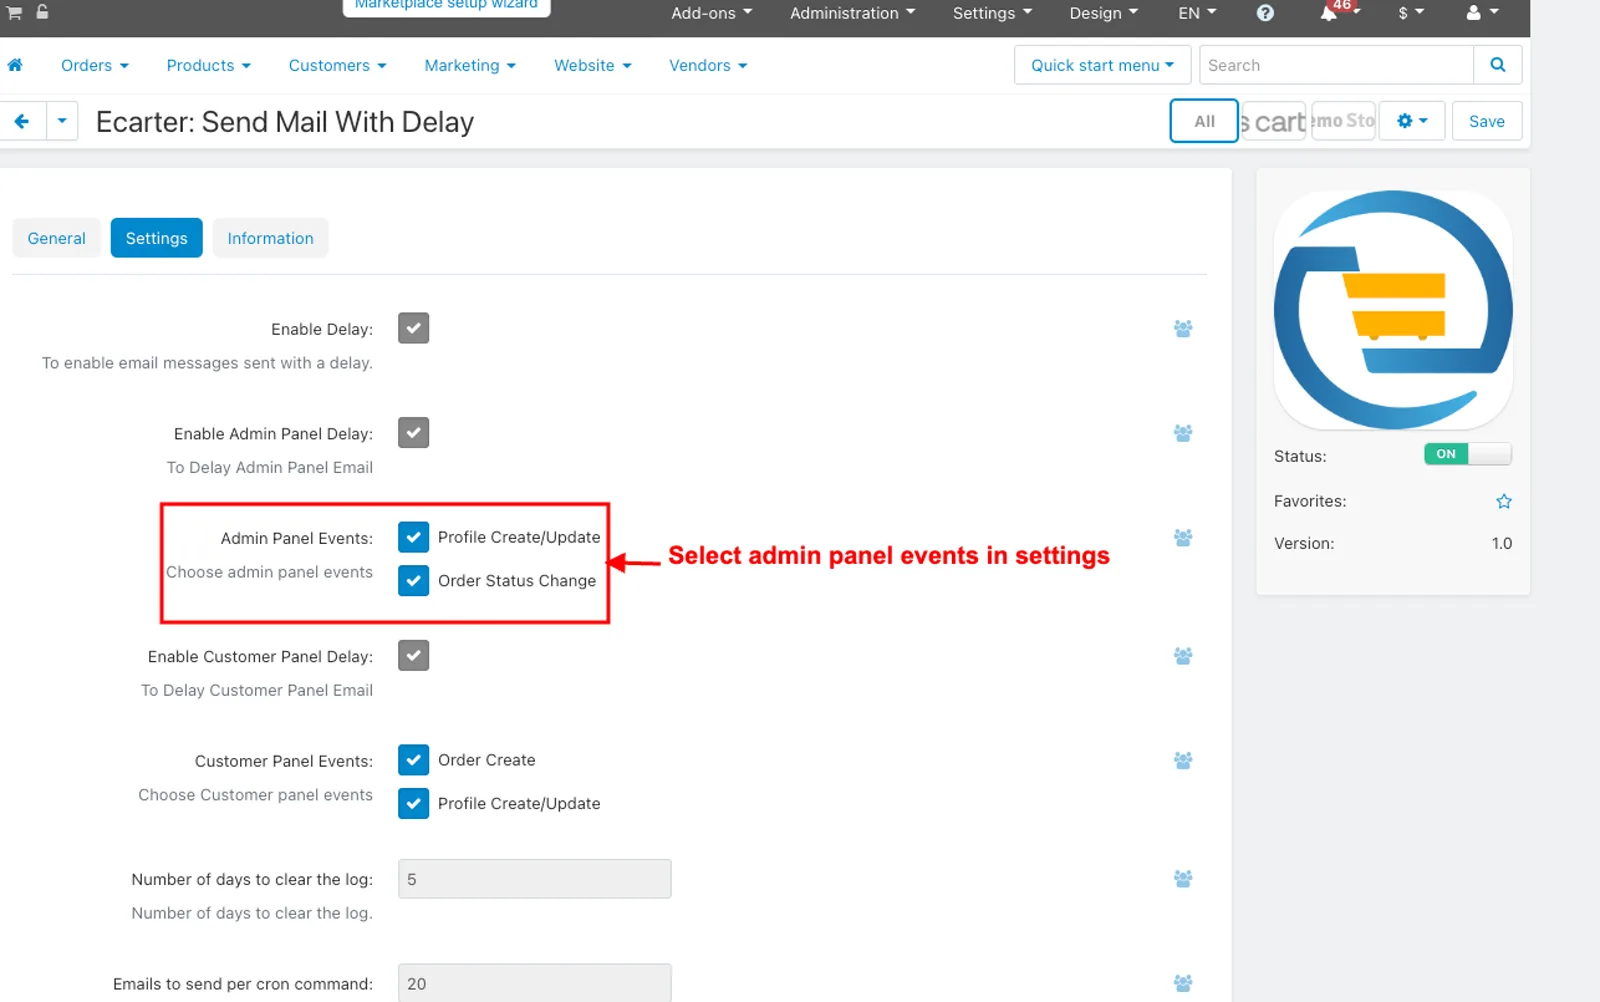
- Admin Panel Events: Here you can select the specific events in the admin panel for which you want to email notifications. The listed events include Profile Create/Update and Order Status Change.
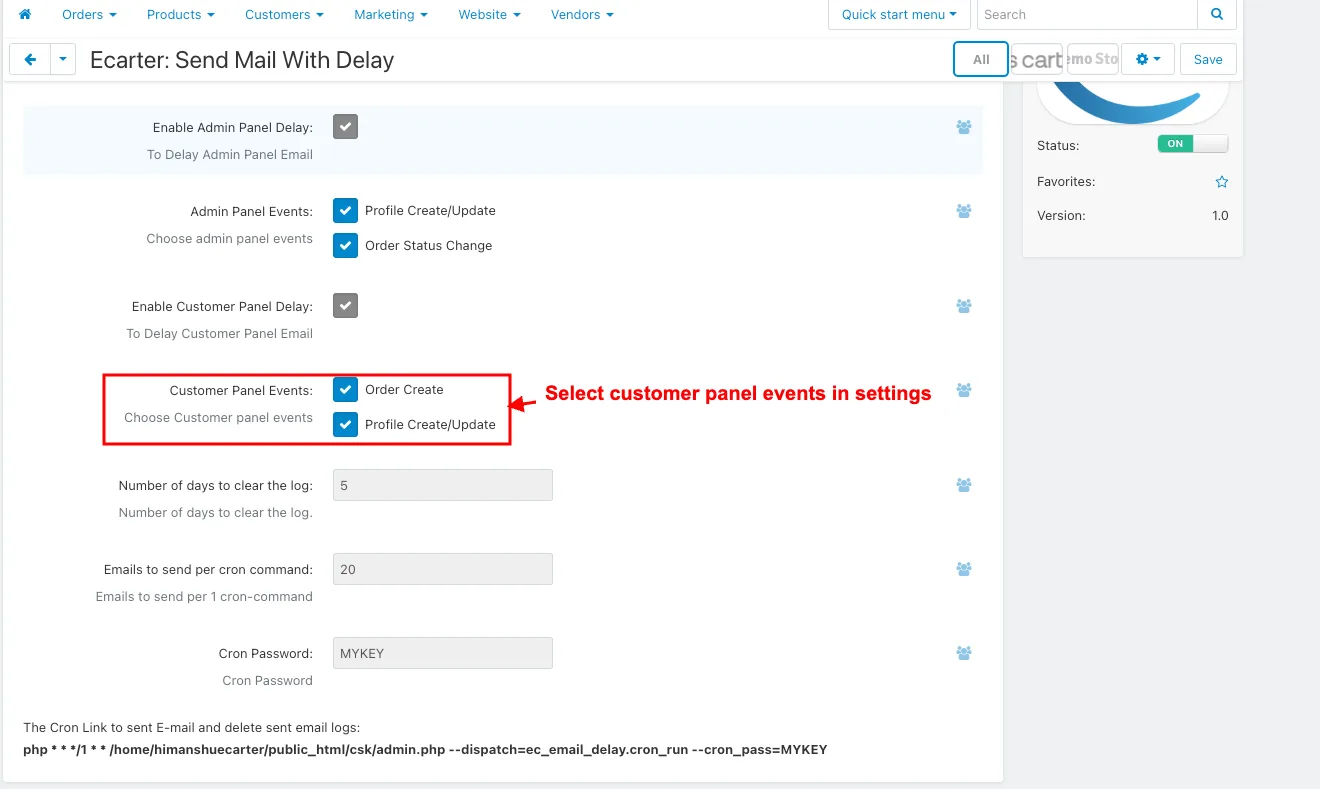
- Enable Customer panel Delay: This setting enables delaying sent emails related to events in the customer panel.
- Customer panel Events: Here you can select the specific events in the customer panel for which you want to email notifications. The listed events include Order Create, and Profile Create/Update.
- Number of days to clear the log: Specifies the number of days after which log entries should be cleared.
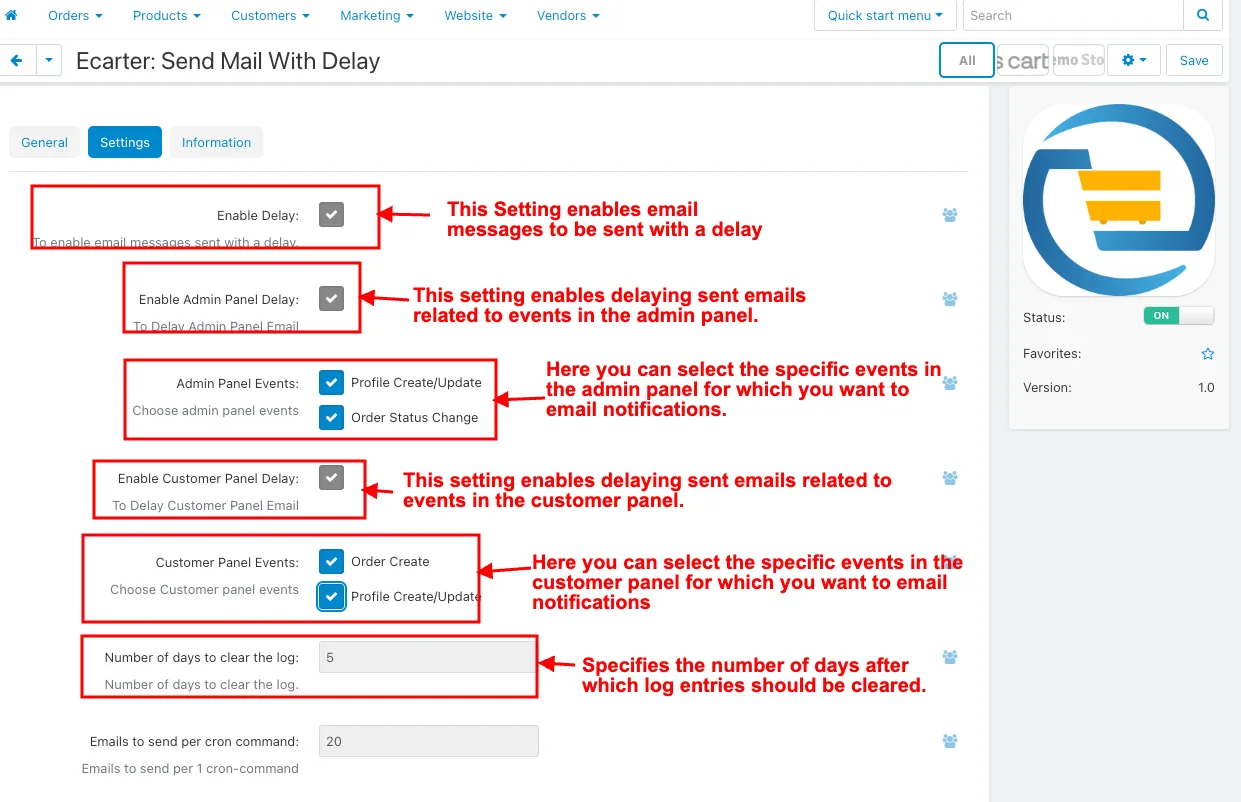
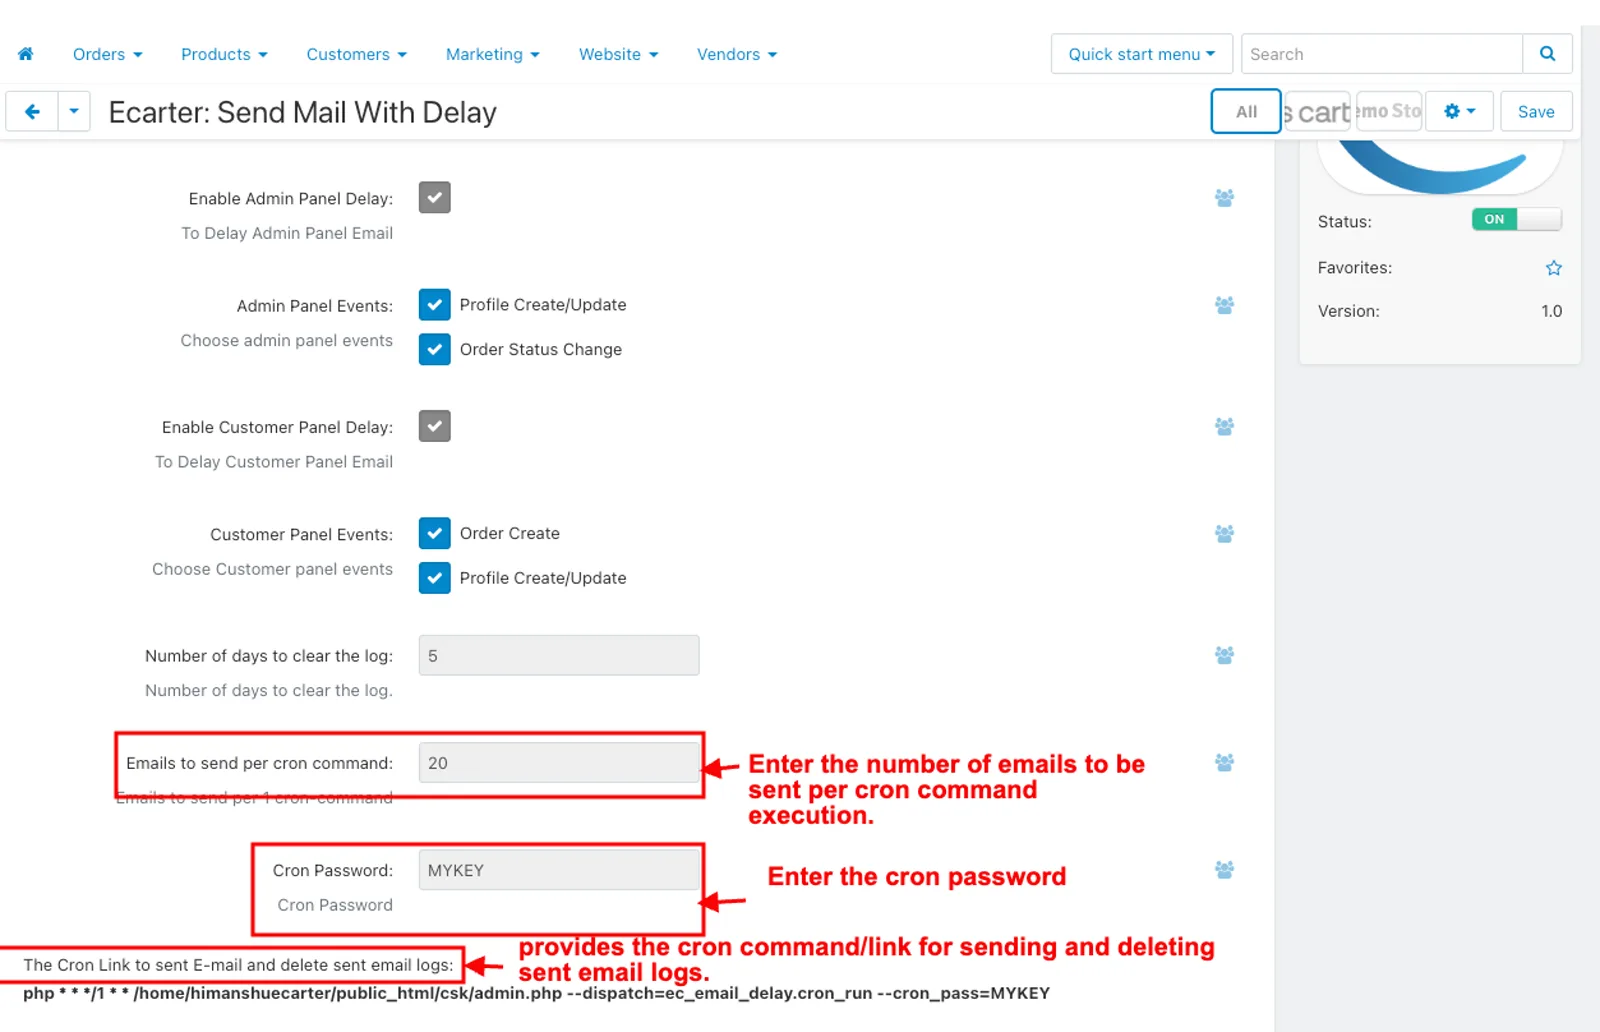
- Emails to send per cron command: Enter the number of emails to be sent per cron command execution.
- Cron Password: Enter the cron password.
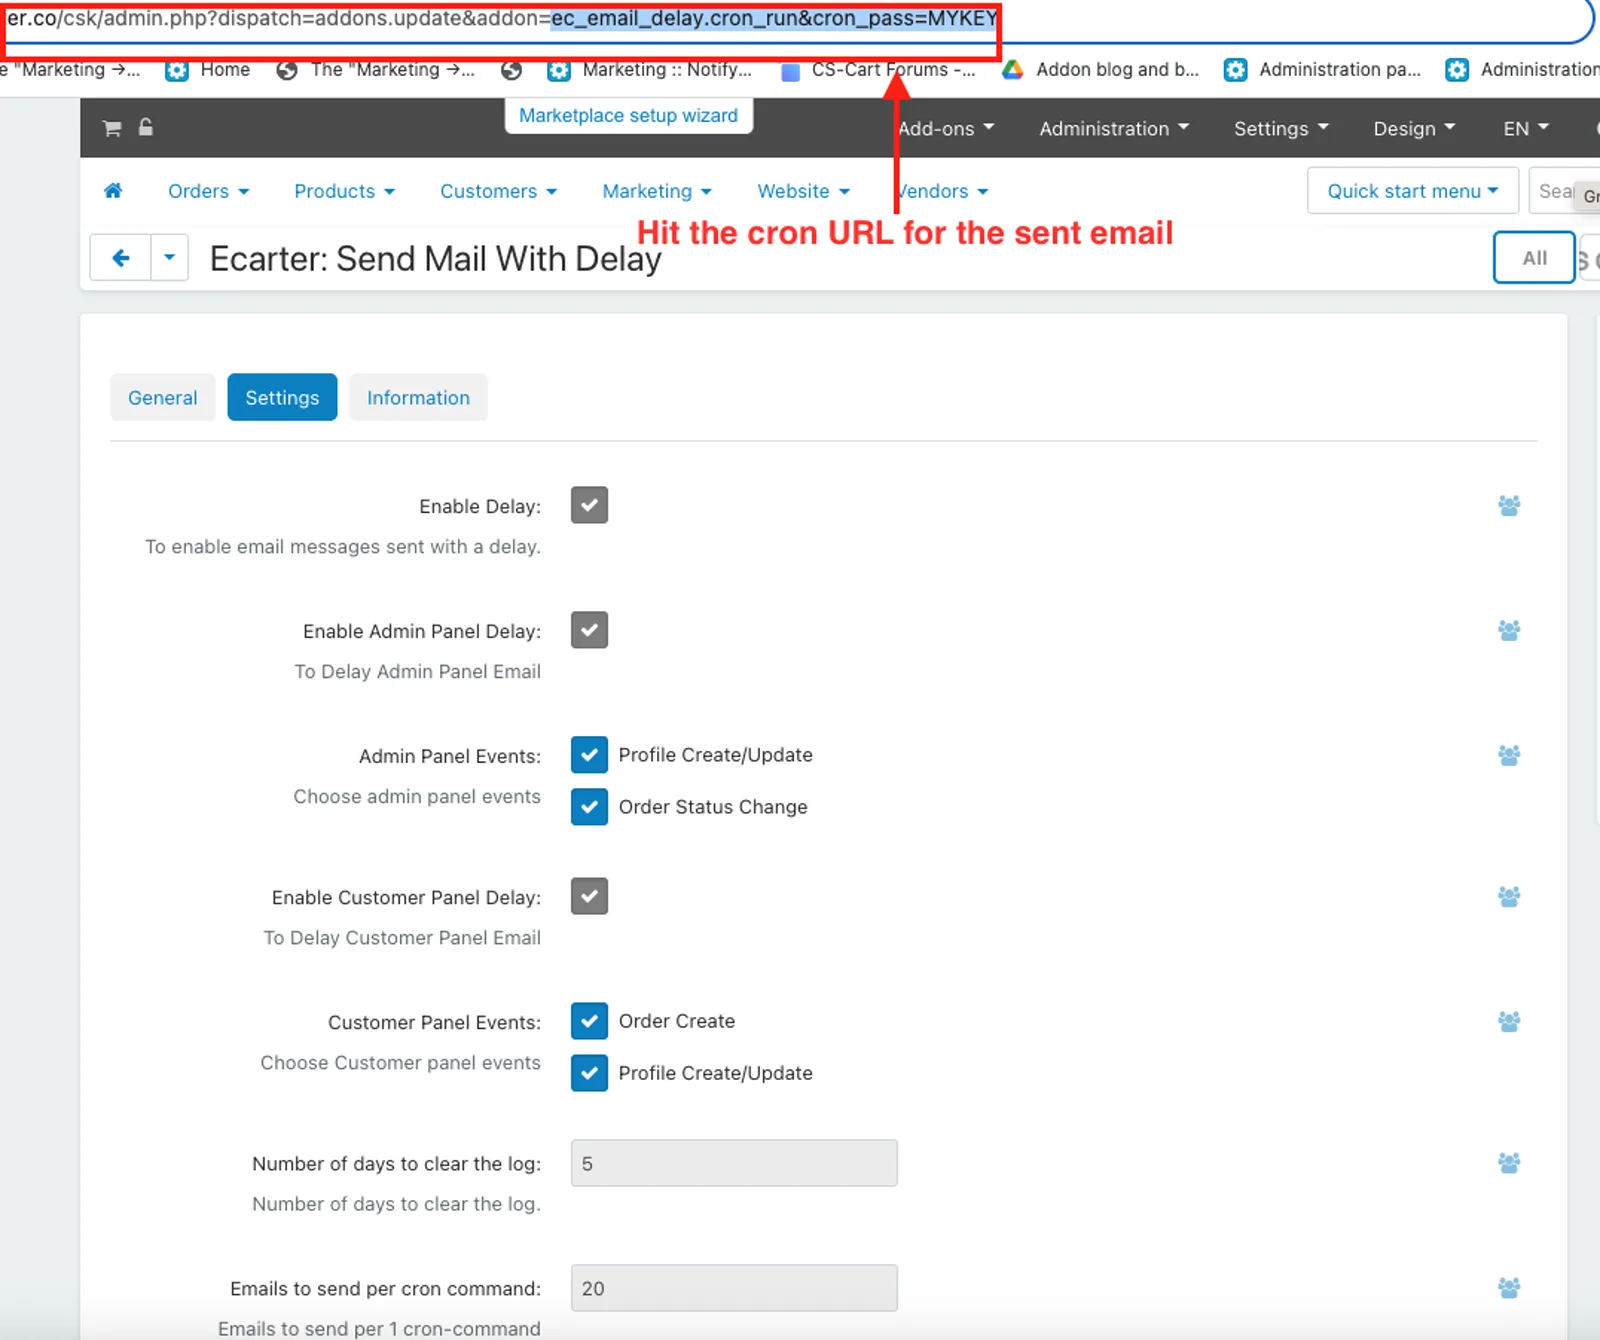
- The Cron Link to send emails and delete sent email logs: provides the cron command/link for sending and deleting sent email logs.
How to Work this Addon on the Admin Panel:
- Select admin panel events in settings.
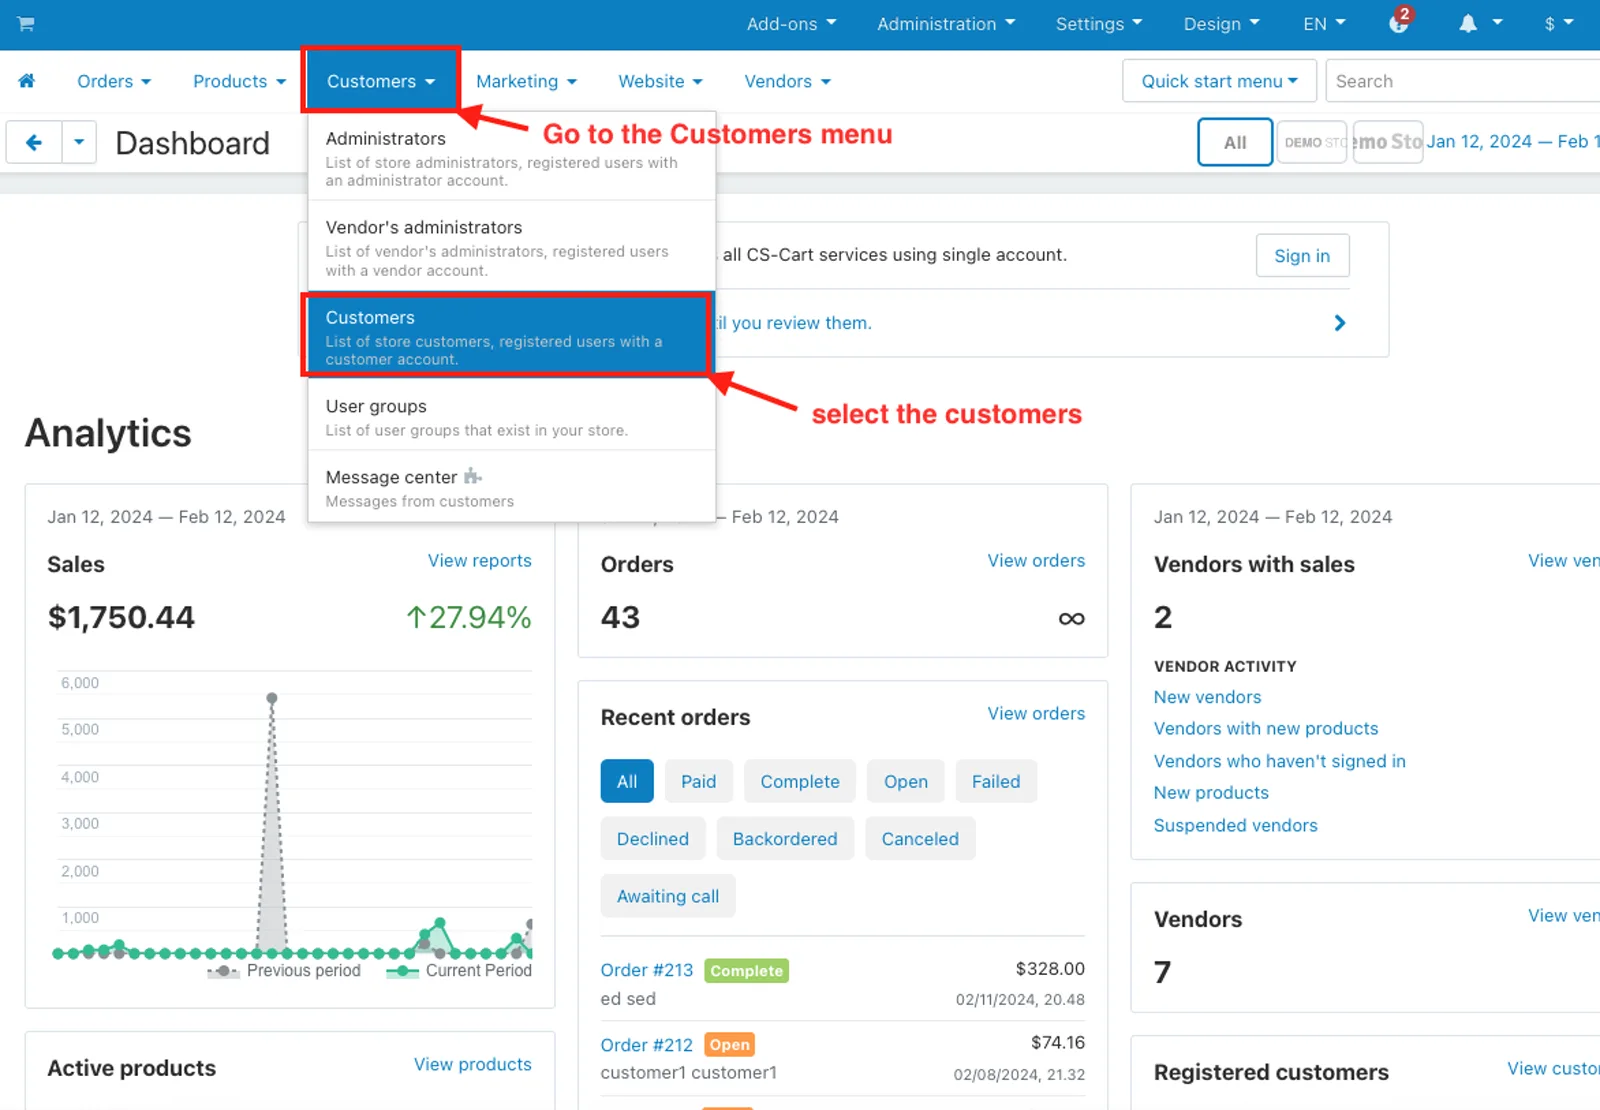
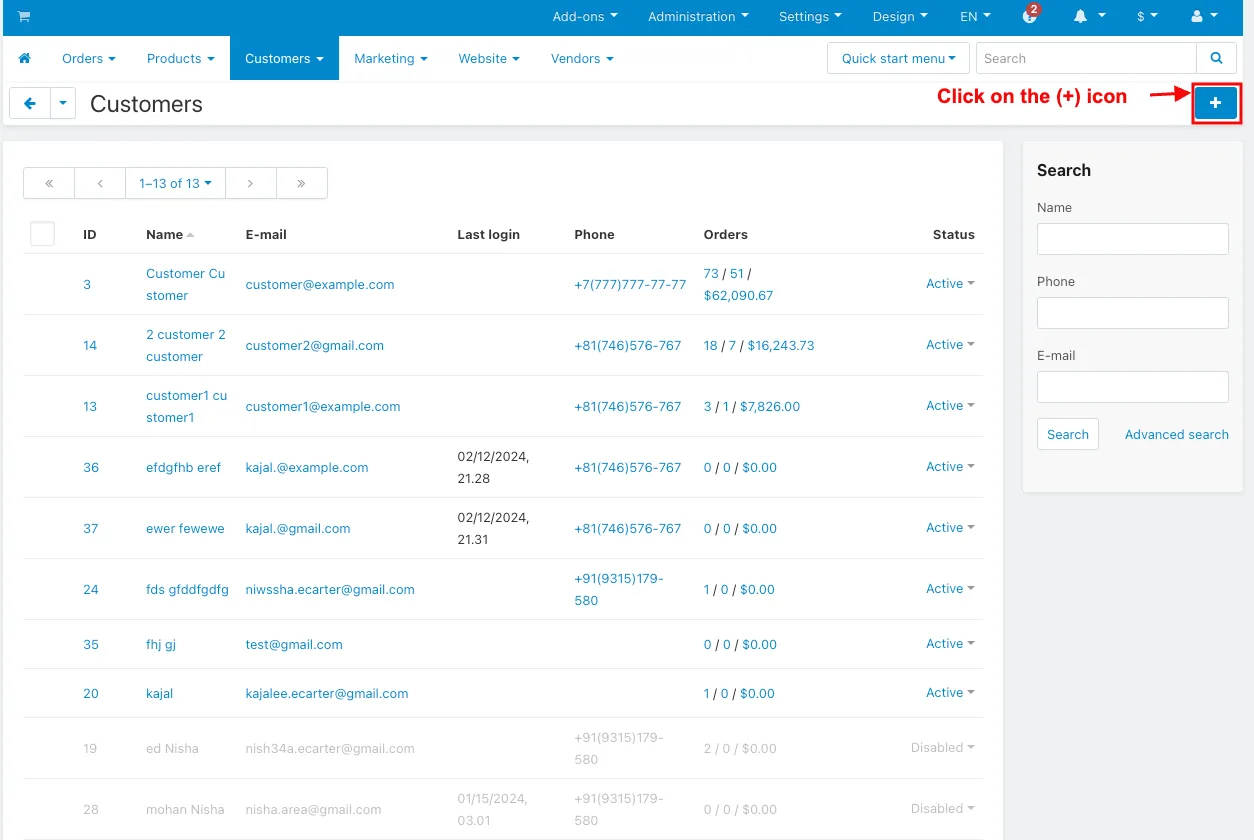
- Go to the Customers >> Customers menu.
- Click on the (+) icon in the top right corner to create the new profile.
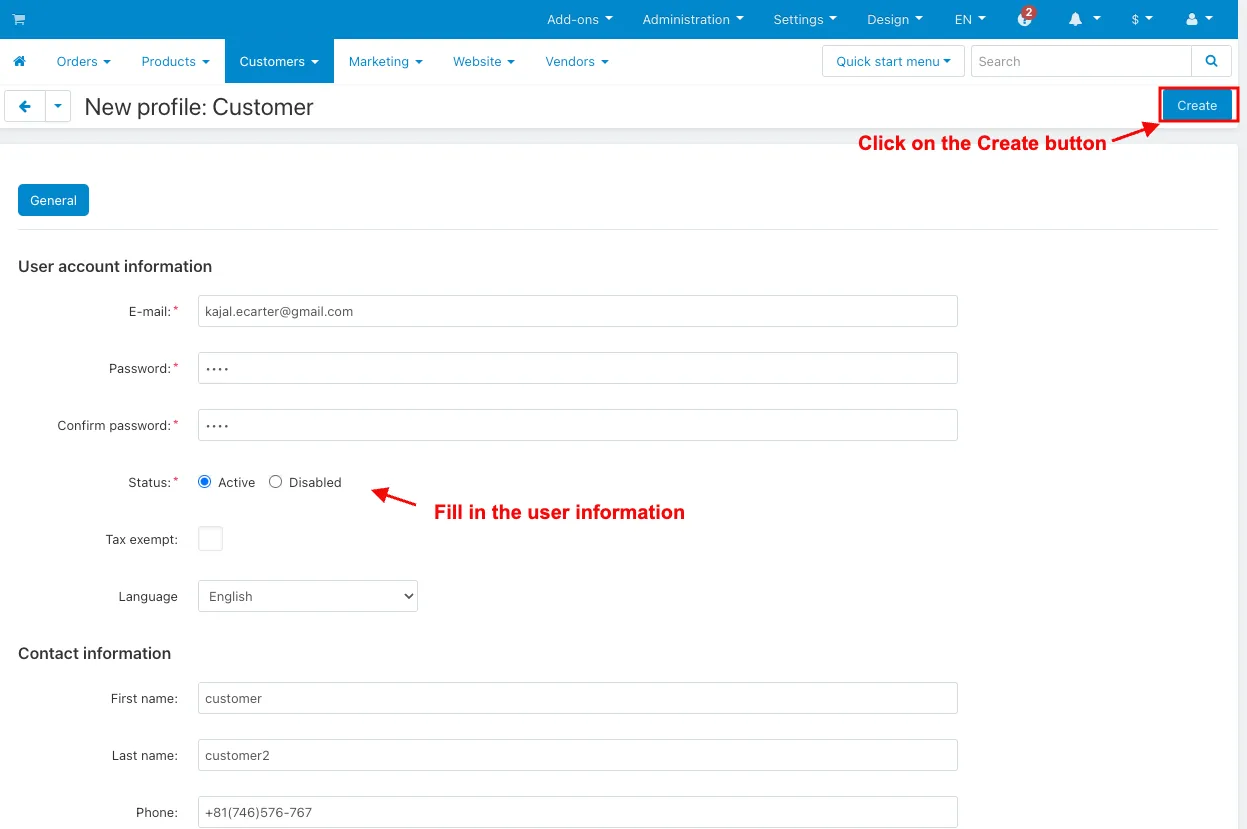
- Fill in the user information.
- Click on the Create button.
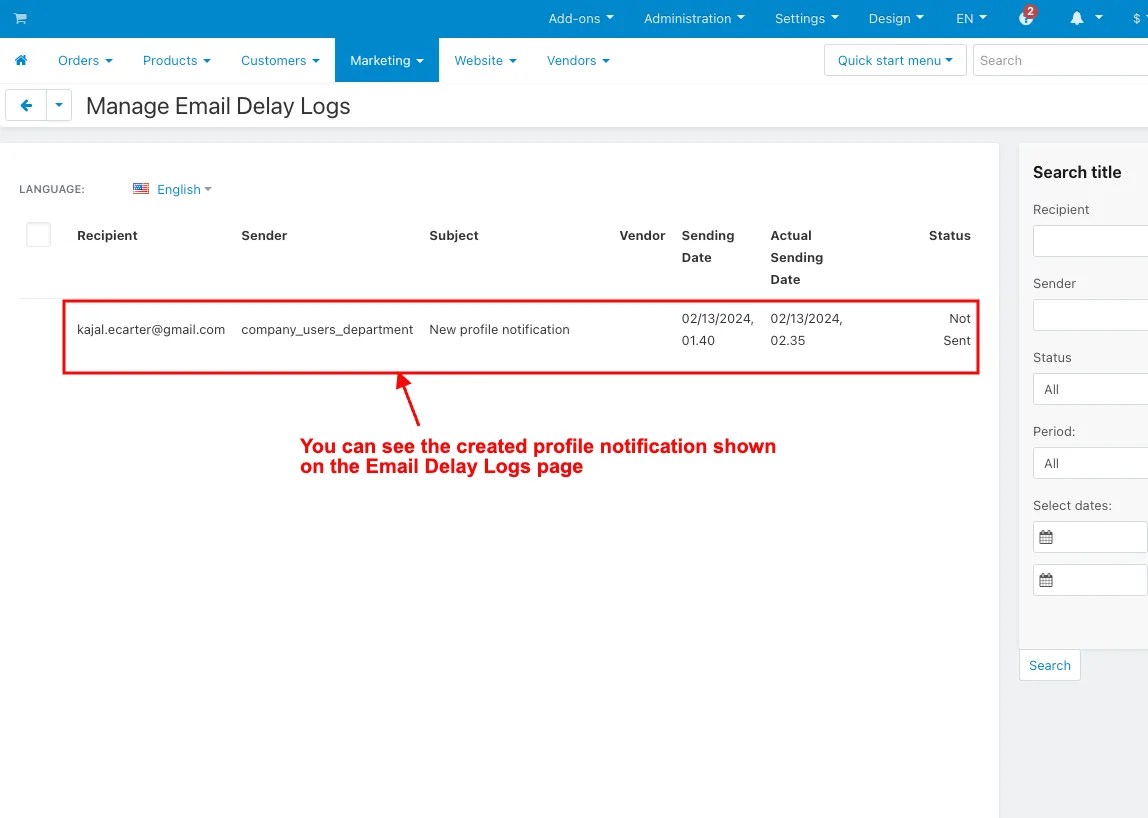
- You can see the created profile notification shown on the Email Delay Logs page.
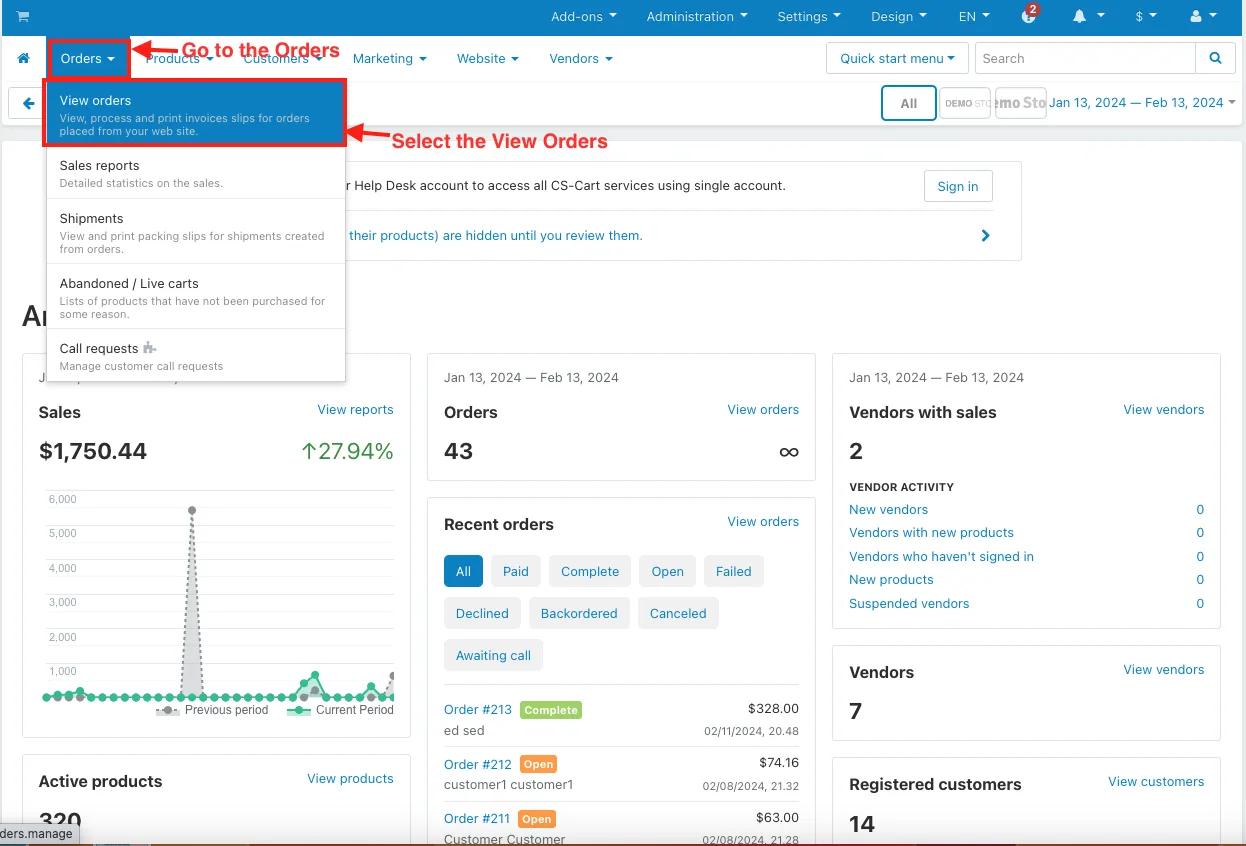
- Go to the Orders.
- Select the View Orders.
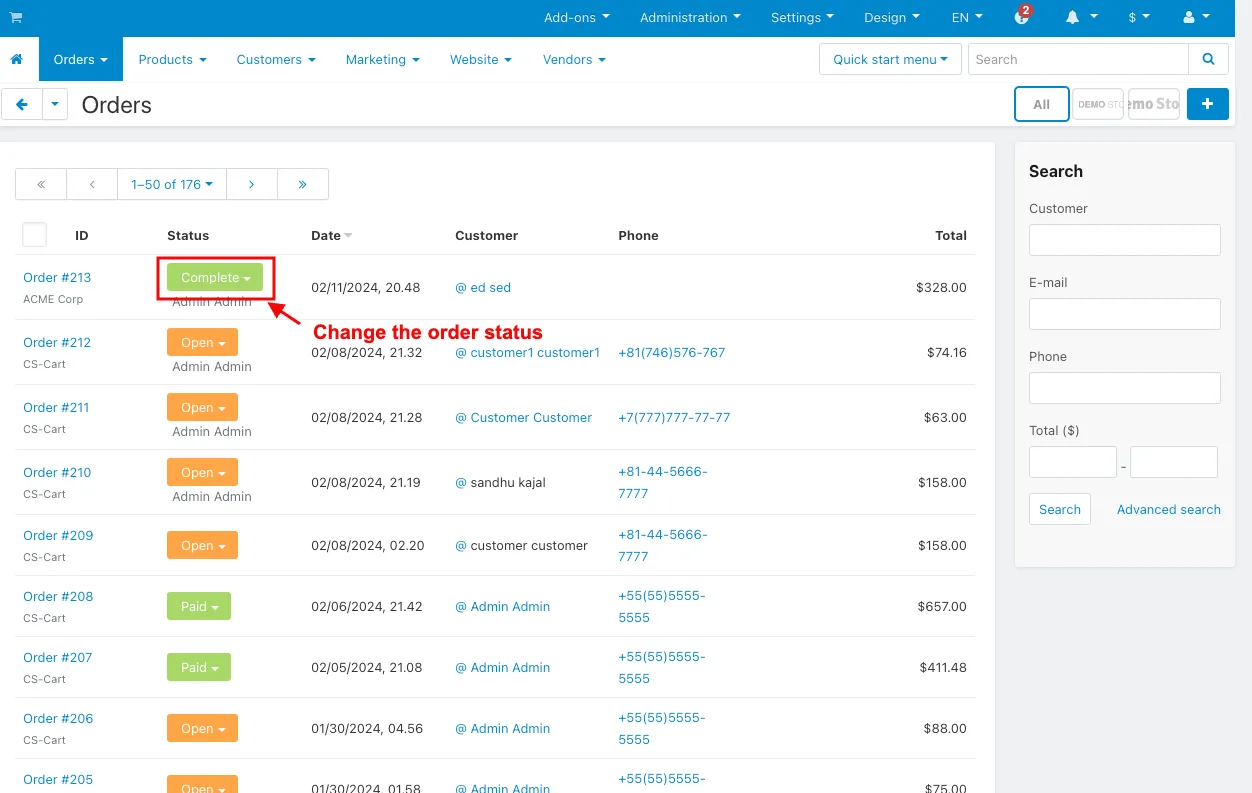
- Change the order status.
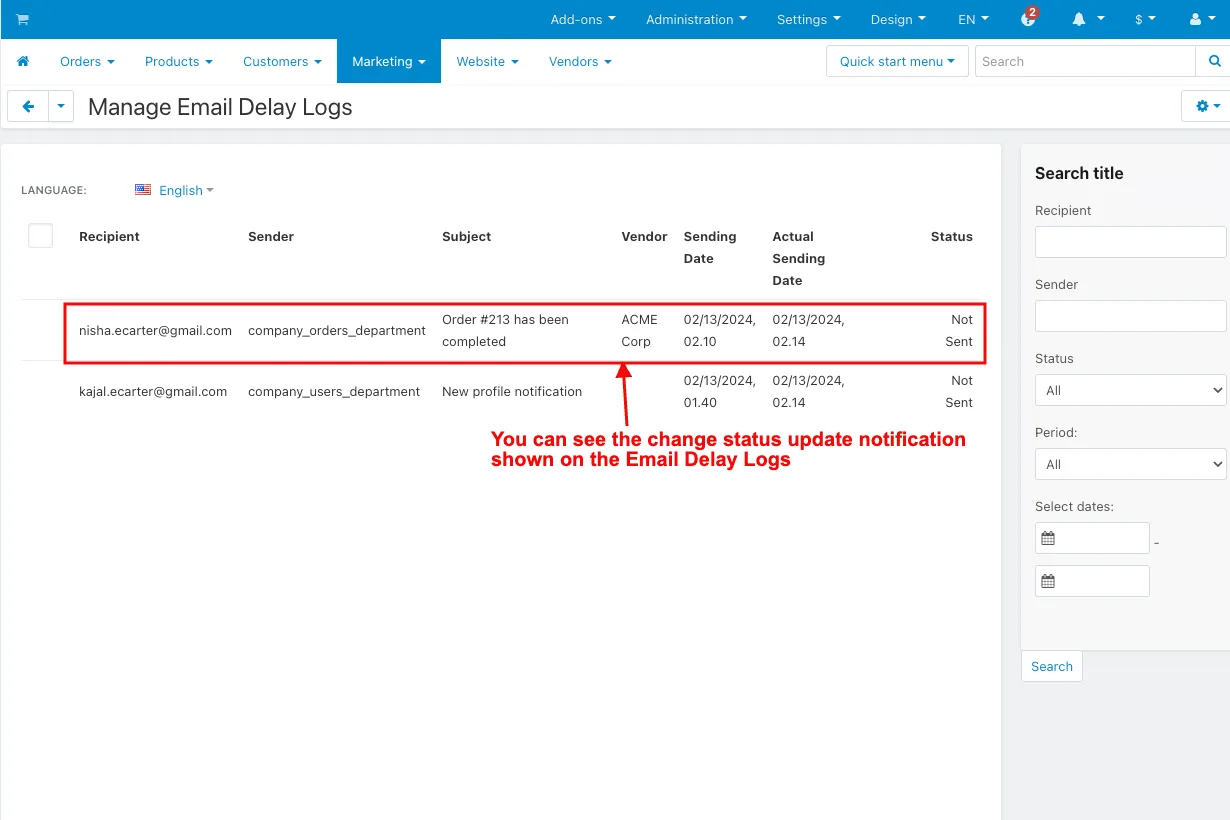
- You can see the change status update notification shown on the Email Delay Logs.
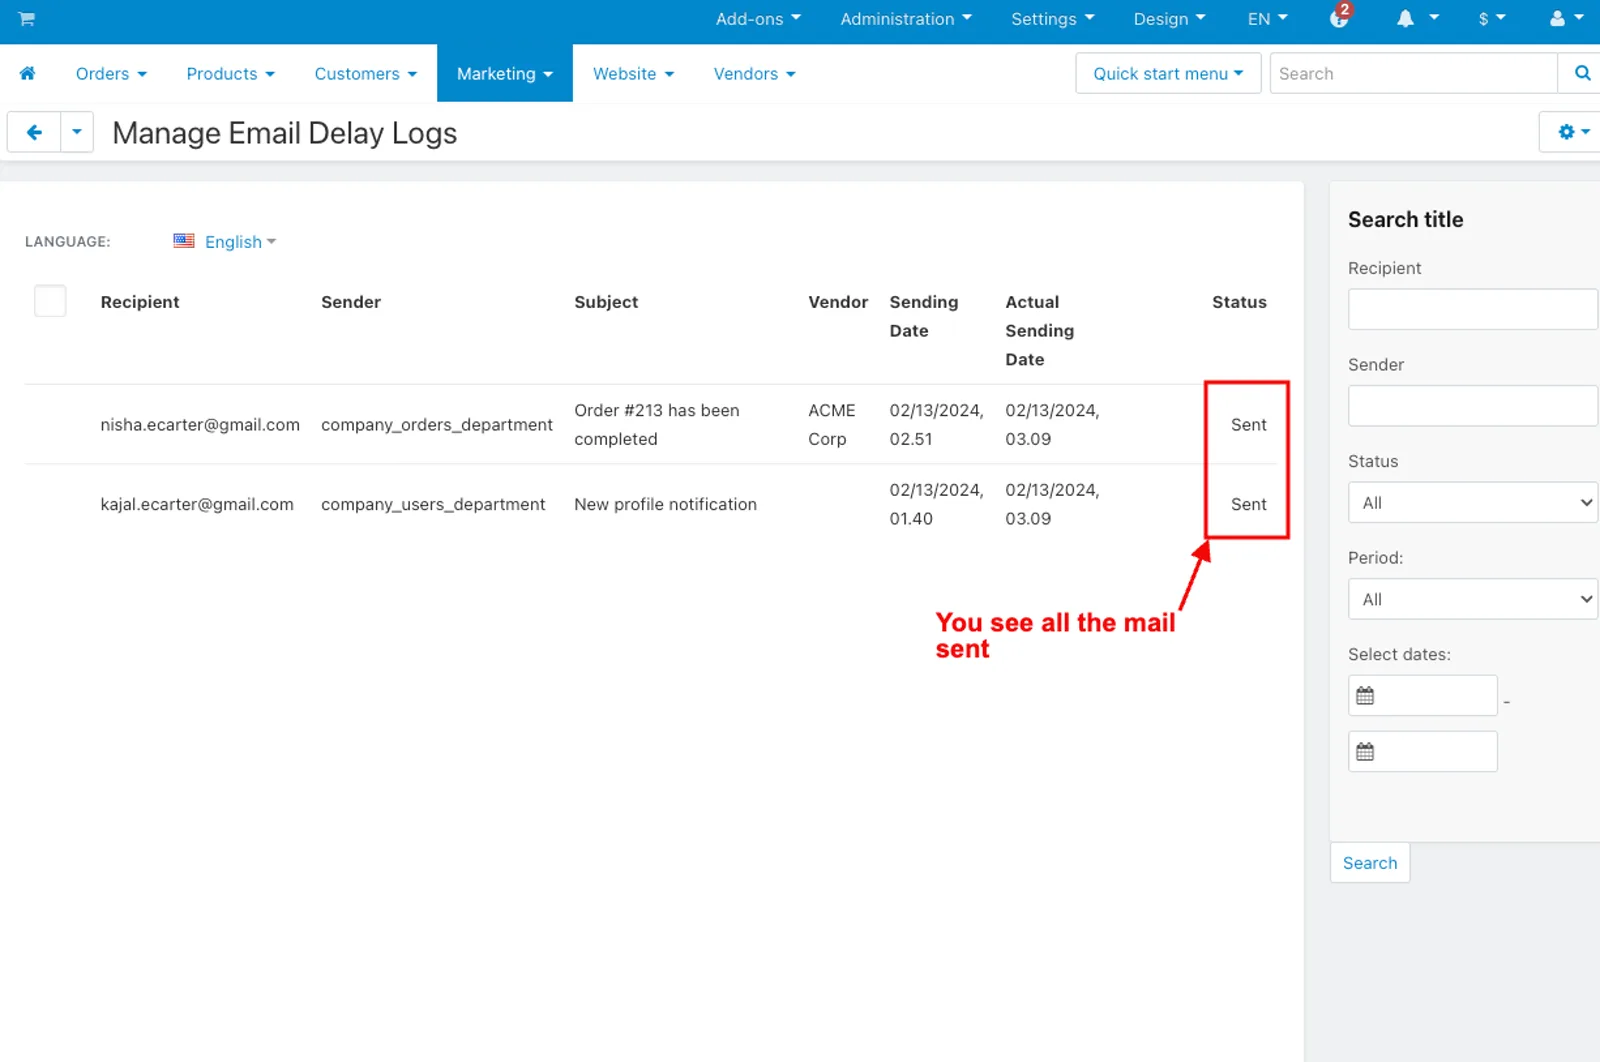
- Hit the cron URL for the sent email.
- You see all the mail sent.
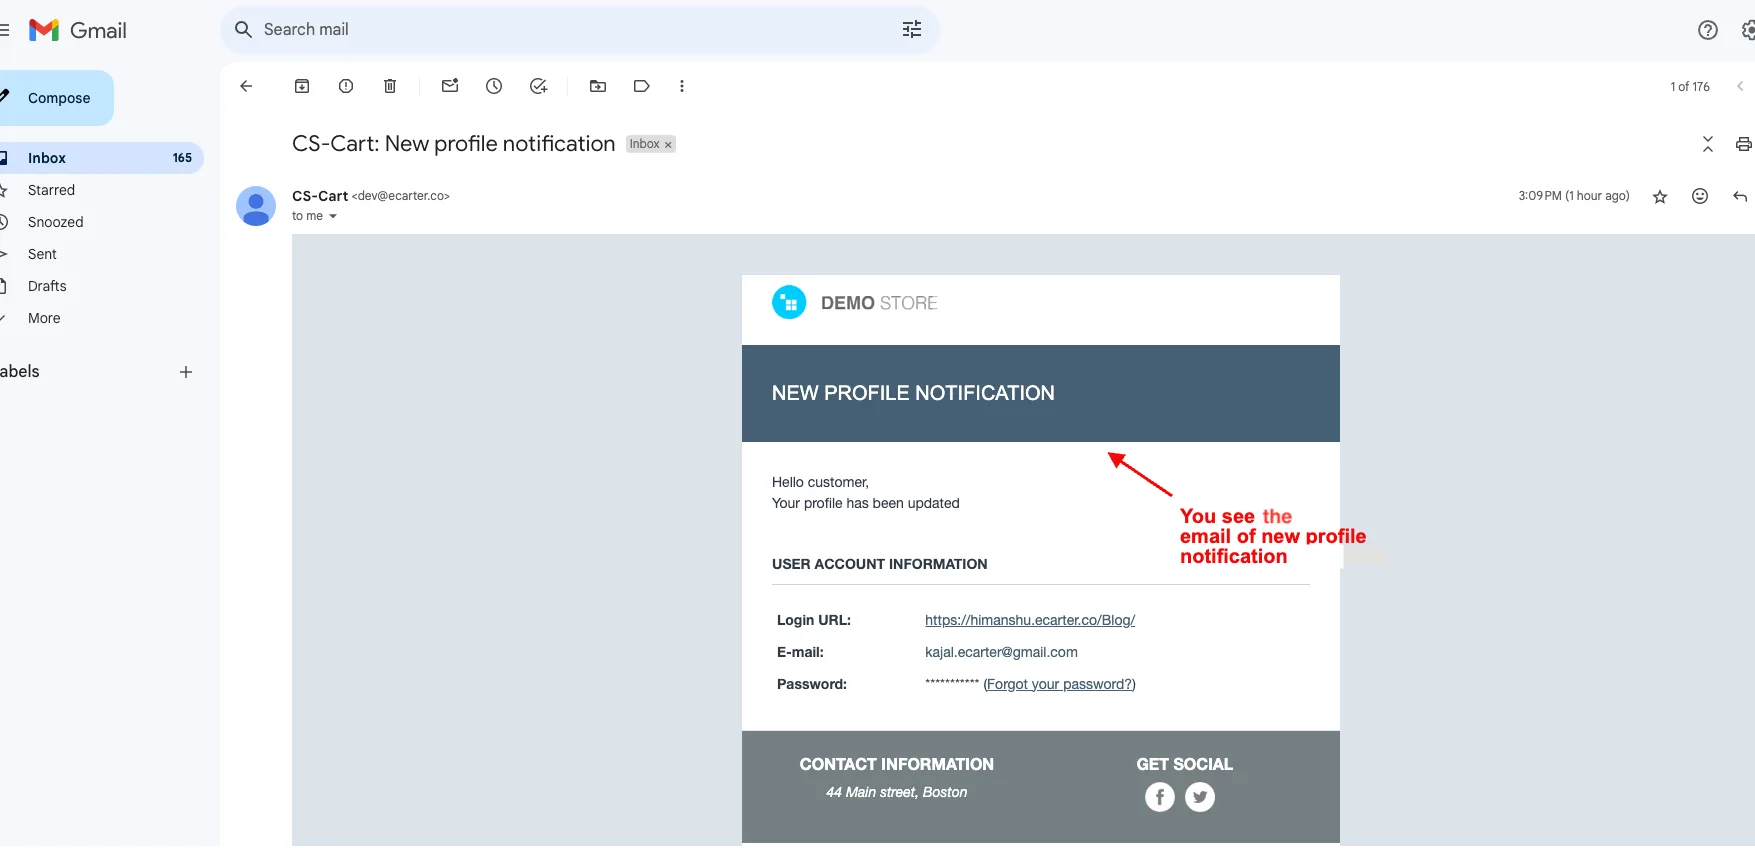
- You see the email of the new profile notification.
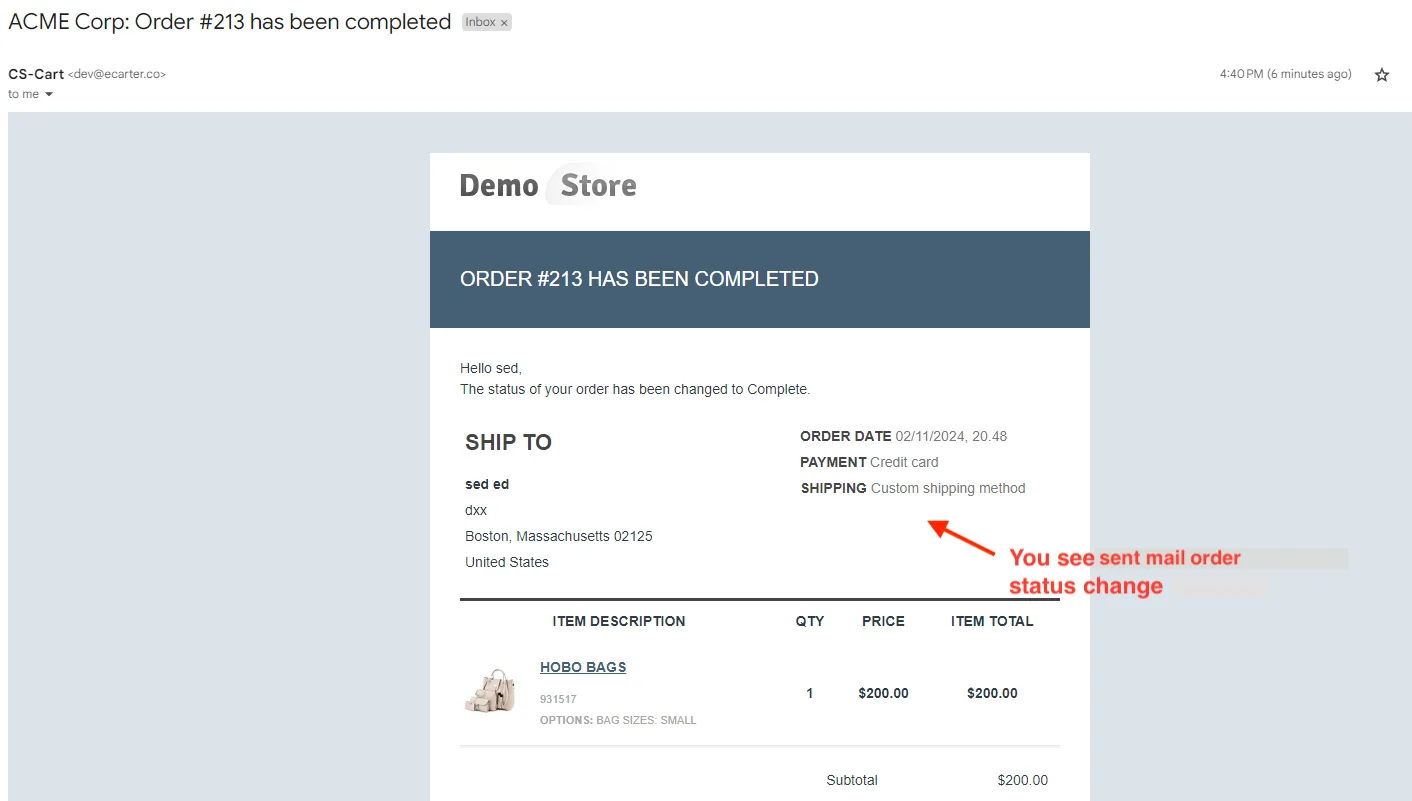
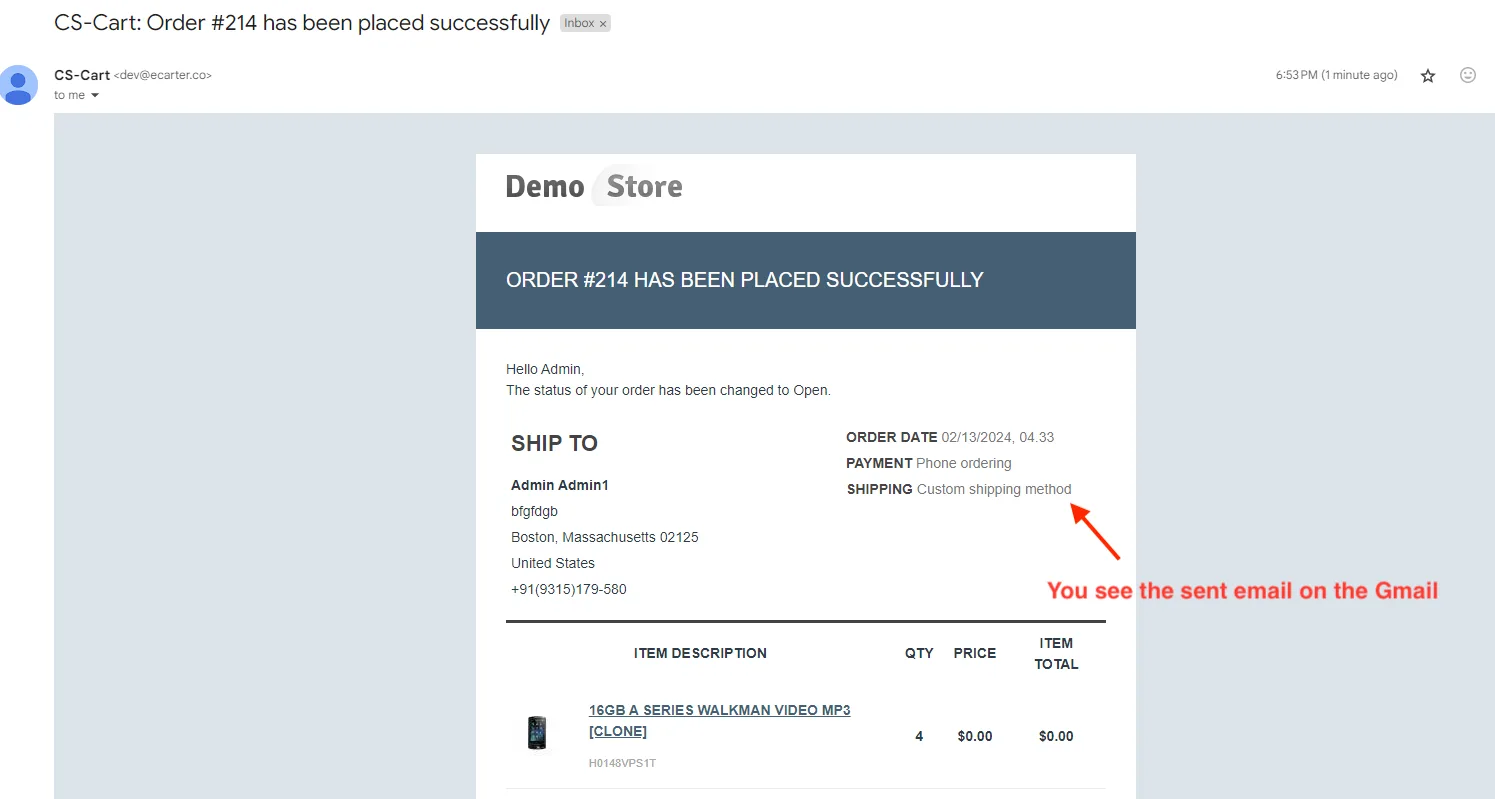
- You see the mail of the order status change.
How to Work this Addon on the Customer Panel:
- Select customer panel events in settings.
- Go to the Storefront.
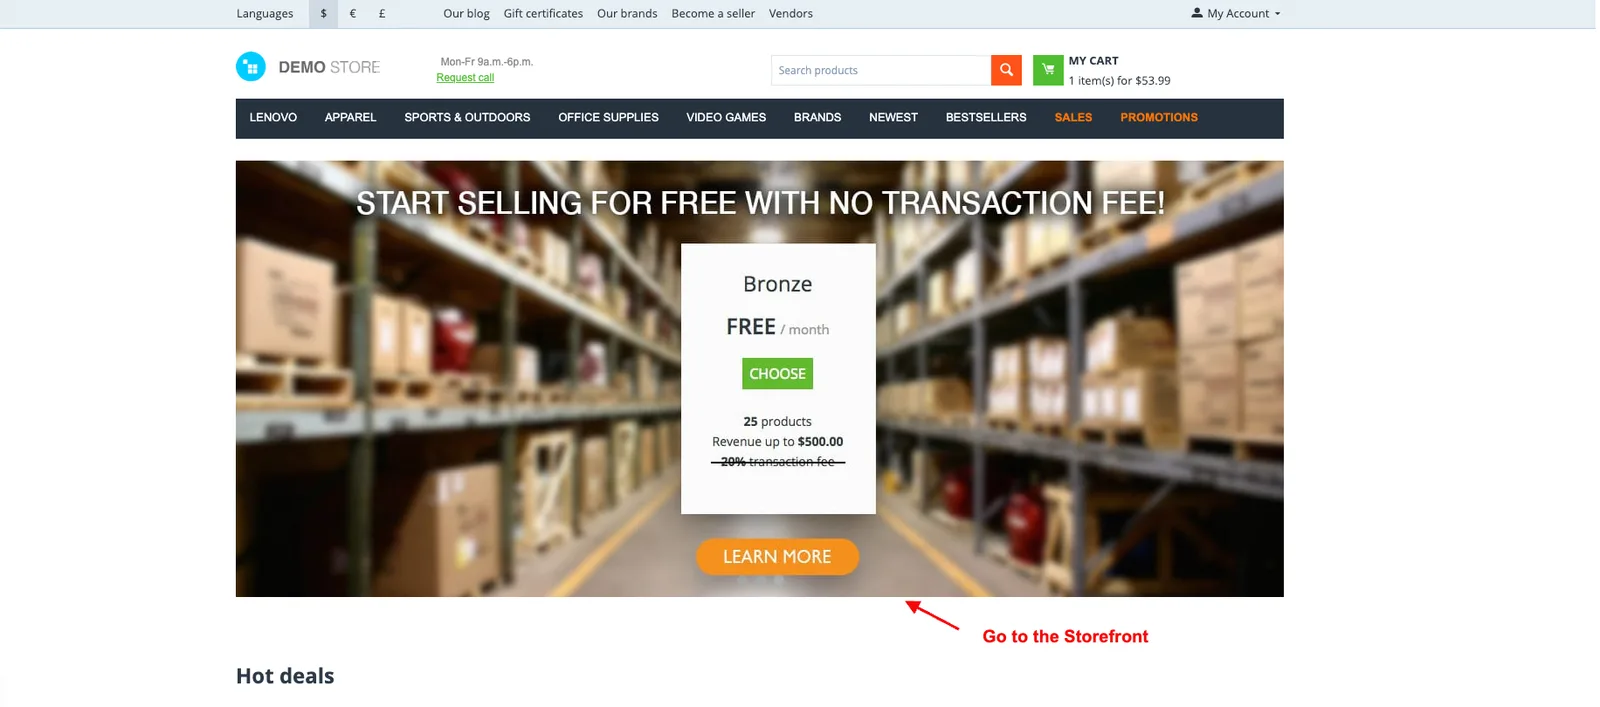
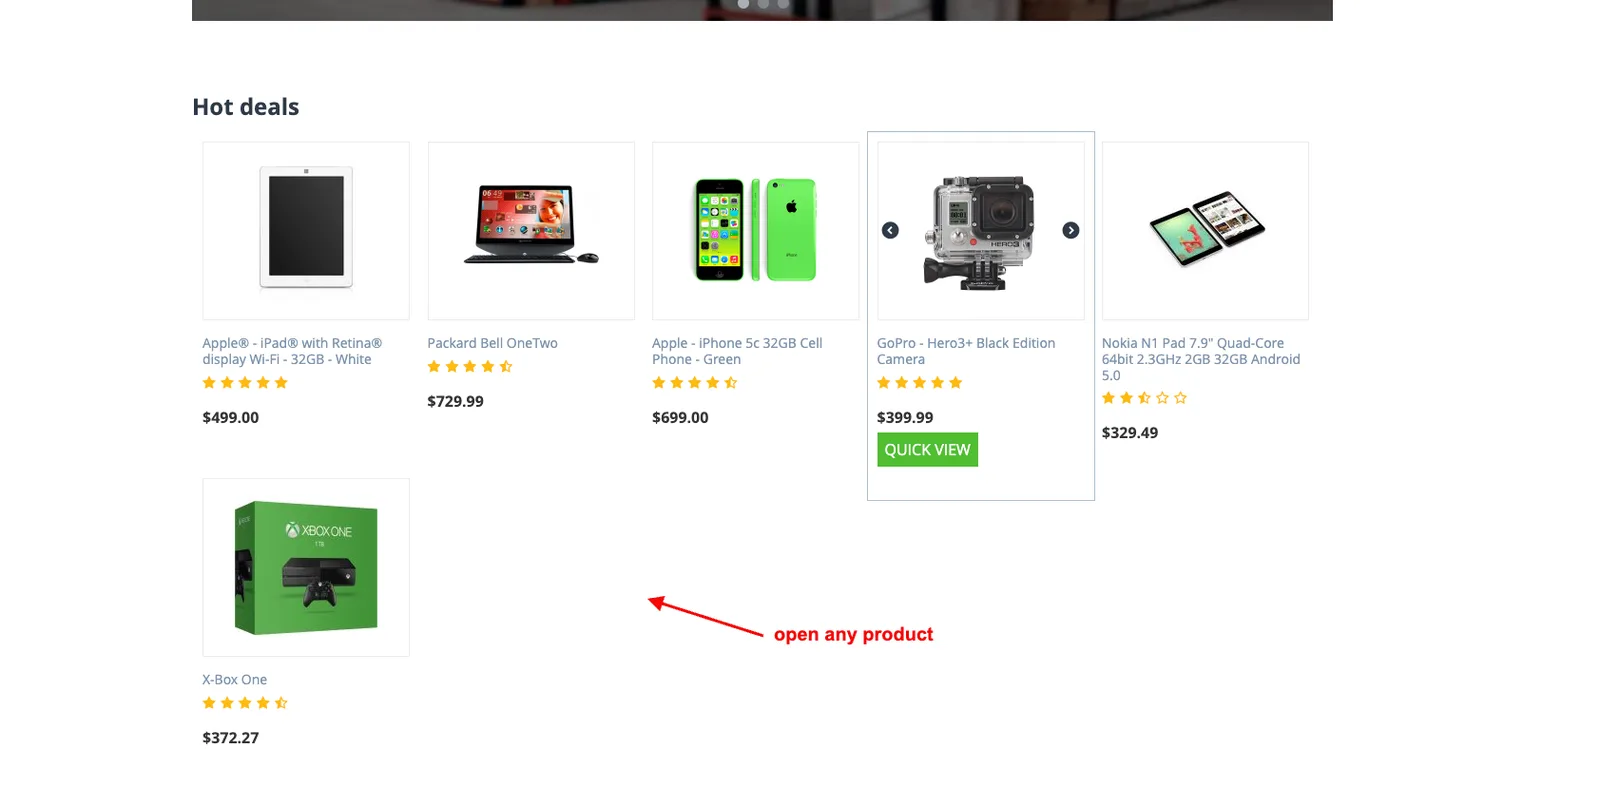
- Open any product.
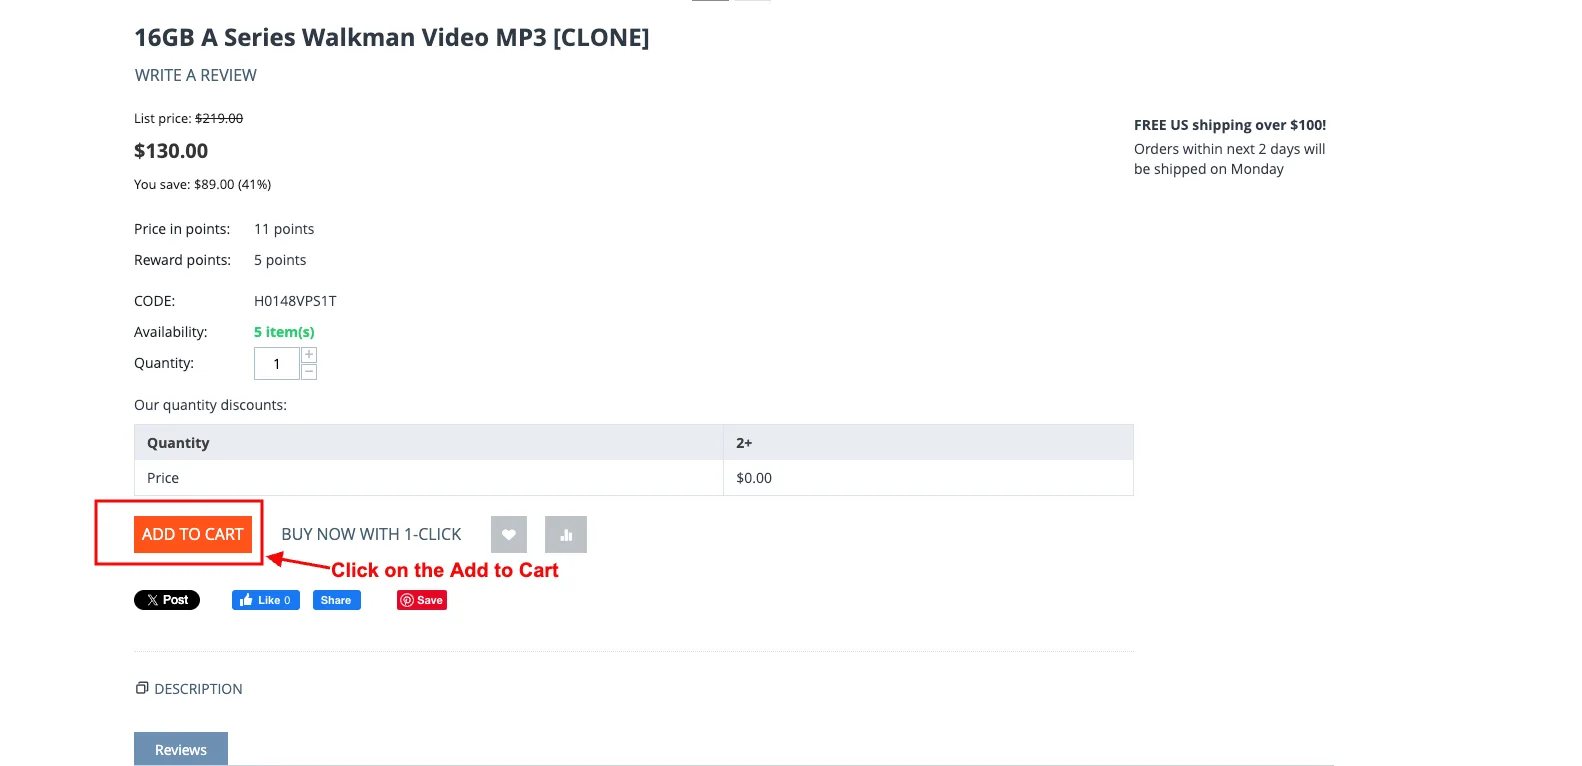
- Click on the Add to Cart.
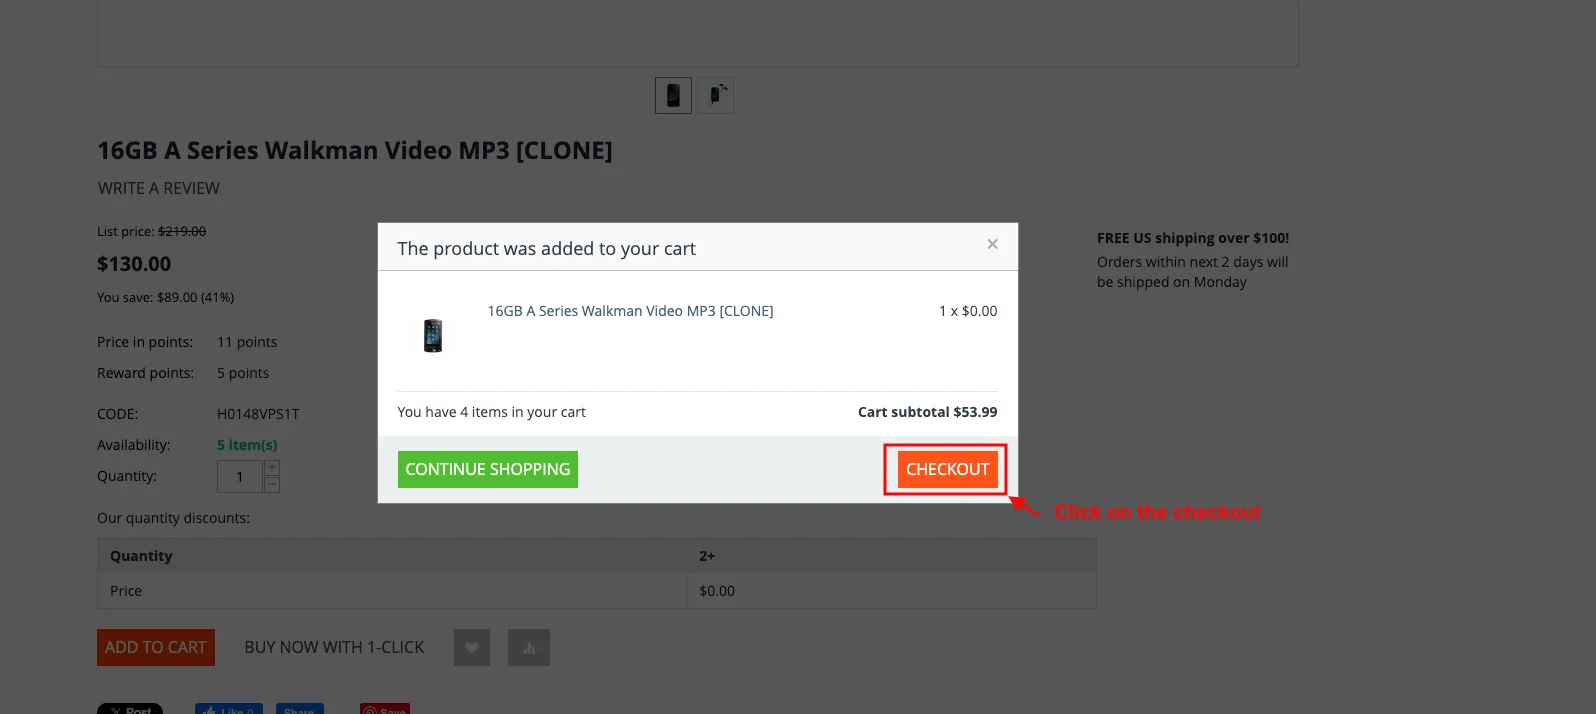
- Click on the checkout.
- Click on the place order.
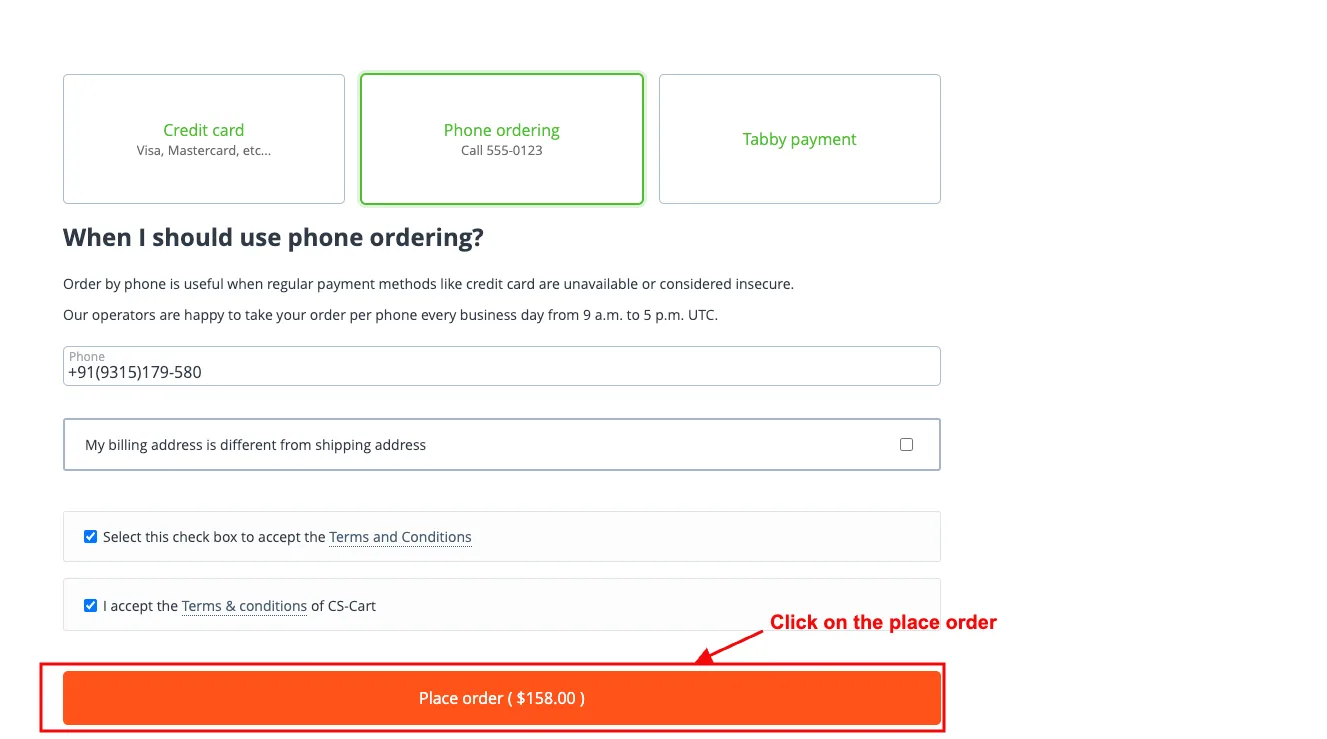
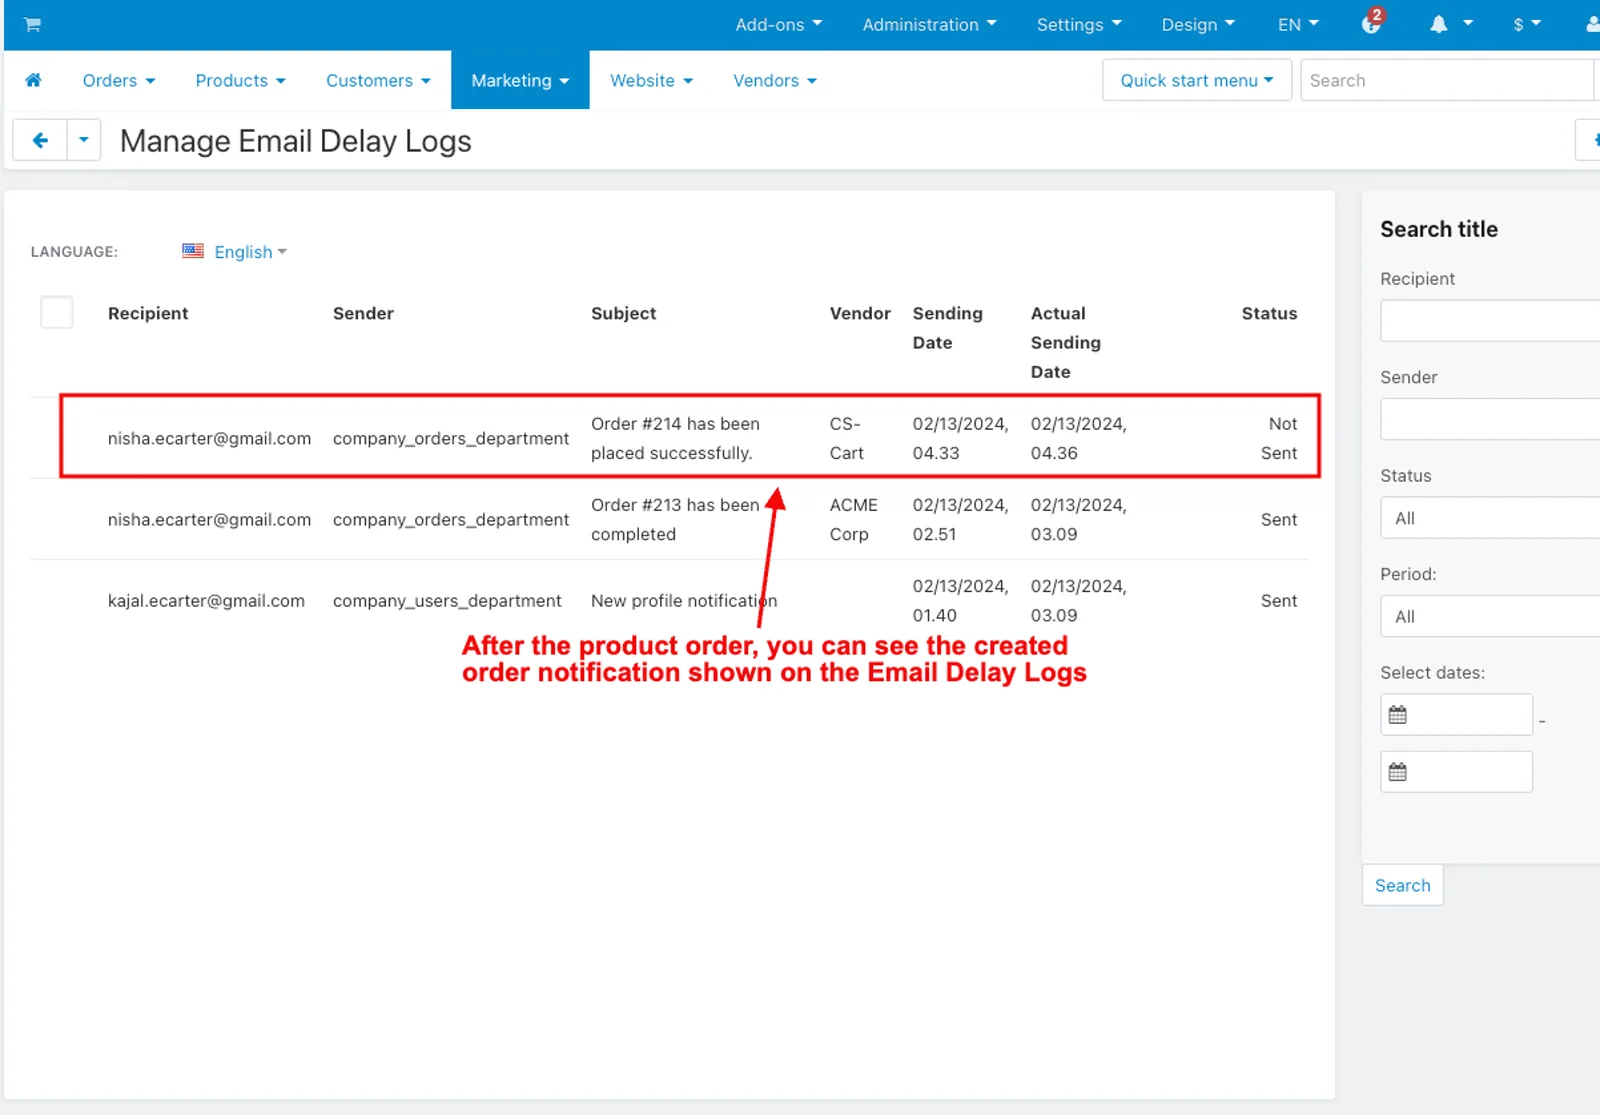
- After the product order, you can see the created order notification shown on the Email Delay Logs.
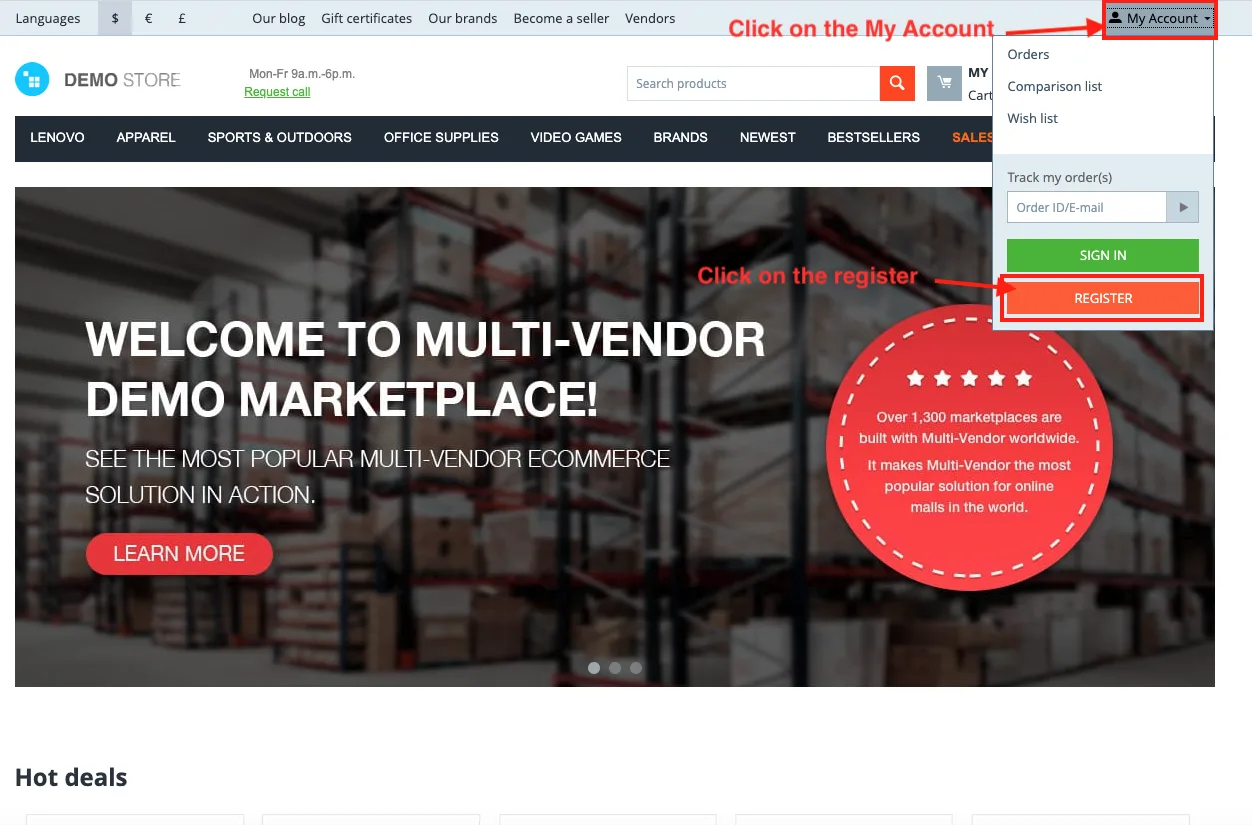
- Click on the My Account to create an account.
- Click on the register.
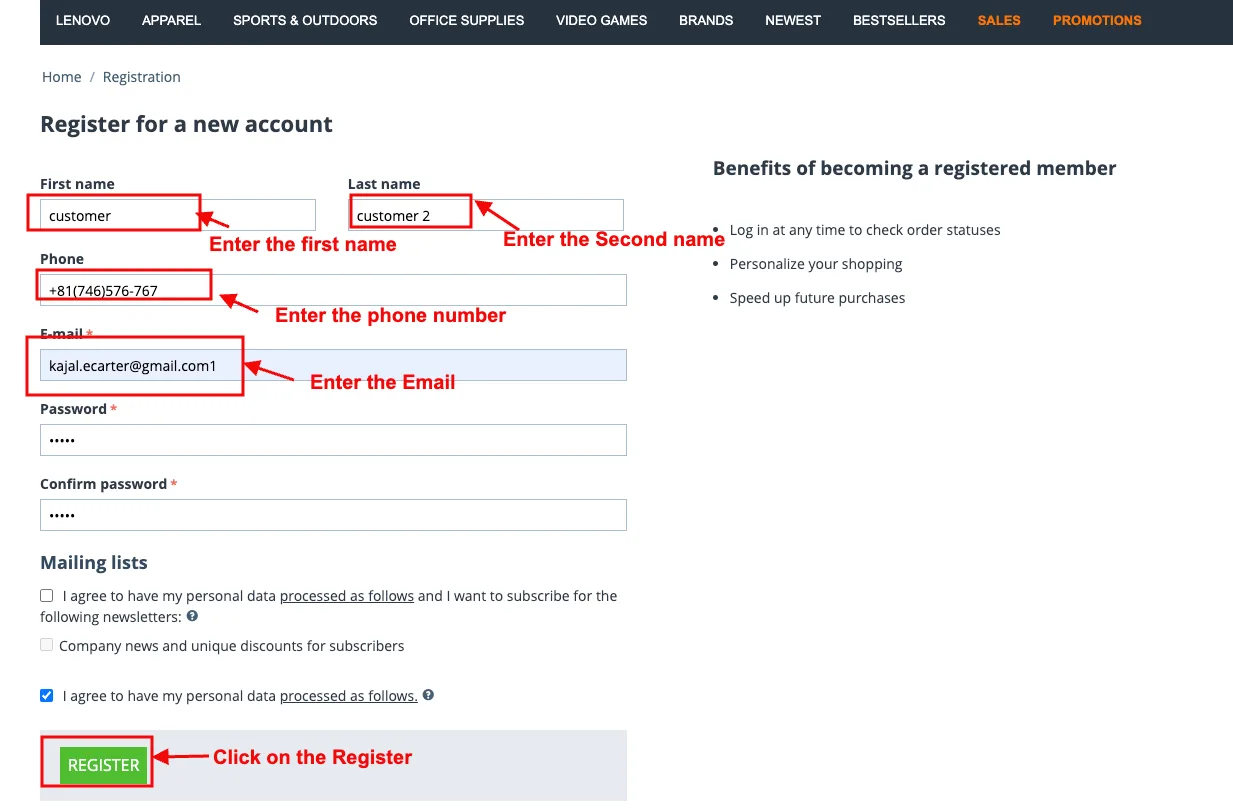
- Enter the first name.
- Enter the second name.
- Enter the phone number.
- Enter the email.
- Click on the Register button.
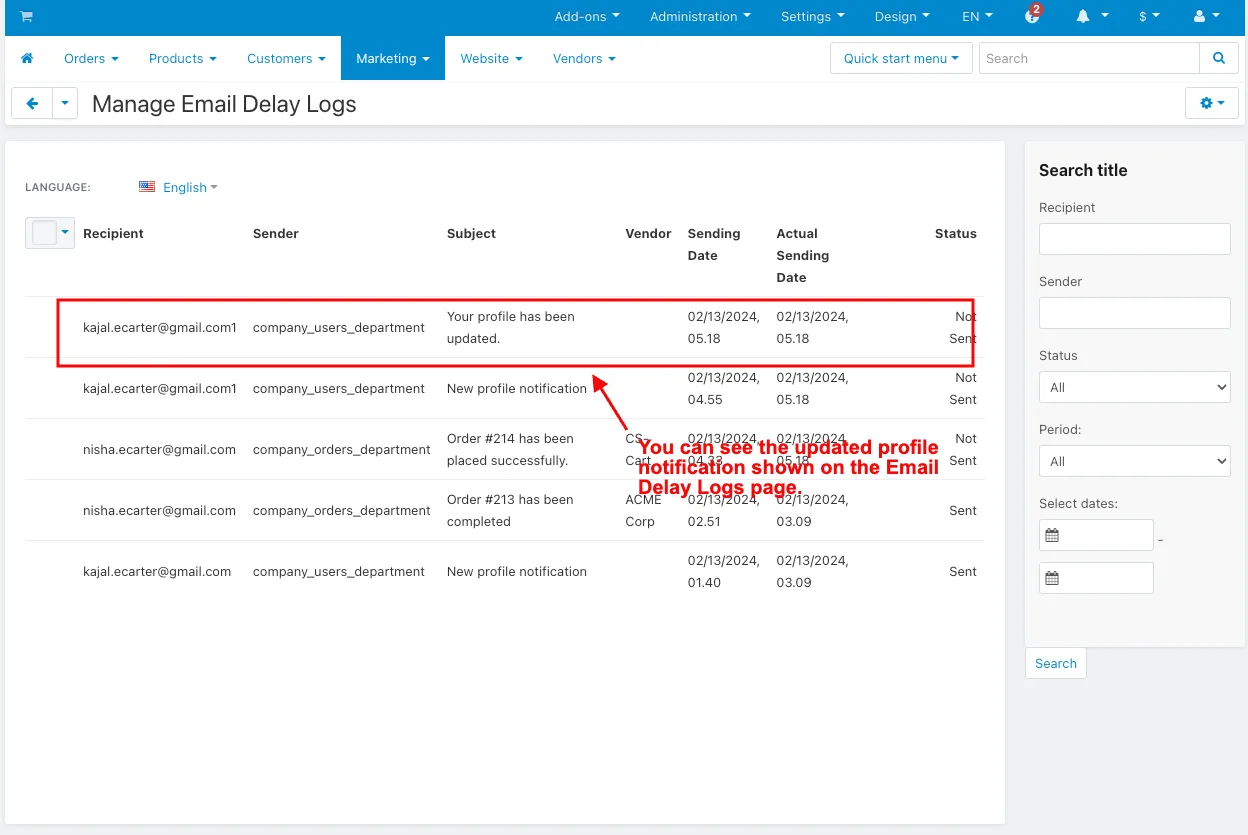
- You can see the created profile notification shown on the Email Delay Logs page.
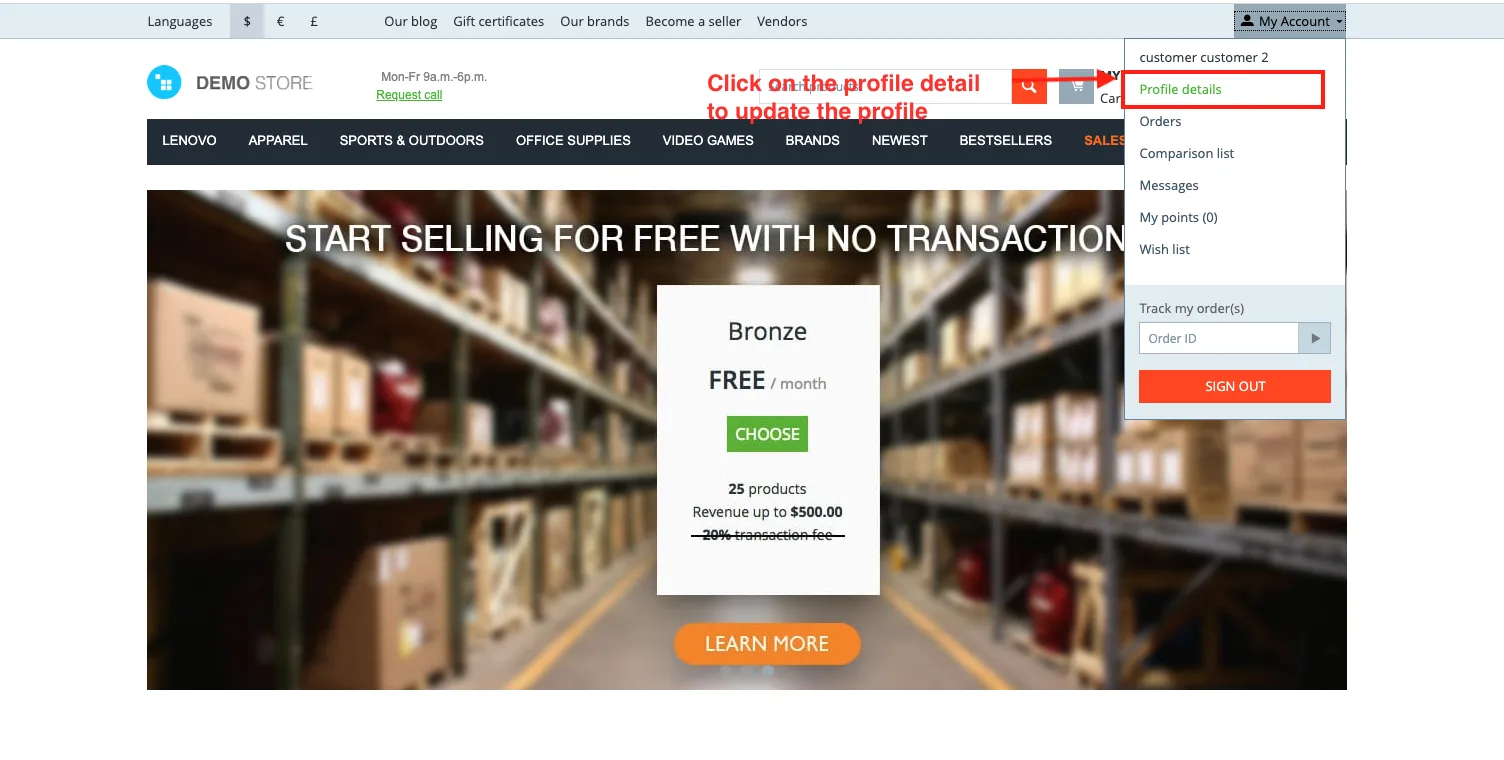
- Click on the profile detail to update the profile.
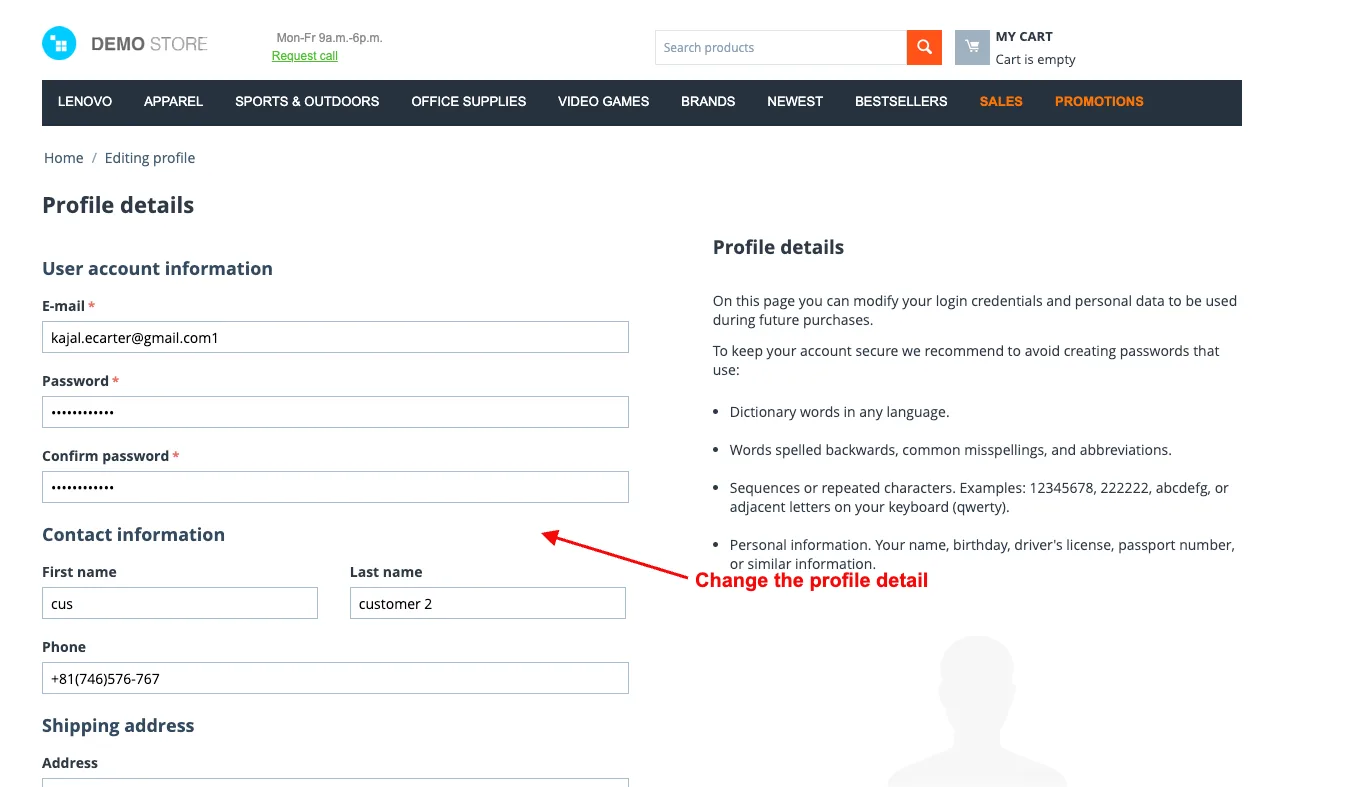
- Change the profile detail.
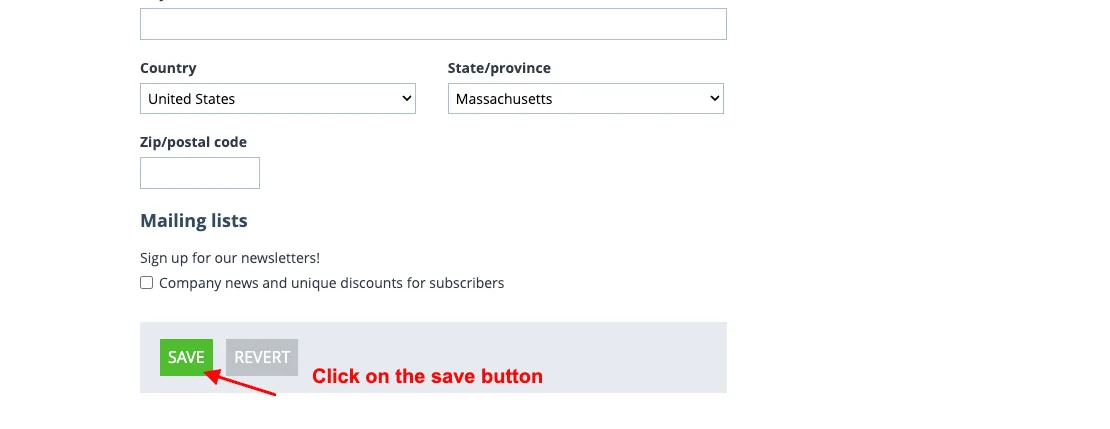
- Click on the save button.
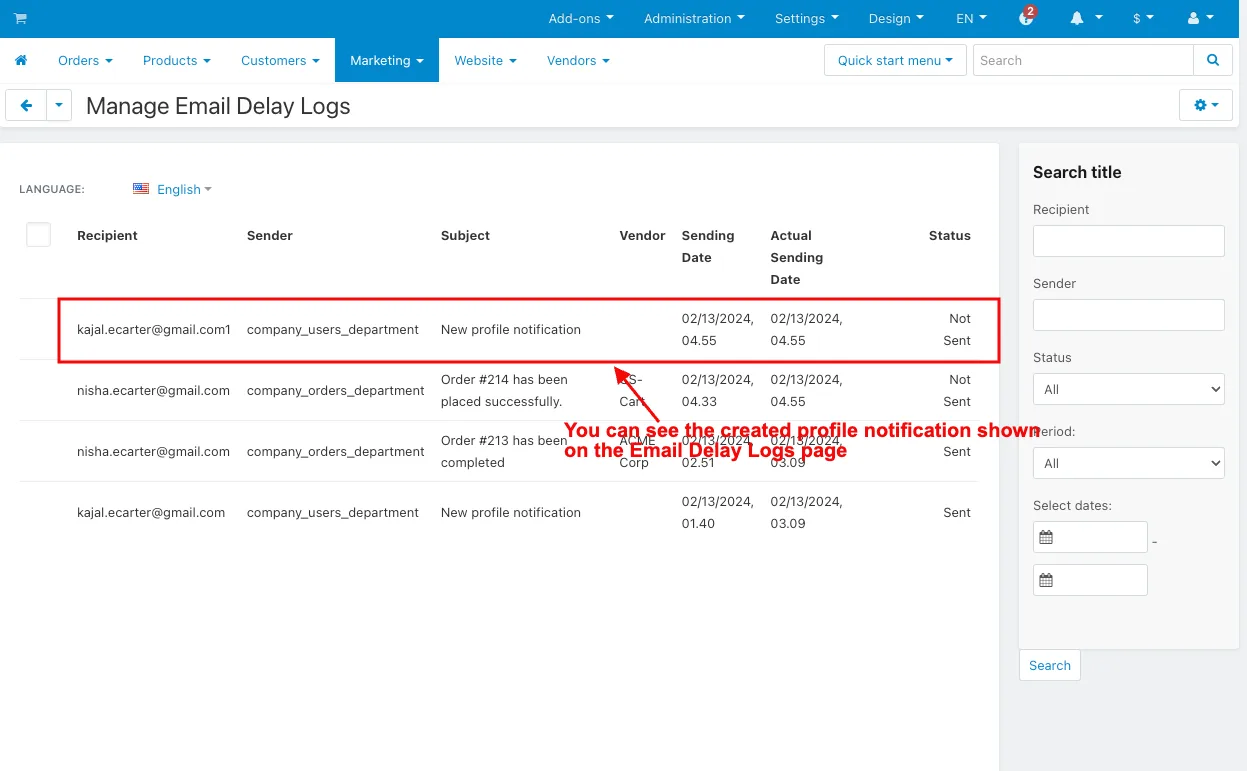
- You can see the updated profile notification shown on the Email Delay Logs page.
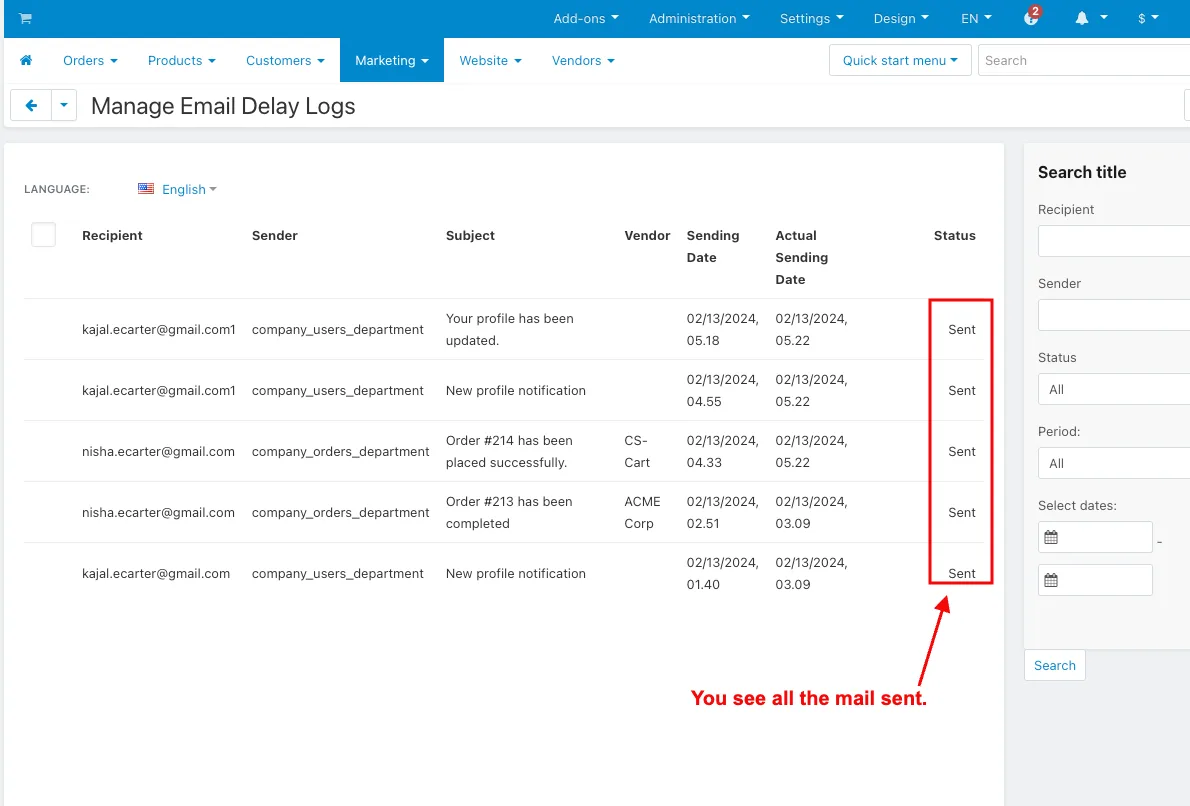
- Hit the cron URL for the sent email.
- You see all the mail sent.
- You see the sent email on Gmail.
Addon-Version:
Version-1.0
Supported Versions:
CS-Cart, CS-Cart Multivendor 4.8.x, 4.9.x,4.10x,4.11x,4.12,4.13x, 4.14x, 4.15x, 4.16x, 4.17x, 4.18x
Support:
This app is developed and published by Ecarter Technologies Pvt. Ltd., a CS-Cart developer. You are guaranteed quality add-ons.
Frequently asked questions
What does the Send Mail With Delay add-on do?
It delays outgoing emails so messages to customers and admins are sent after a set delay rather than instantly. You choose which events, such as order updates or profile changes, trigger these delayed emails.
Can I control how many delayed emails are sent at once?
Yes. You can set how many emails are sent per cron command, which lets you manage the volume of outgoing messages processed on each run.
How does the add-on handle logs and security?
You can set how many days logs are kept so records stay organized, and the cron process is protected with a personalized cron password.
Is this add-on compatible with my version of CS-Cart?
It is built for CS-Cart and works with recent versions. Share the exact CS-Cart version and edition you run and we will confirm compatibility before you buy.
Nisha Gaur is a Technical Content Writer at Ecarter Technologies. She writes technical documentation, tutorials and buying guides covering CS-Cart, Magento, Shopify and eCommerce development.