
Set Up Google APIs with OAuth for Secure Access
Working with Google APIs like the Google Sheets API may feel confusing at first, as it involves multiple steps in Google Cloud Console.
This guide explains how to set up secure access to Google APIs, such as Google Sheets and Google Drive, using OAuth. OAuth is the permission method that lets only authorized users reach the data, so information stays protected. The post walks through the setup in Google Cloud Console step by step: creating a project, enabling the APIs you need, and creating OAuth credentials. It is written for anyone who needs to connect an application to Google services and wants a plain, ordered explanation of the process rather than a technical reference.
Google APIs, like Google Sheets or Drive, need a secure way to access data. OAuth helps give permission safely, so only authorized users can use the data. Setting up OAuth in Google Cloud Console may seem tricky at first, but with the right steps, it becomes easy. This guide explains how to enable APIs, create credentials, and set up secure access in a simple way.
Create a Project in Google Cloud
Start by creating a project in Google Cloud Console. A project works as a central place where all API settings, credentials, and configurations are stored. It helps you manage everything in one place and keeps your work organized.
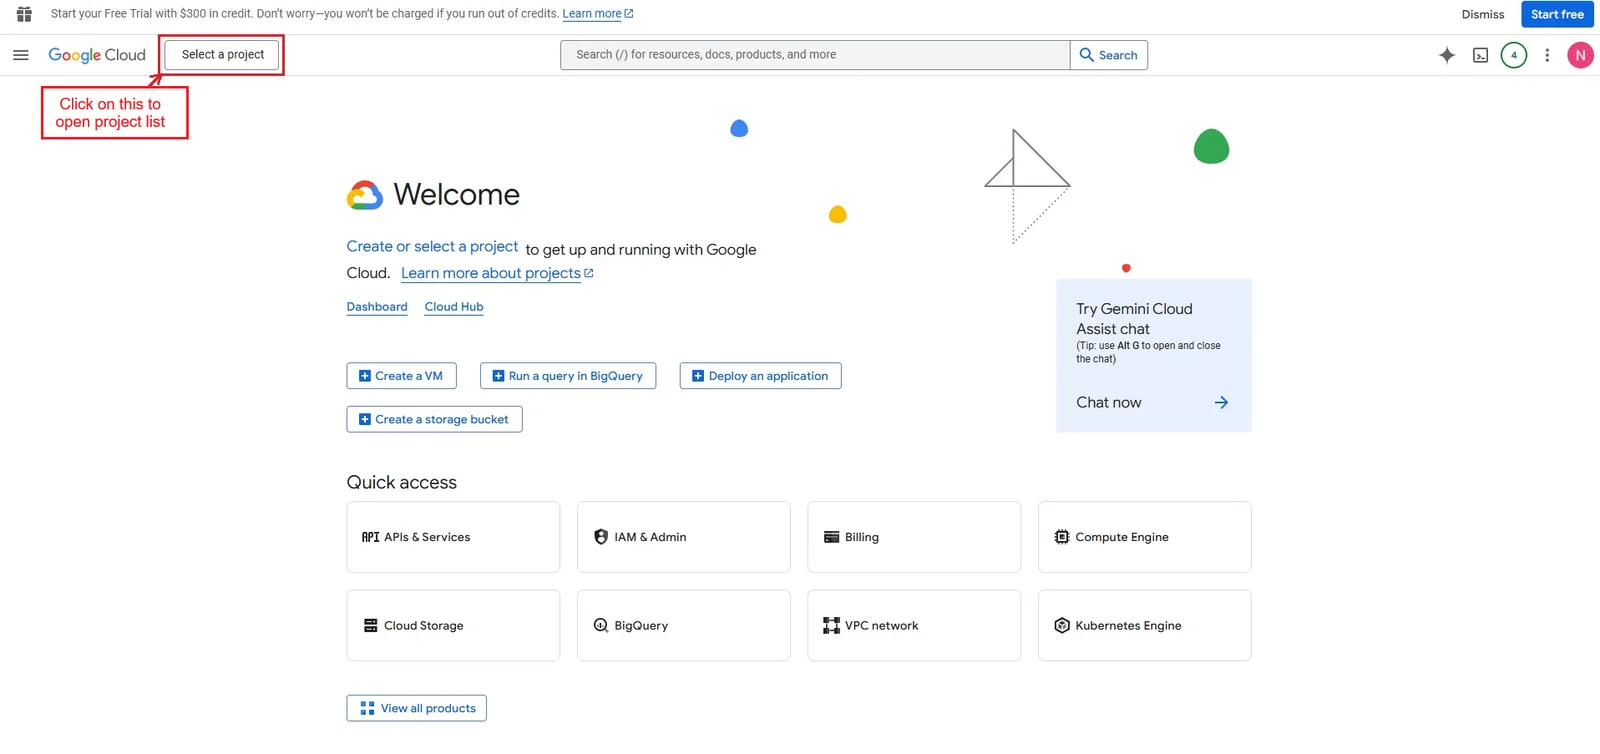
Click on “Select a project” to open the projects list.
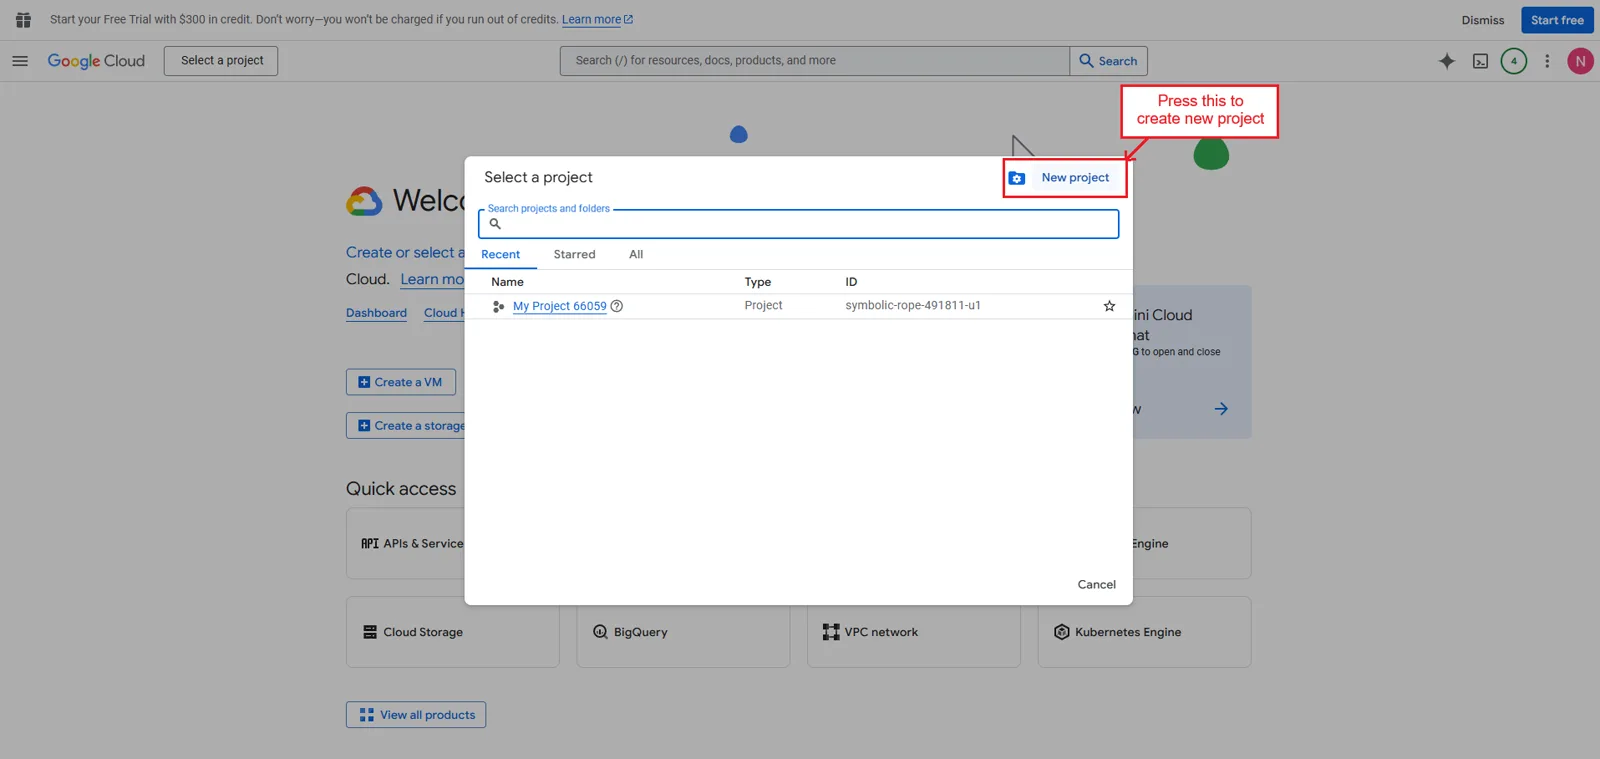
- Press “New Project” to start the project creation process.
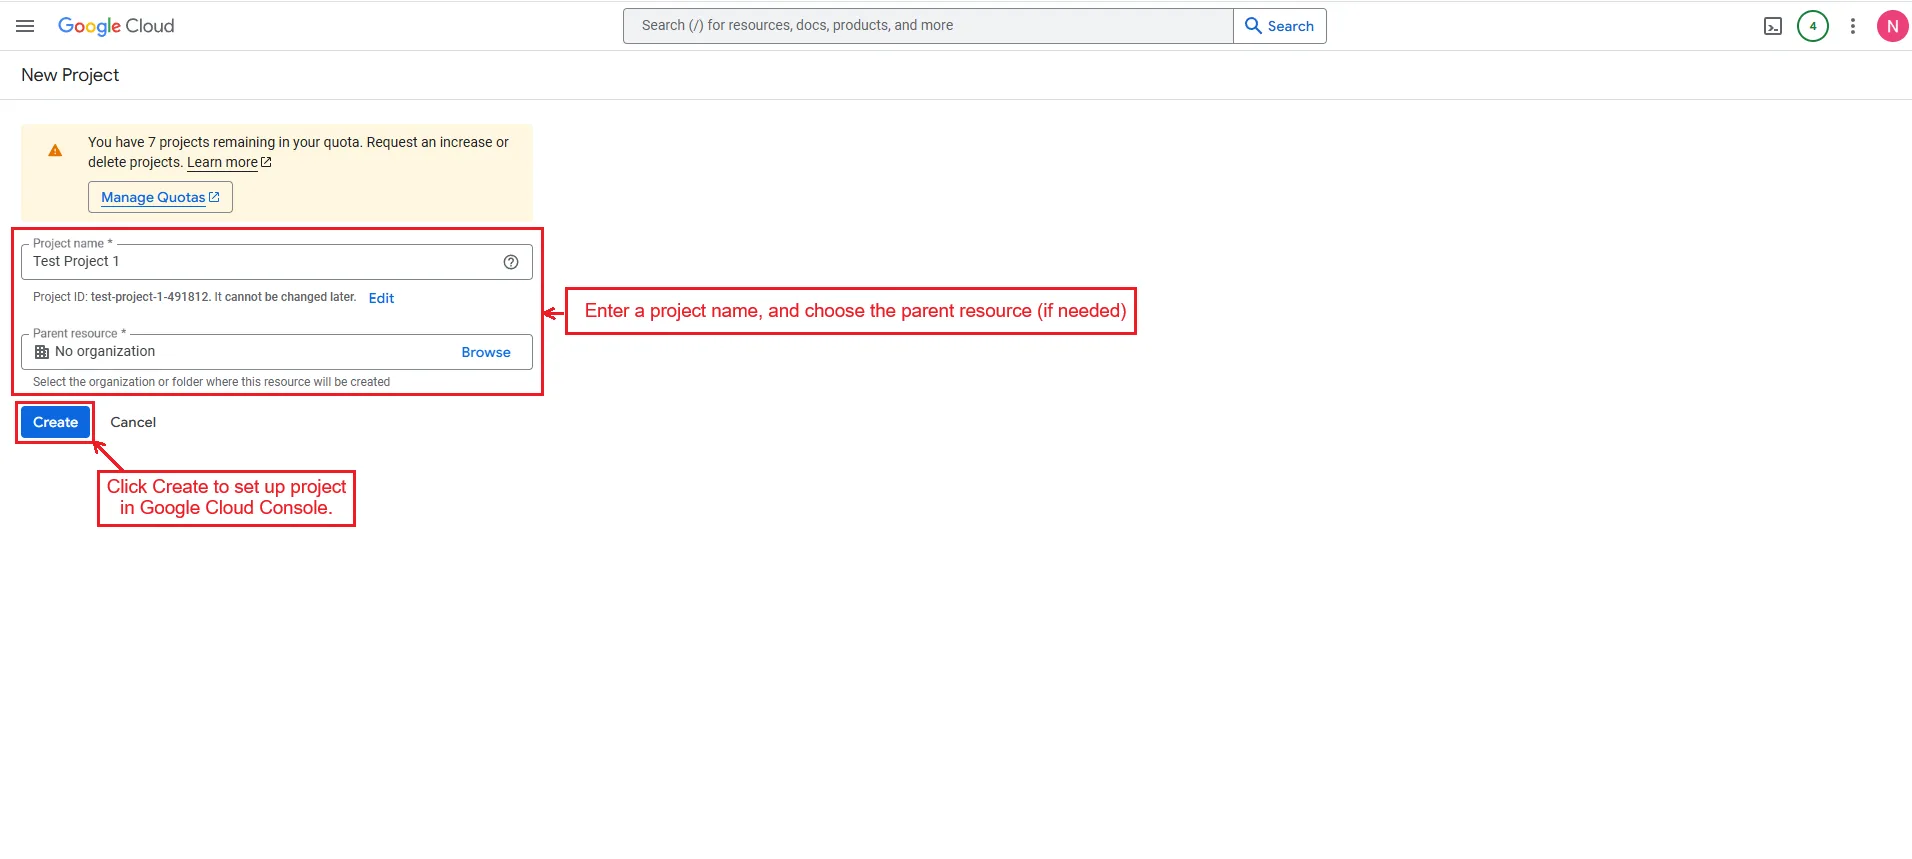
- Enter a project name, choose the parent resource (if needed), and click Create to set up your project in Google Cloud Console.
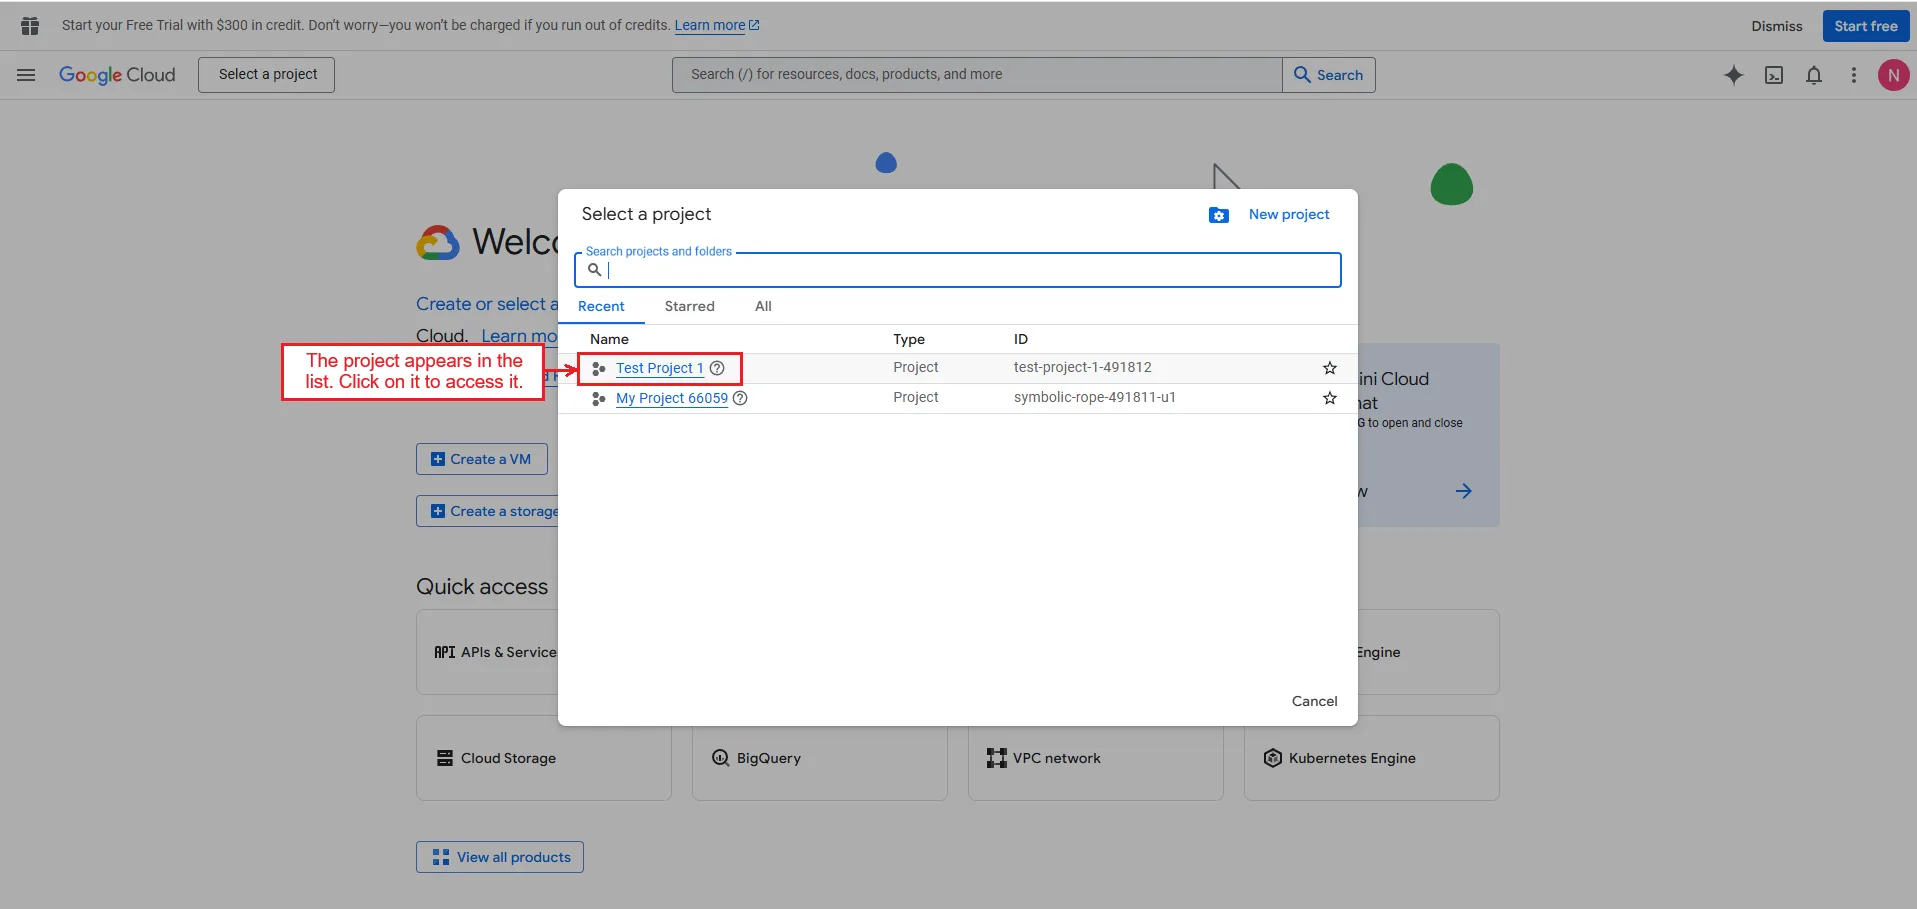
- The newly created project appears in the list. Click on it to access it.
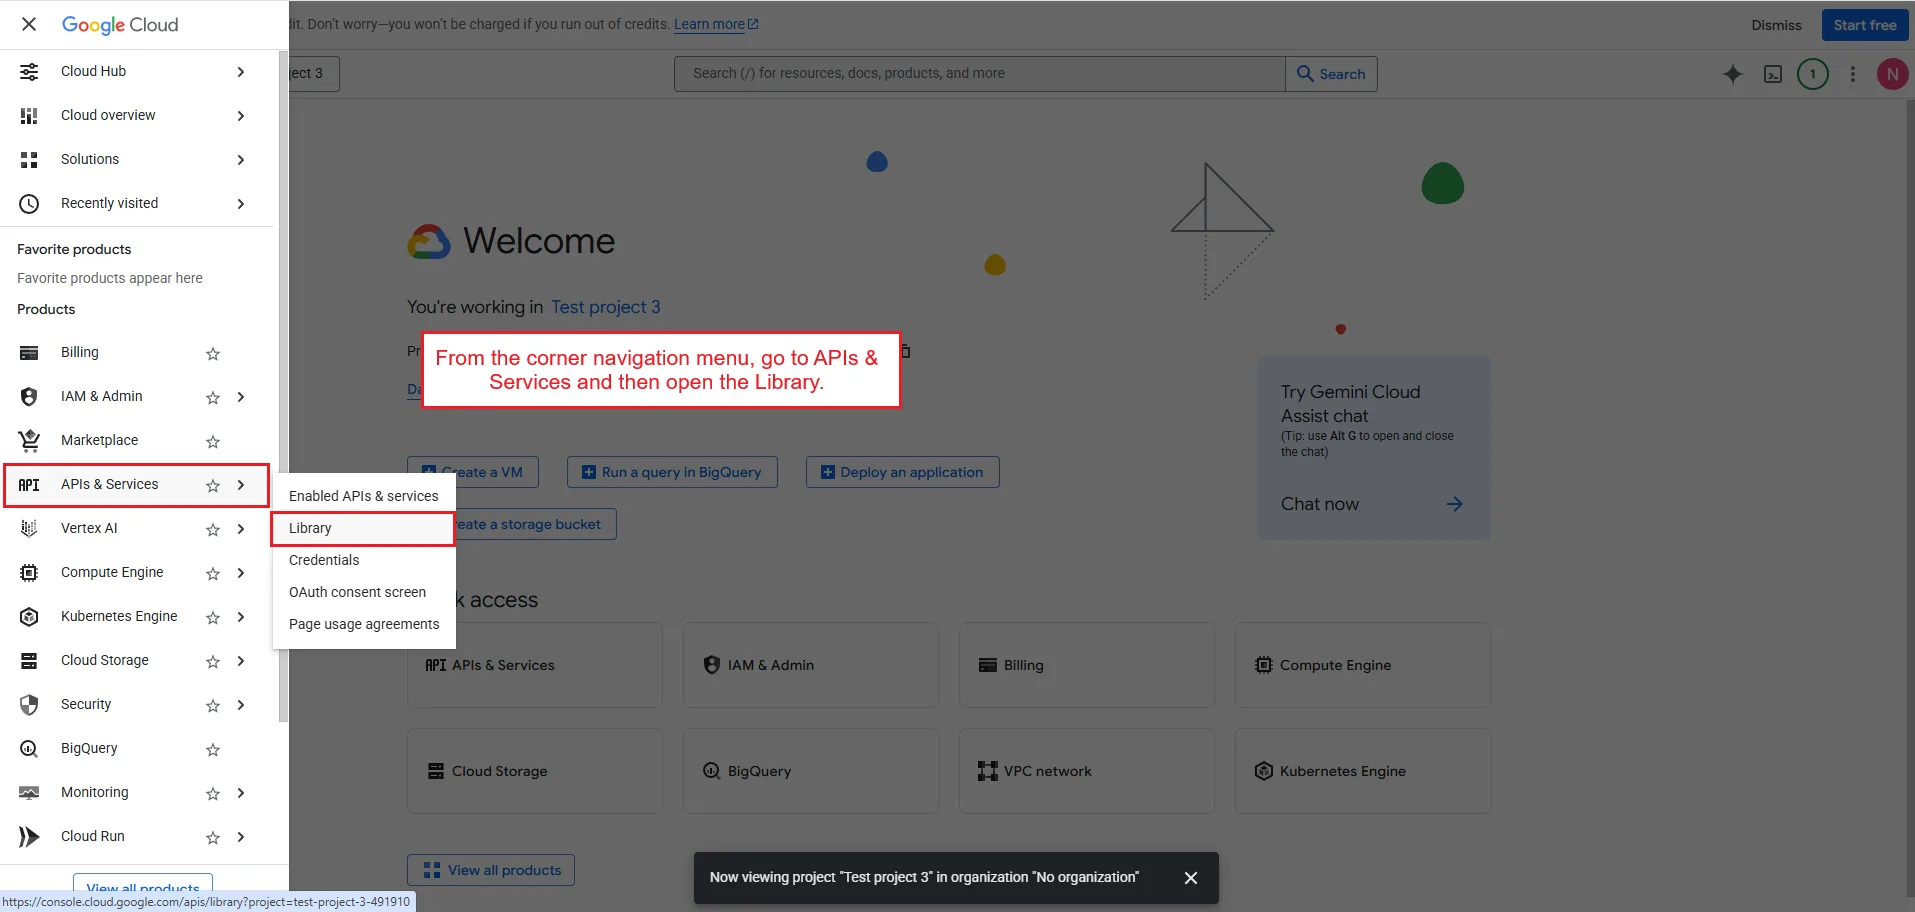
- From the corner navigation menu, go to APIs & Services and then open the Library.
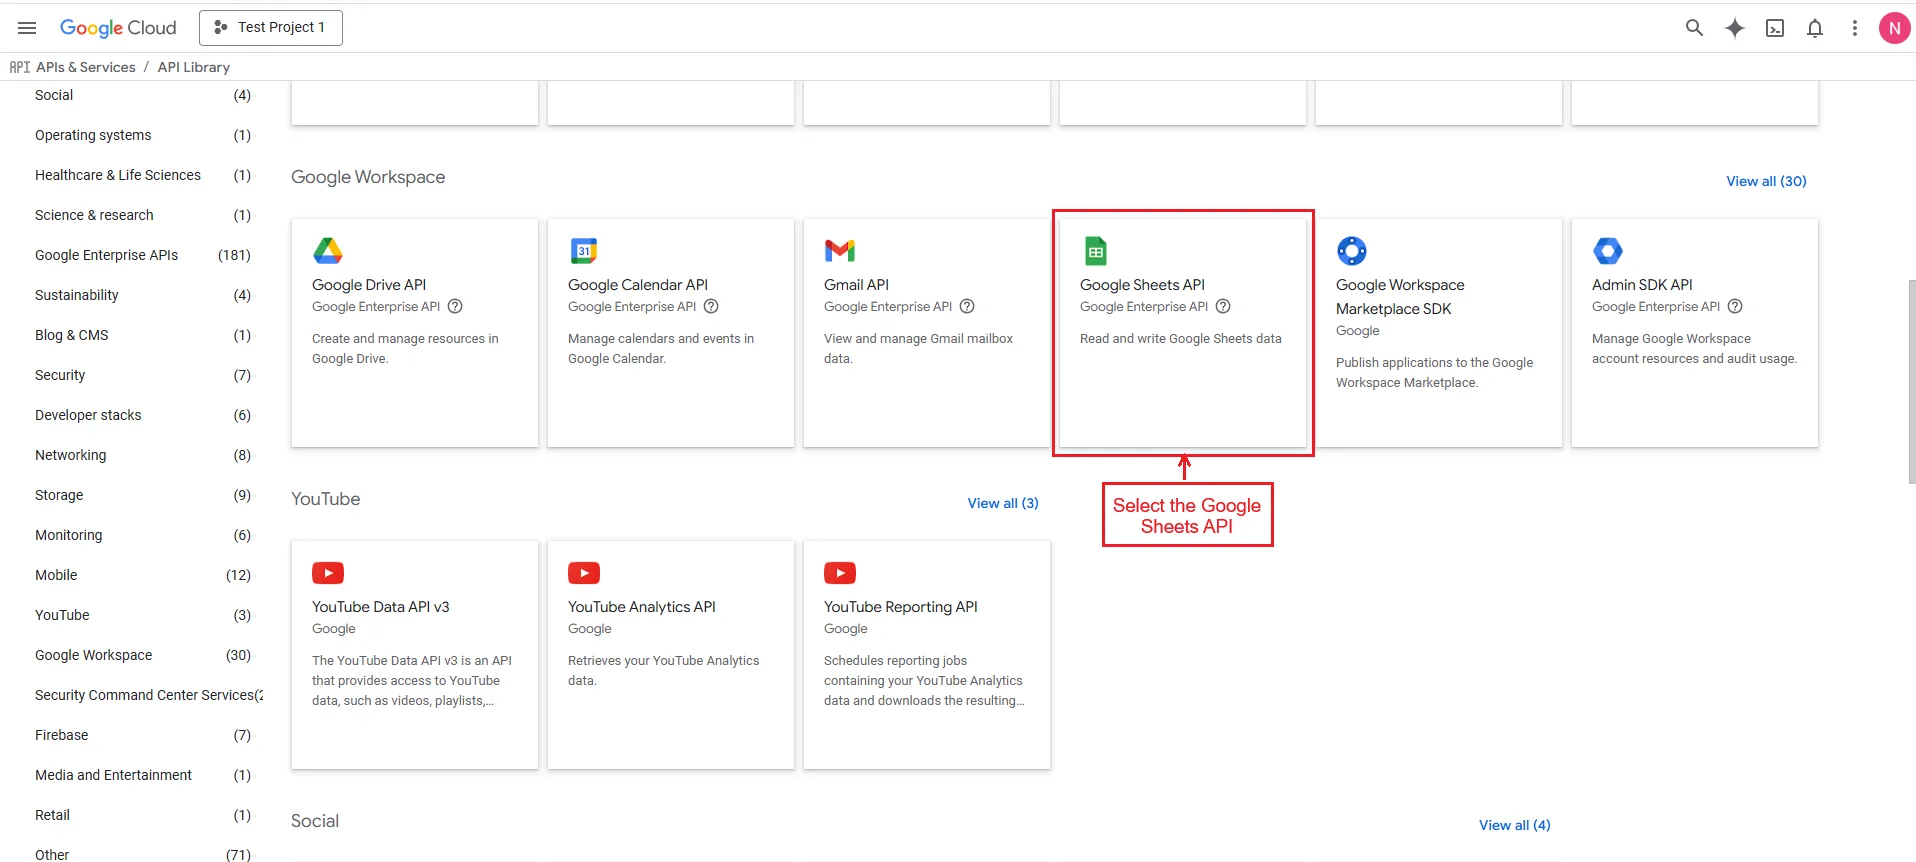
- Select the Google Sheets API.
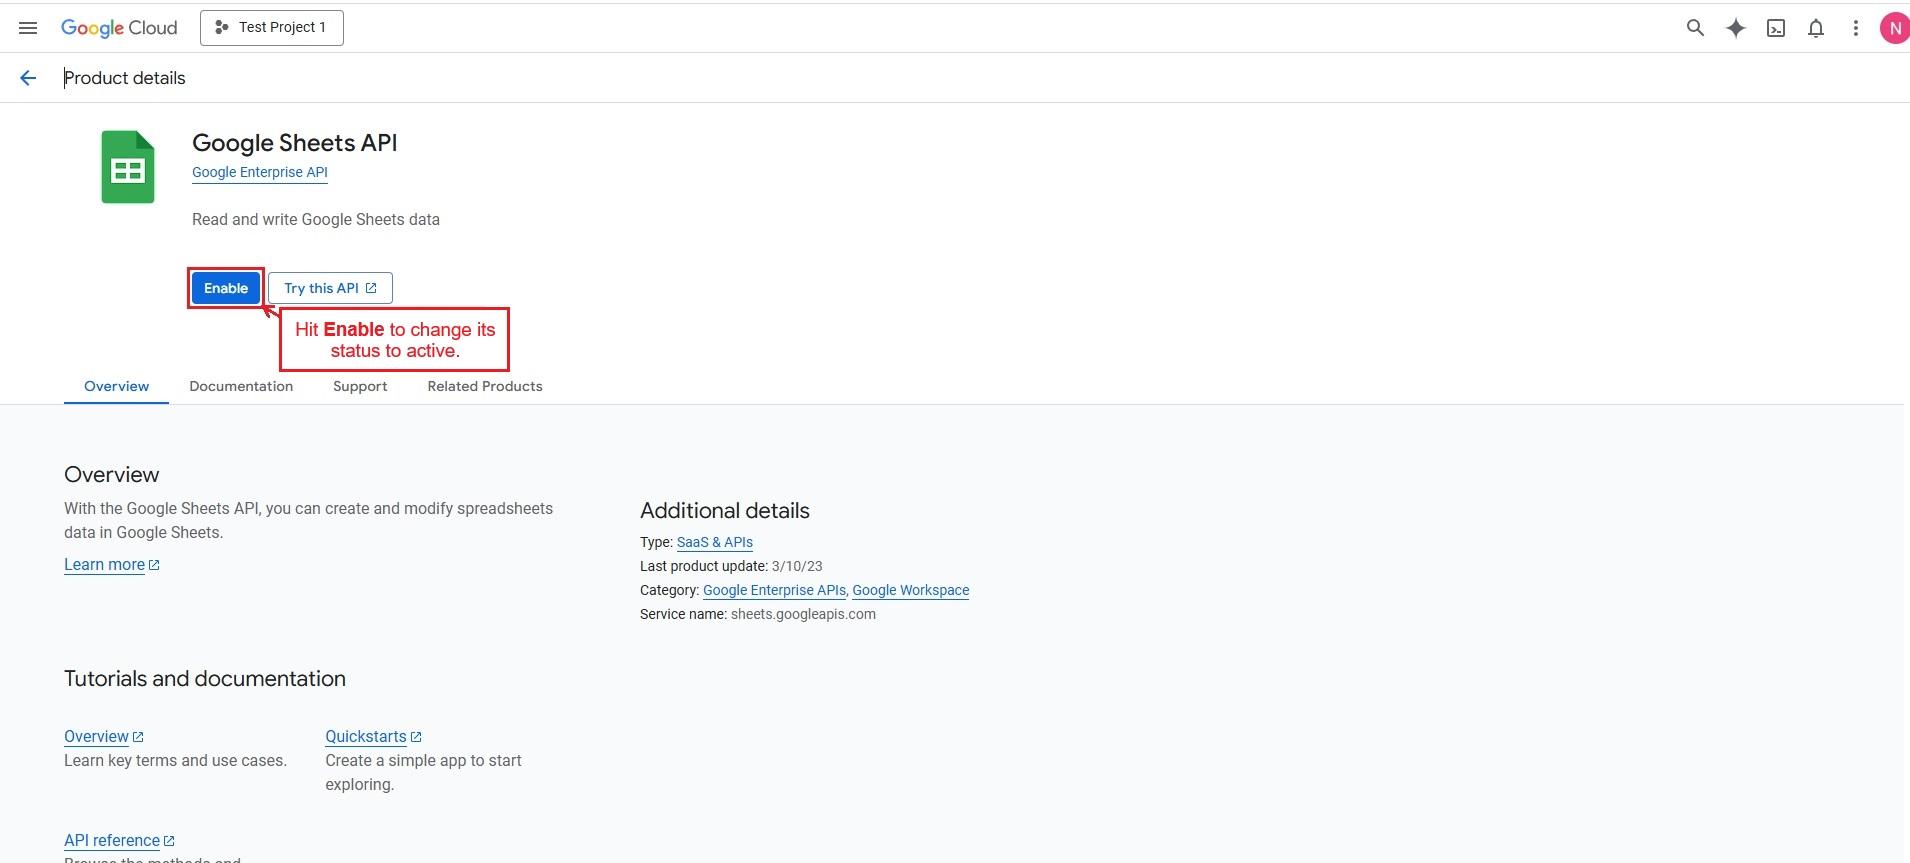
- Hit “Enable” to change its status to active.
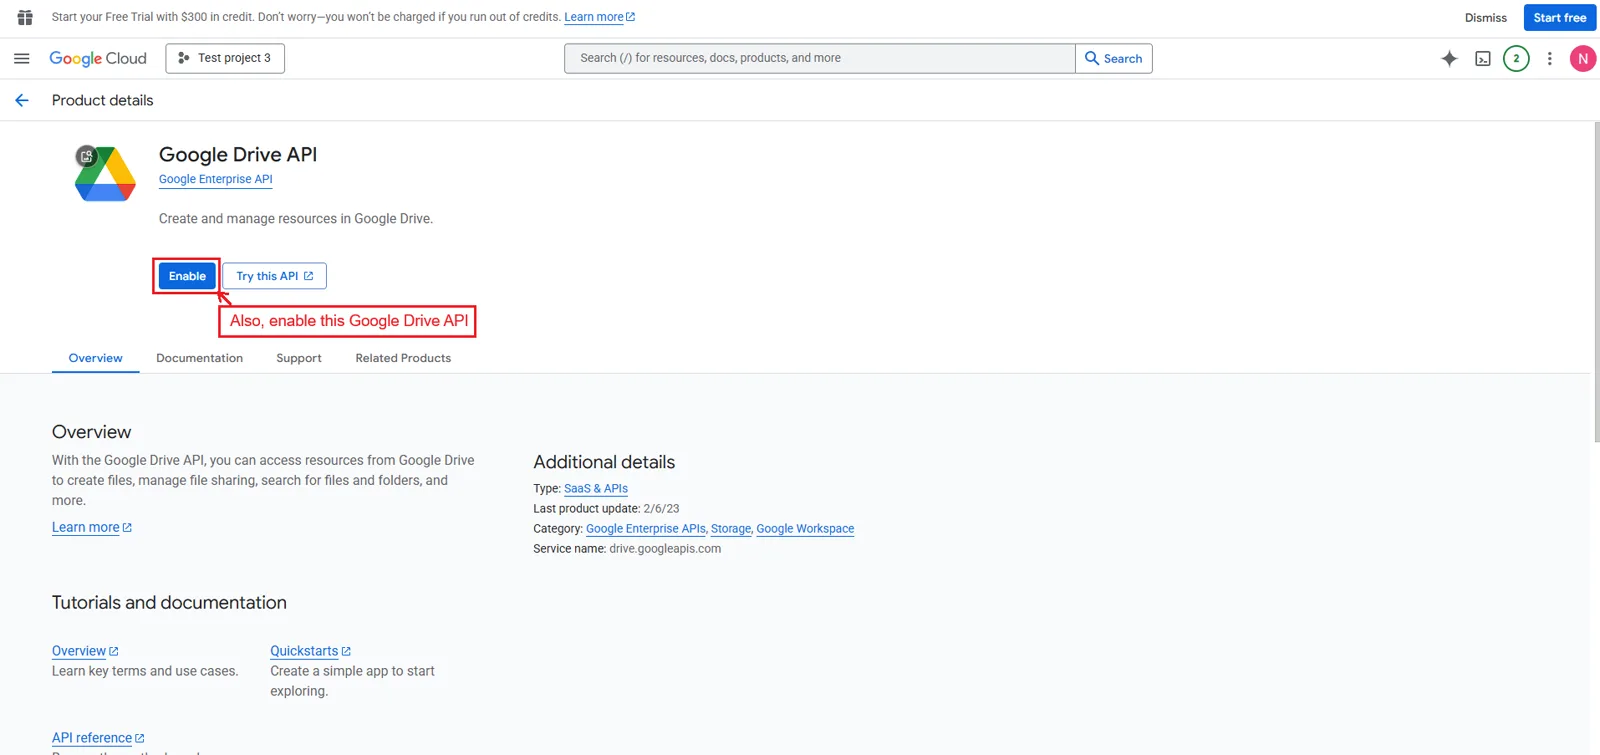
- Also, enable the Google Drive API to access and manage Google Sheets files stored in Google Drive.
- Now, select the Credentials options, tap on Create credentials, and select the OAuth client ID.
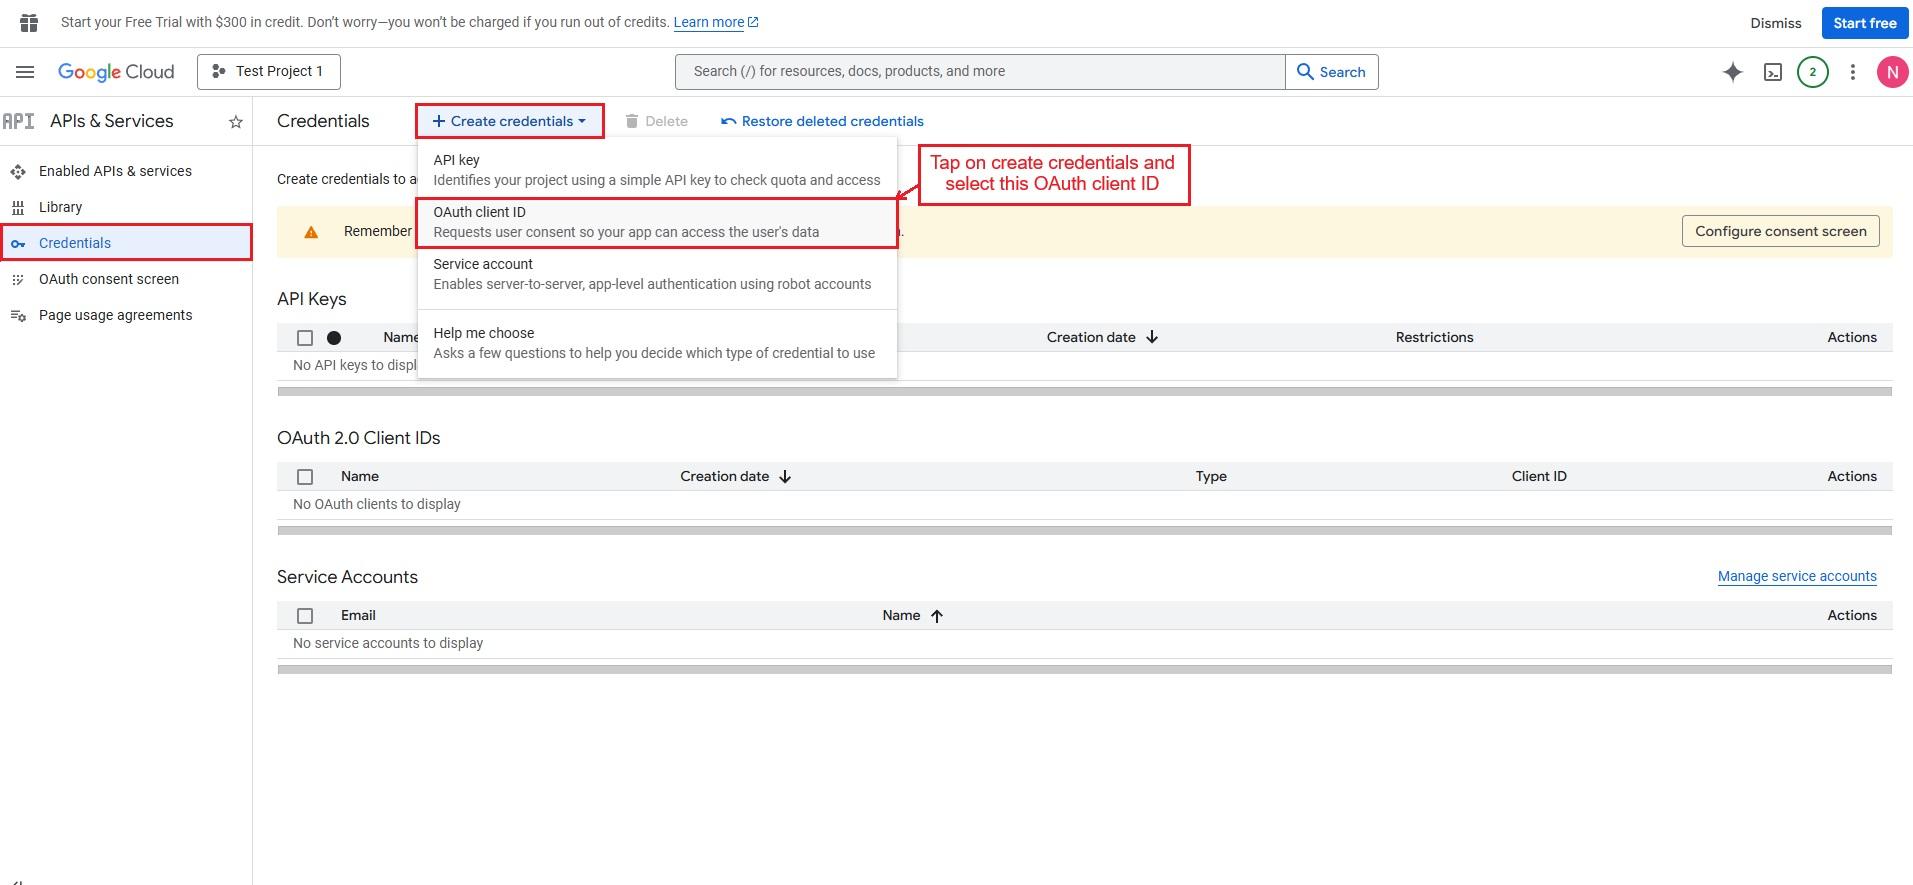
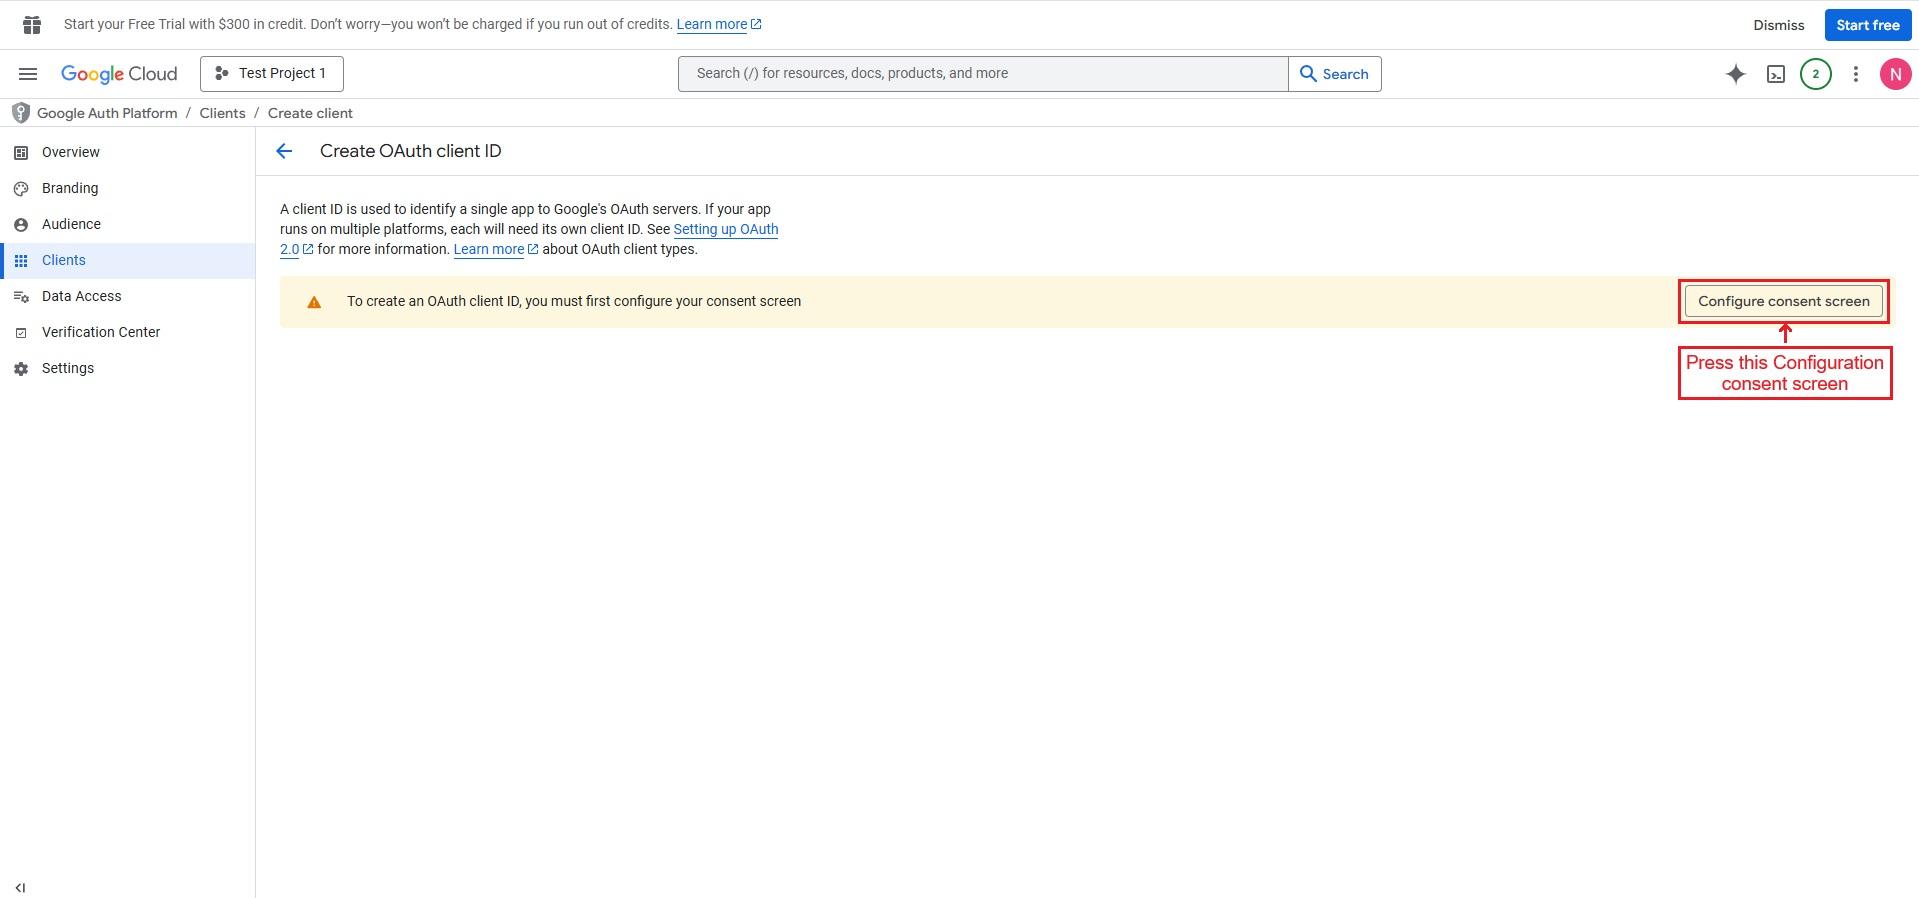
- Press the Configuration consent screen.
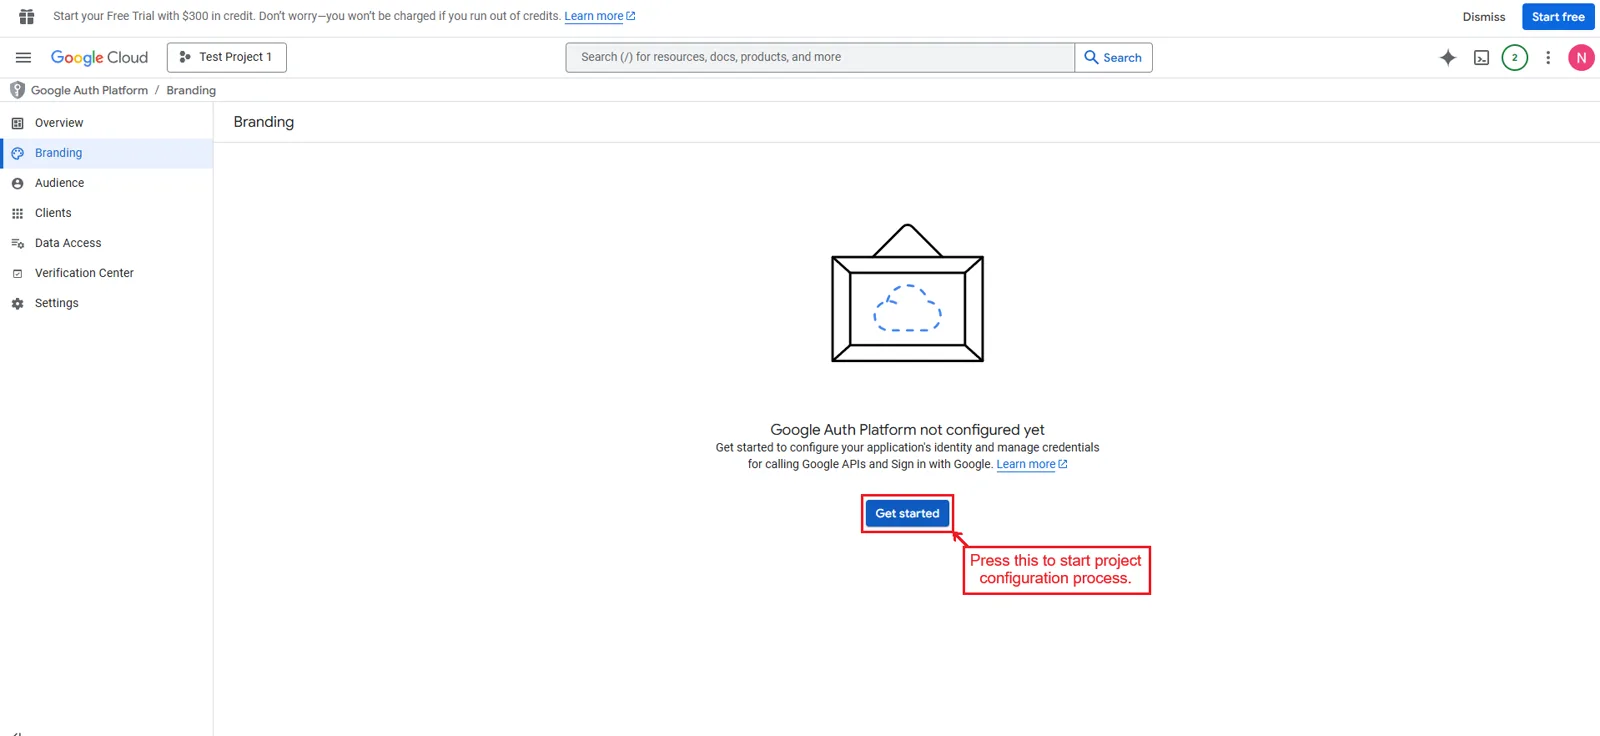
- Enter “Get started” to start the project configuration process.
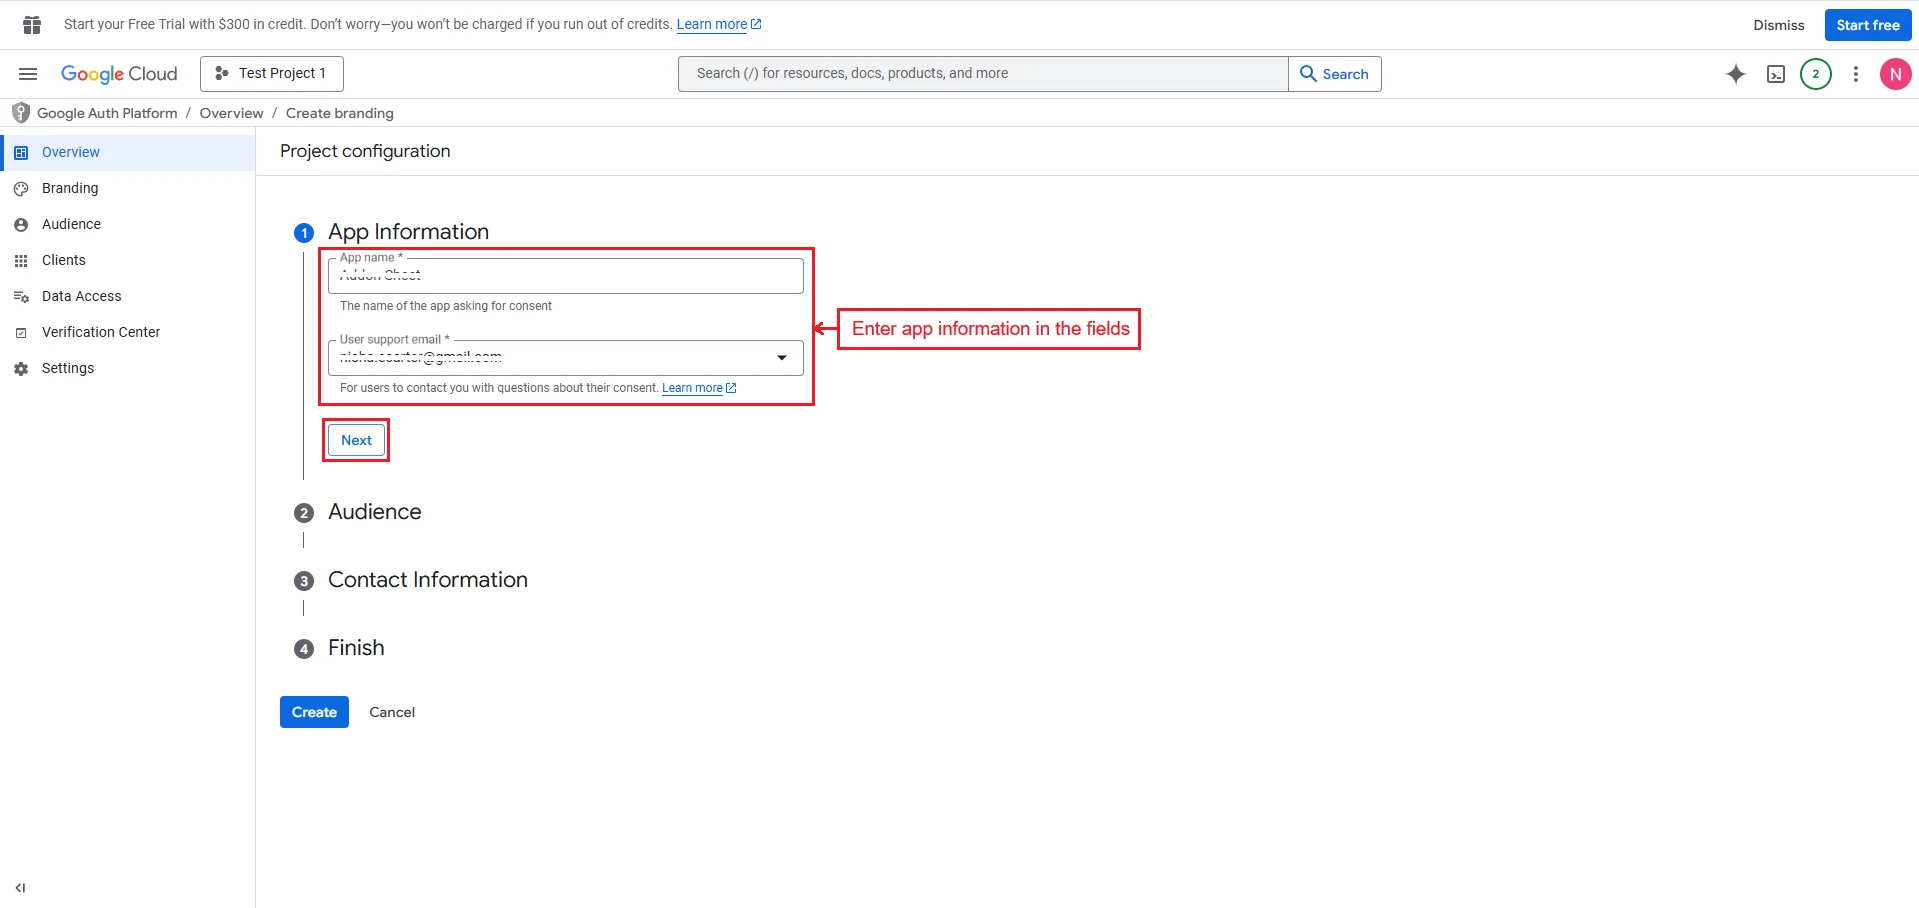
- Enter details in the App information fields.
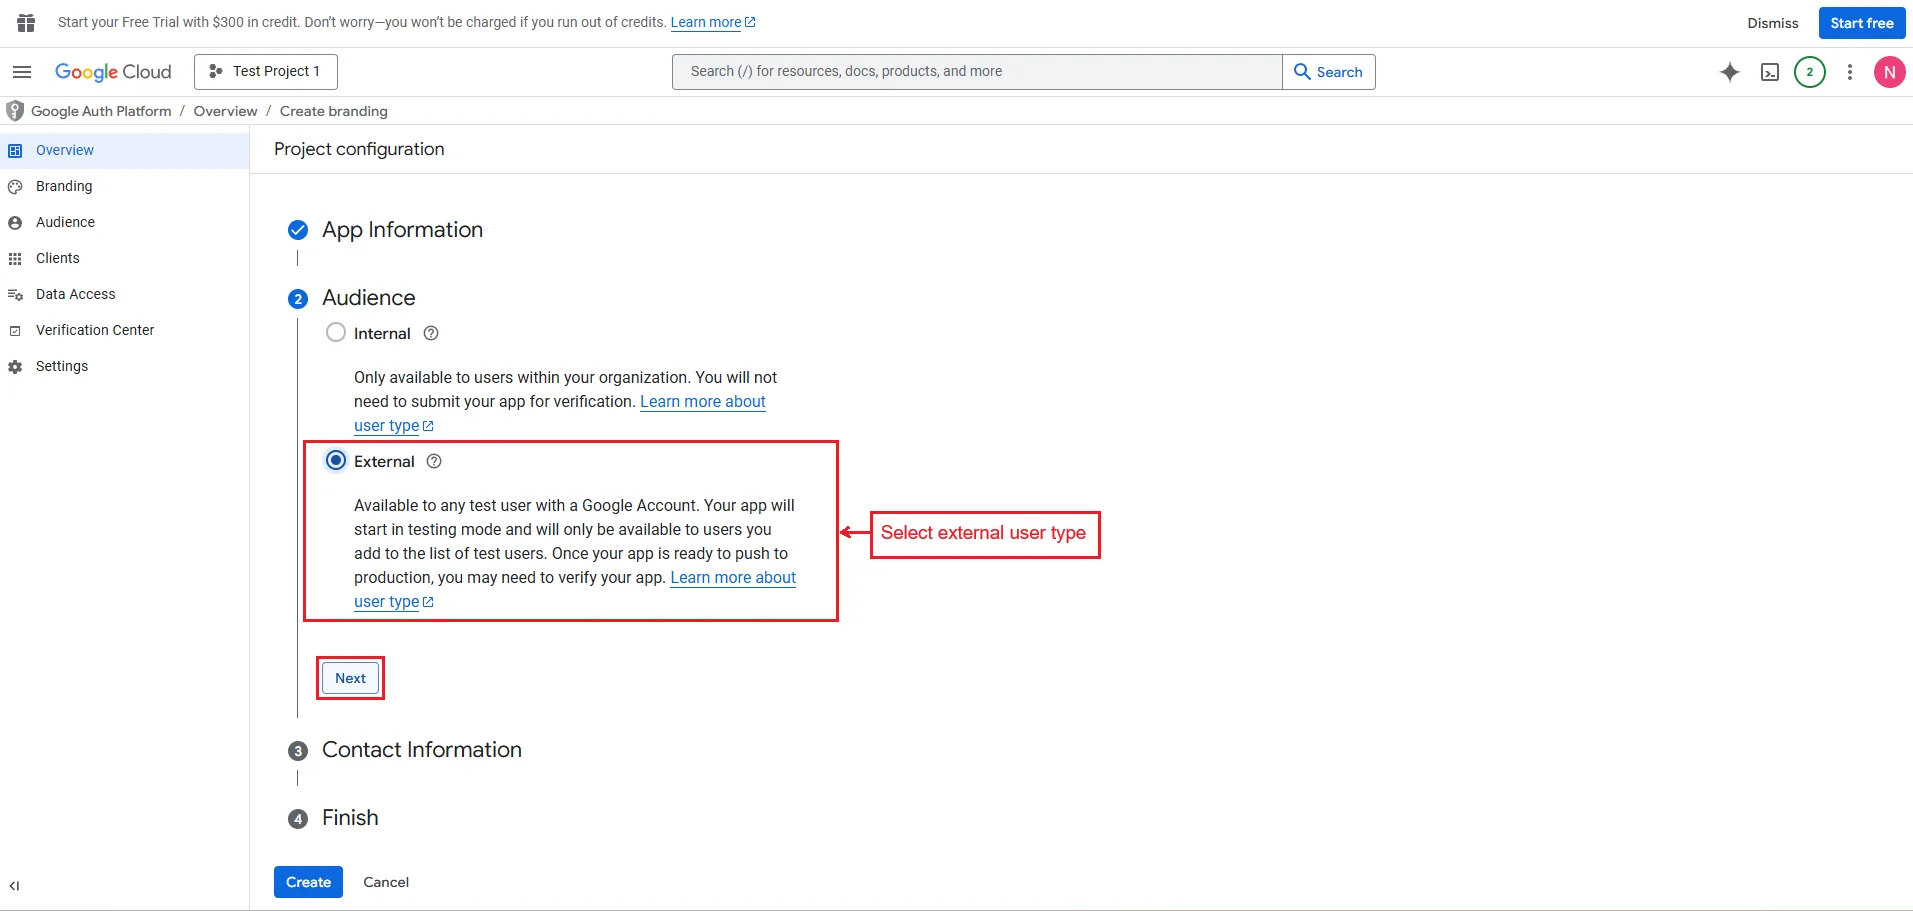
- Select the external User type.
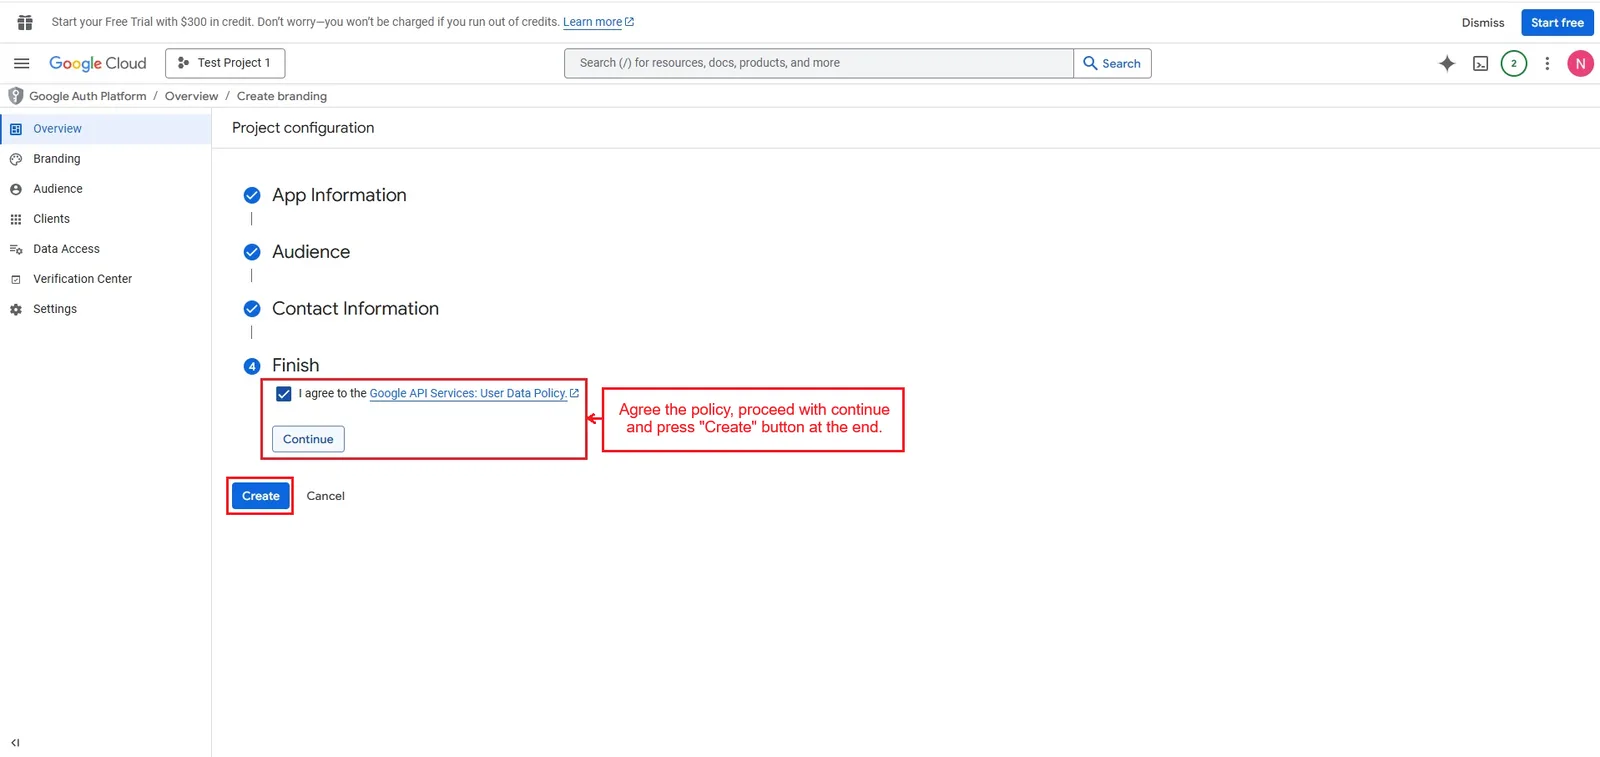
- Agree the policy, proceed with continue and press "Create" button at the end.
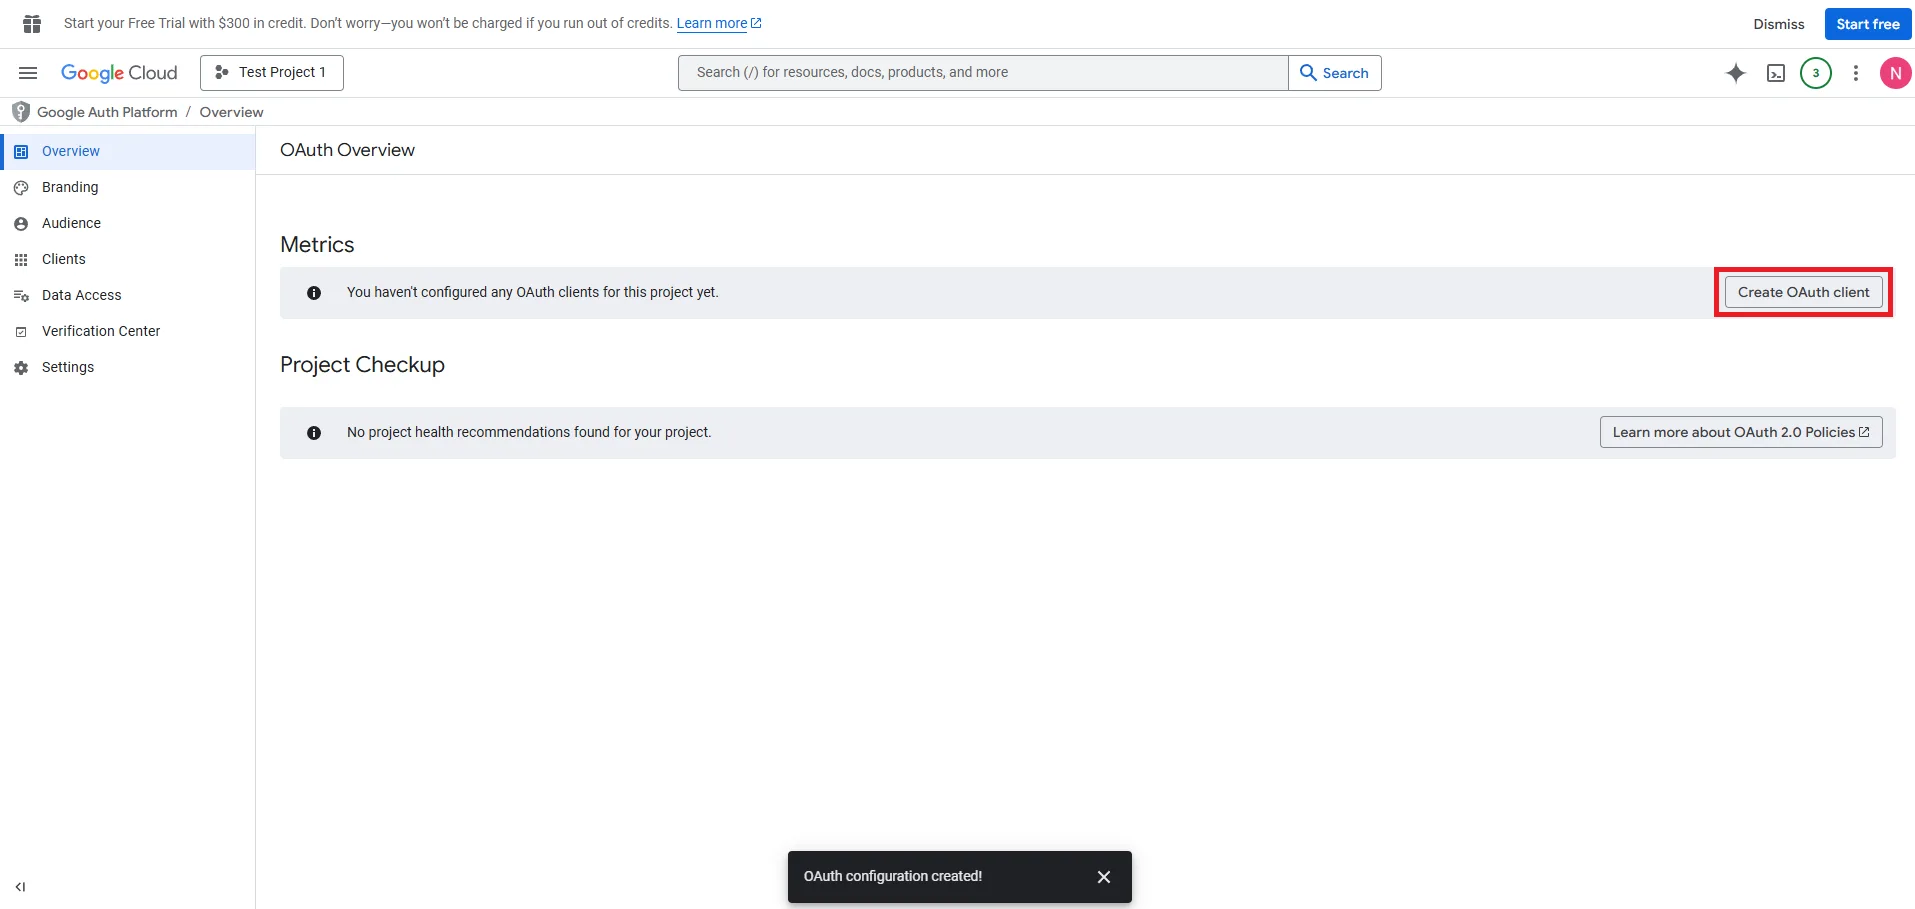
- Continue by using the “Create OAuth Client”.
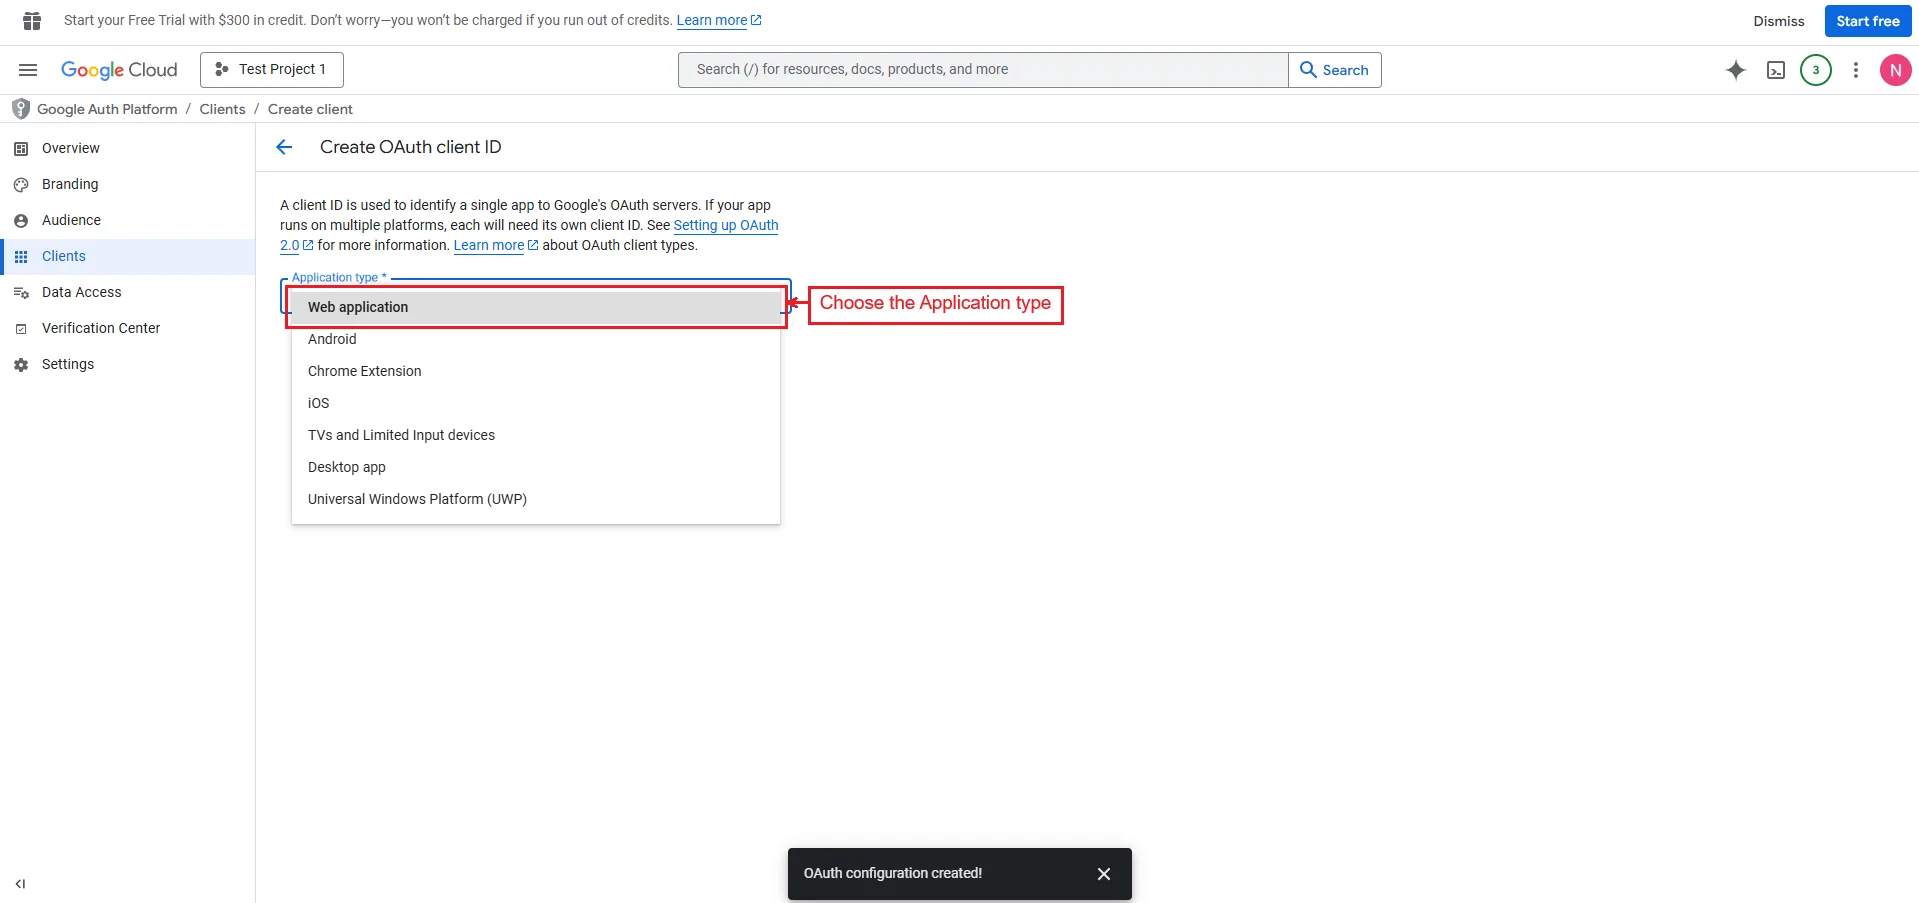
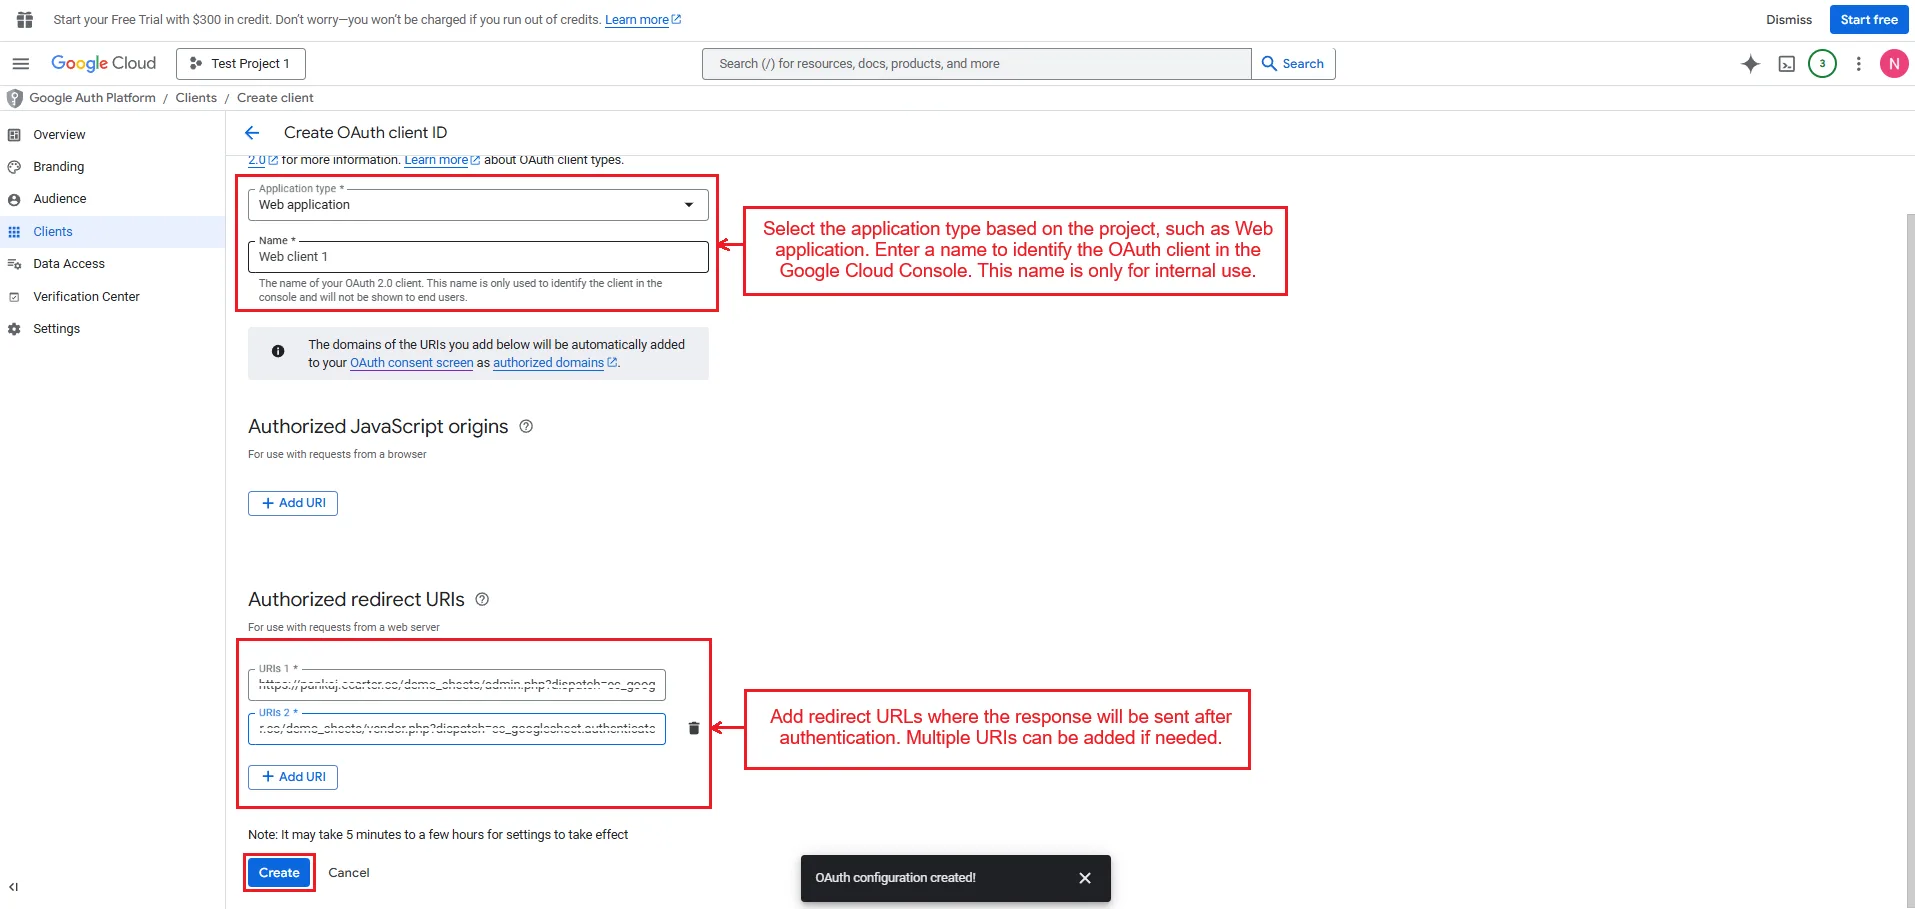
- Choose the Application type.
- Next, enter a name to identify the OAuth client in the Google Cloud Console. This name is only for internal use.
- Add redirect URLs where the response will be sent after authentication. Multiple URIs can be added if needed.
- And press the “Create” button.
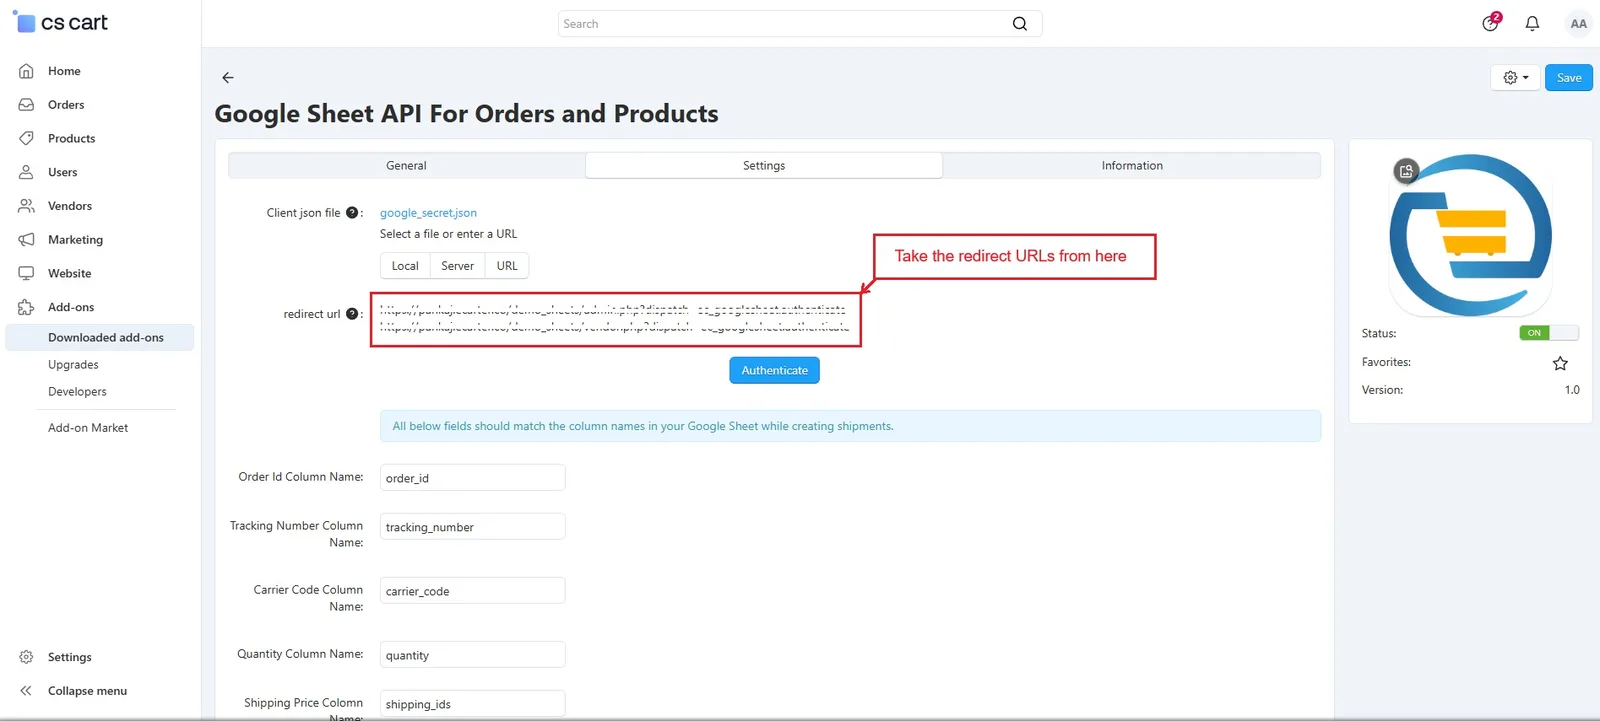
- The above redirect links are available in the Settings tab of the admin panel.
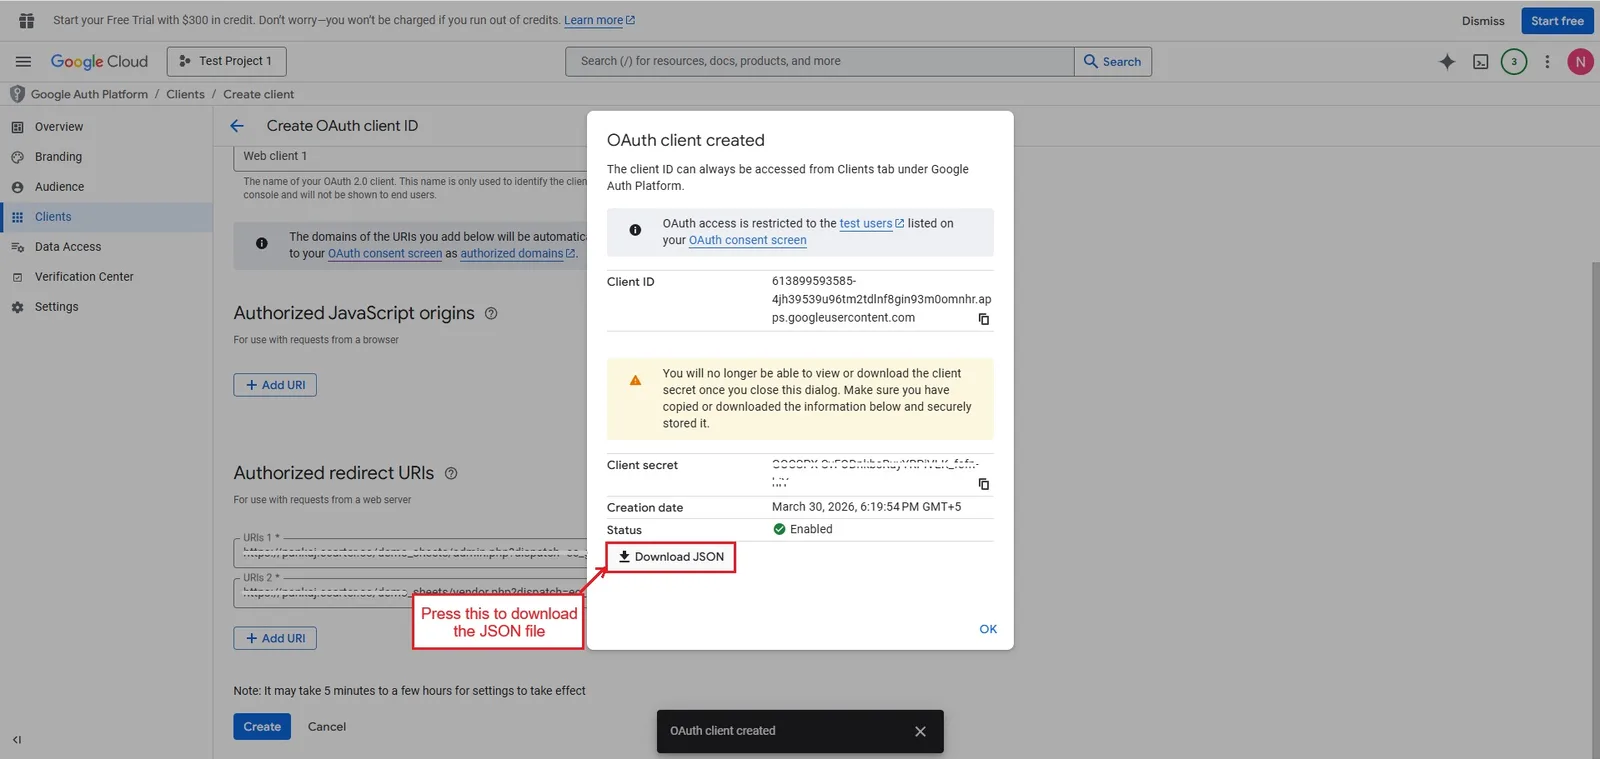
- Select “Download JSON” to save the file.
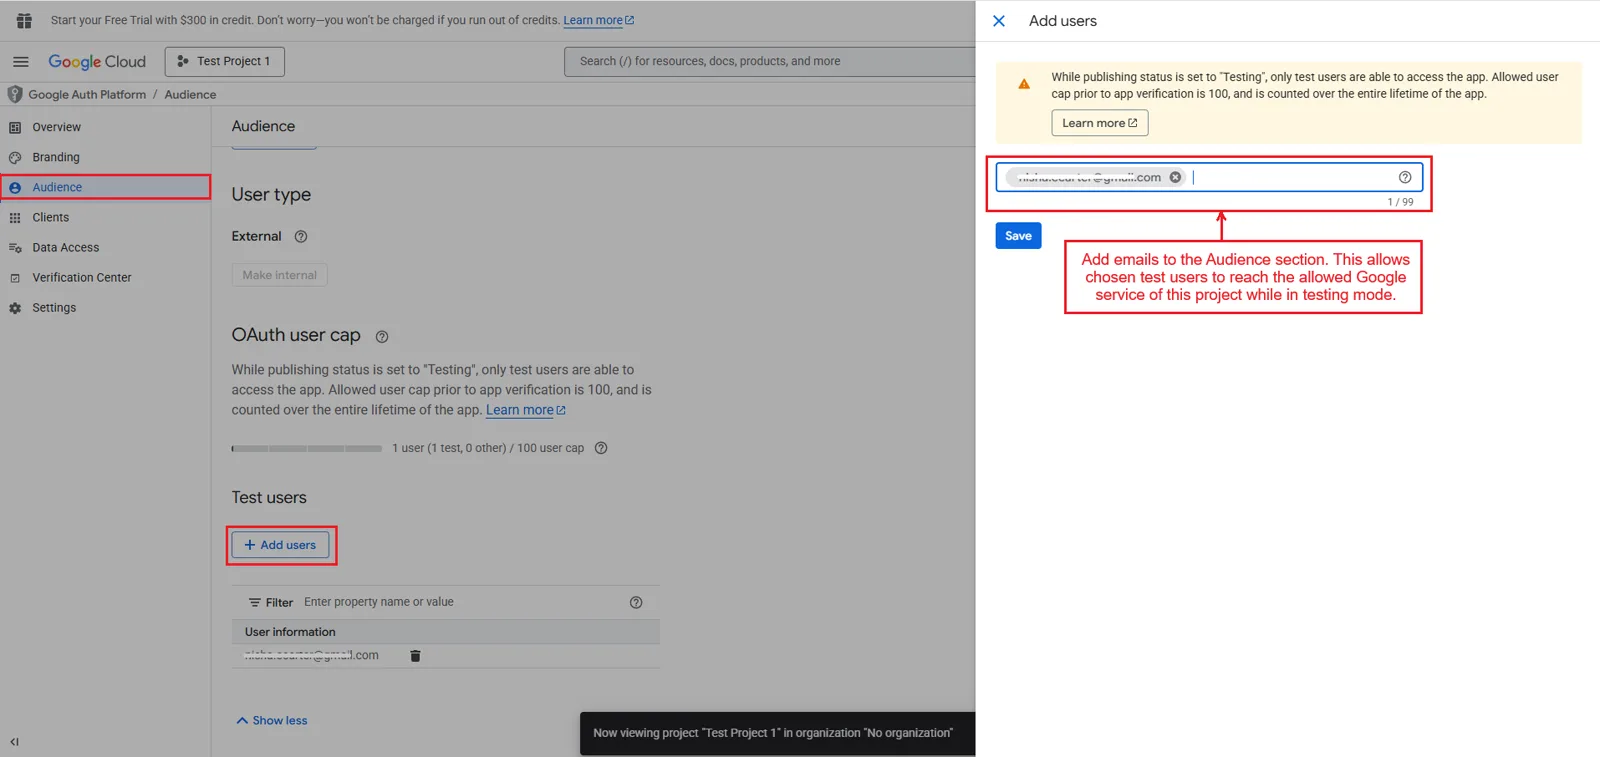
- Also, add emails in the Audience section to allow selected test users to access the approved Google service during testing mode.
- Now, the JSON file is ready to use for authentication, and it can be added to the app /add-on to connect with Google Sheet services.
Frequently asked questions
What is OAuth used for when connecting to Google APIs?
OAuth is the method that grants permission to access Google data safely, so that only authorized users can use it. It is how you set up secure access to services like Google Sheets and Google Drive without exposing the data to anyone else.
Which Google APIs does this guide show you how to enable?
The guide covers enabling the Google Sheets API and the Google Drive API. The Drive API is enabled so you can access and manage the Google Sheets files that are stored in Google Drive.
Why do I need to create a project in Google Cloud Console first?
A project acts as a central place where all your API settings, credentials, and configurations are stored. Creating one first keeps everything organized and lets you manage the setup in a single location before you enable APIs or create credentials.
Where do I create the OAuth credentials once the APIs are enabled?
In the Credentials section of Google Cloud Console, you choose Create credentials and select OAuth client ID. You then configure the consent screen to complete the secure access setup.
Nisha Gaur is a Technical Content Writer at Ecarter Technologies. She writes technical documentation, tutorials and buying guides covering CS-Cart, Magento, Shopify and eCommerce development.